1. Giriş
This manual provides comprehensive instructions for the assembly, operation, and maintenance of your Zipper ZI-CR342 Pet Enclosure. Please read this manual thoroughly before assembly and use to ensure safe and correct operation. Keep this manual for future reference.

Şəkil 1: The Zipper ZI-CR342 Pet Enclosure. This image shows the complete structure of the enclosure, featuring a galvanized metal frame and PVC-coated wire mesh walls, with a door for access. The peaked roof design provides ample space and protection.
2. Təhlükəsizlik Təlimatları
- Ensure all components are securely fastened during assembly to prevent collapse.
- Place the enclosure on a level, stable surface to maintain structural integrity.
- Regularly inspect the enclosure for any damaged parts, sharp edges, or loose connections. Repair or replace as necessary.
- Do not allow children to climb on or play inside the enclosure unsupervised.
- This enclosure is designed for pets; do not use it for purposes other than its intended use.
- Wear appropriate protective gear (gloves) during assembly to avoid cuts from wire mesh or metal edges.
3. Paketin məzmunu
Quraşdırmaya başlamazdan əvvəl aşağıda sadalanan bütün komponentlərin mövcud olduğunu və zədələnmədiyini yoxlayın.
- Galvanized steel tubes (Ø25 x 0.65 mm) for frame construction.
- PVC-coated galvanized wire mesh panels.
- UV-resistant sun protection film for the roof.
- Door assembly with zipper closure.
- Fixing materials (connectors, bolts, nuts, cable ties).
4. Quraşdırma və Quraşdırma
The Zipper ZI-CR342 features a simple modular interlocking system for straightforward assembly. Two people are recommended for easier setup.
- Ərazini hazırlayın: Choose a flat, clear, and stable outdoor location for the enclosure. Ensure adequate space for the 3m x 4m footprint.
- Əsas çərçivəni yığın: Connect the galvanized tubes to form the rectangular base (3m x 4m) using the provided connectors. Ensure all connections are snug.
- Şaquli dayaqları düzəldin: Attach the vertical tubes to the base frame at designated points.
- Install Roof Frame: Construct the peaked roof frame by connecting the remaining tubes to the vertical supports.
- Attach Wire Mesh Panels: Secure the PVC-coated galvanized wire mesh panels to the frame using the provided fixing materials (e.g., cable ties, clips). Ensure the mesh is taut and covers all open sides.
- Qapını quraşdırın: Integrate the door assembly into the designated opening. Ensure it opens and closes smoothly and the zipper closure functions correctly.
- Apply Sun Protection Film: Drape and secure the UV-resistant sun protection film over the roof section. This provides shade and protection from the elements.
- Son yoxlama: Double-check all connections, ensuring they are tight and secure. Verify there are no gaps or sharp edges that could harm animals.

Şəkil 2: Detail of a frame joint. This image illustrates how the galvanized tubes connect using the modular system, highlighting the secure fastening points essential for structural stability.

Şəkil 3: Detail of the wire mesh. The PVC-coated galvanized wire mesh provides durability and protection for the animals within the enclosure.
5. Korpusun istismarı
- Giriş: Use the zippered door for entry and exit. Always ensure the zipper is fully closed when animals are inside to prevent escape.
- Yerləşdirmə: Position the enclosure in an area that offers additional natural shade or protection from strong winds, if possible, in addition to the provided sun protection film.
- Animal Introduction: Introduce pets to the enclosure gradually, ensuring they have access to food, water, and appropriate shelter within the enclosure (e.g., a small coop for poultry).
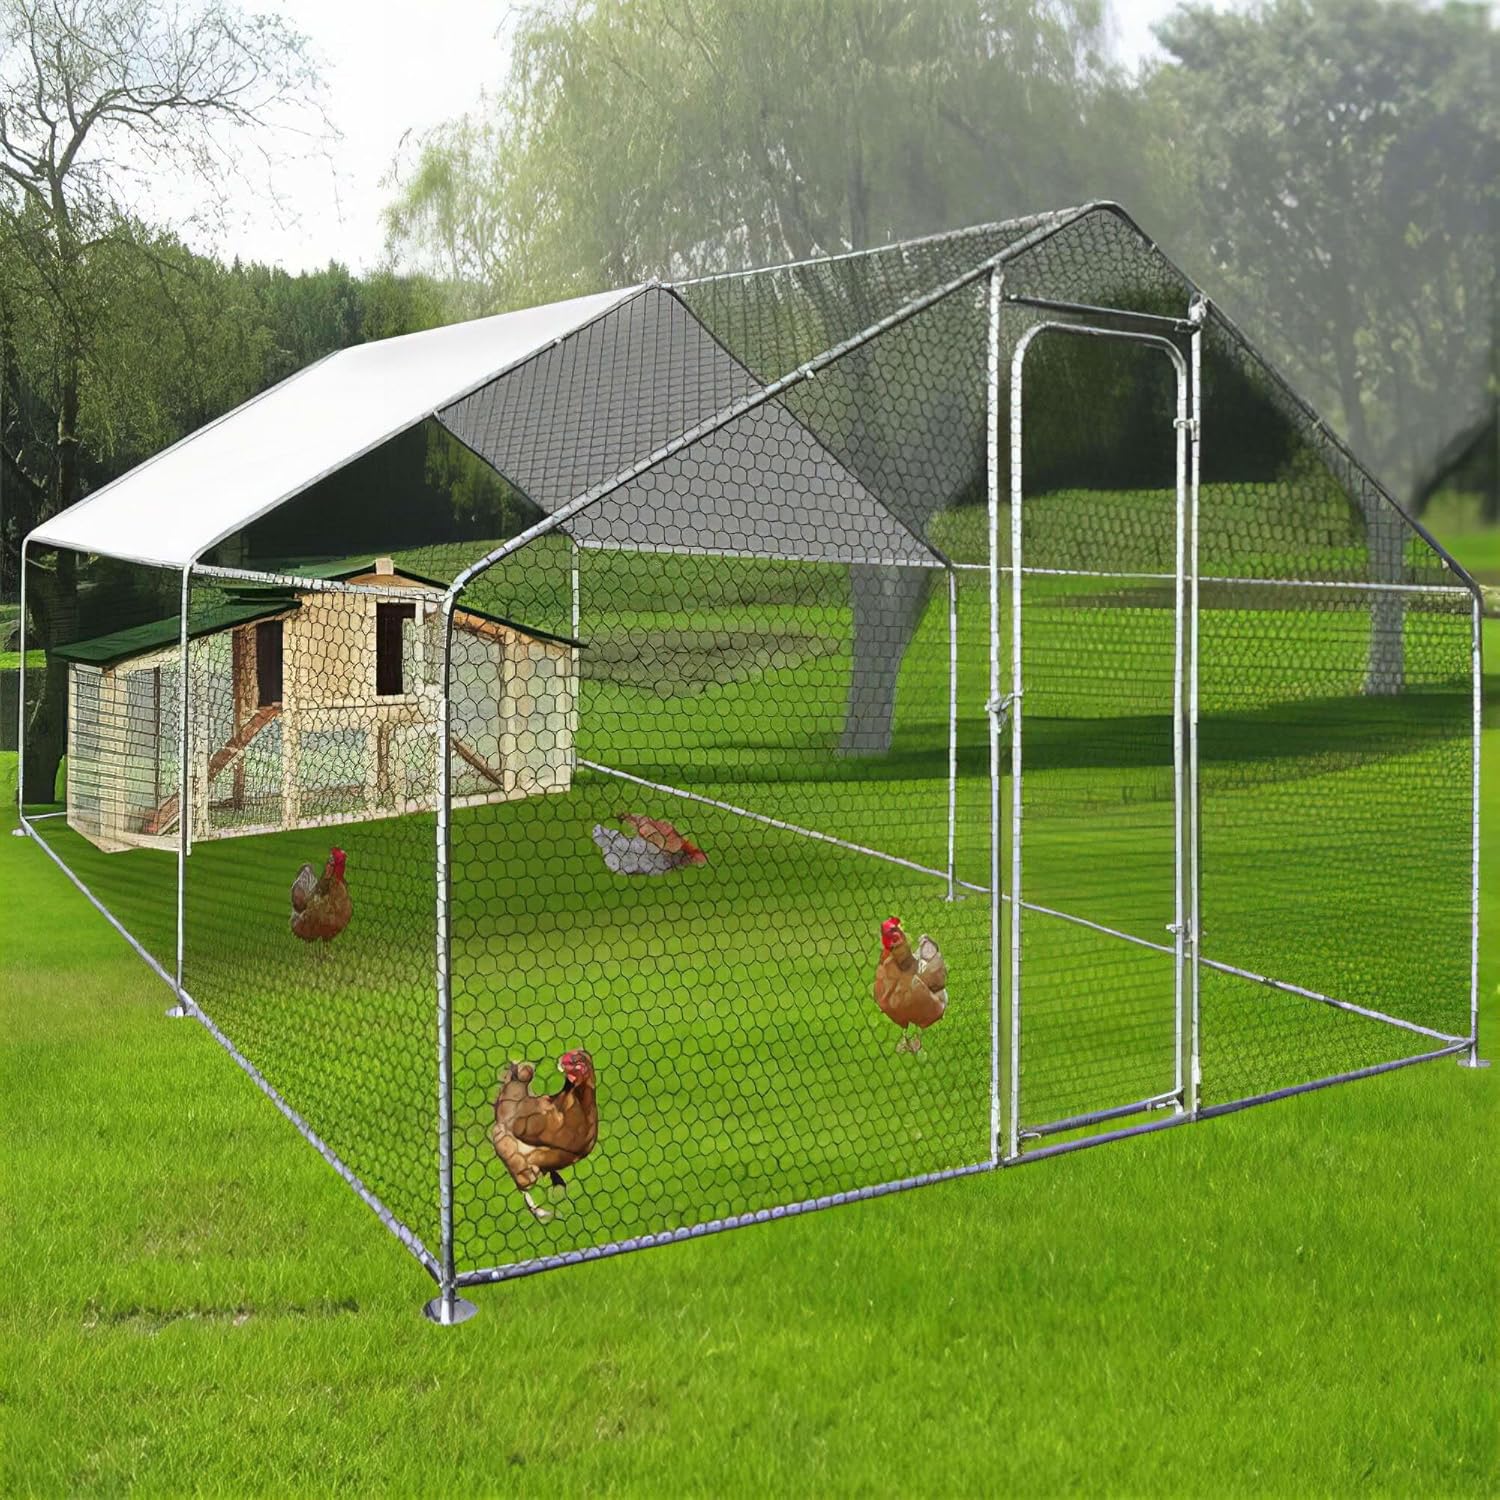
Şəkil 4: Example of enclosure use. This image demonstrates the Zipper ZI-CR342 Pet Enclosure in a typical setup, providing a secure and spacious environment for poultry, complete with an internal shelter.
6. Baxım
- Təmizləmə: Regularly clean the enclosure, including the mesh and frame, with mild soap and water. Rinse thoroughly and allow to dry.
- Yoxlama: Periodically check all frame connections, mesh integrity, and the door mechanism for wear or damage. Tighten any loose bolts.
- UV Film: Inspect the UV protection film for tears or degradation. Replace if necessary to maintain sun protection.
- Qışlama: In areas with heavy snow or extreme weather, consider disassembling or reinforcing the enclosure to prevent damage.
7. Giderme
- Enclosure Instability: Ensure all frame tubes are fully inserted into connectors and all bolts are tightened. Verify the enclosure is on level ground.
- Mesh Damage: Small tears in the PVC-coated mesh can often be repaired with heavy-duty zip ties or specialized mesh repair kits. For large damage, consider replacing the affected panel.
- Fermuar nasazlığı: Check for obstructions in the zipper teeth. Apply a silicone-based lubricant if the zipper is stiff. If damaged, the door panel may need replacement.
8. Spesifikasiyalar
| Xüsusiyyət | Detal |
|---|---|
| Model | ZI-CR342 |
| Ölçülər (U x G x Y) | 3 m x 4 m x 2 m (approximately 9.8 ft x 13.1 ft x 6.6 ft) |
| Çəki | 35.9 kq (təxminən 79.1 funt) |
| Çərçivə materialı | Galvanized Steel Tubes (Ø25 x 0.65 mm) |
| Mesh Material | PVC-coated Galvanized Wire Mesh |
| Dam materialı | UV-resistant Sun Protection Film |
| Bağlama növü | Fermuar |
| Xüsusi Xüsusiyyətlər | Modular interlocking system, UV resistant |
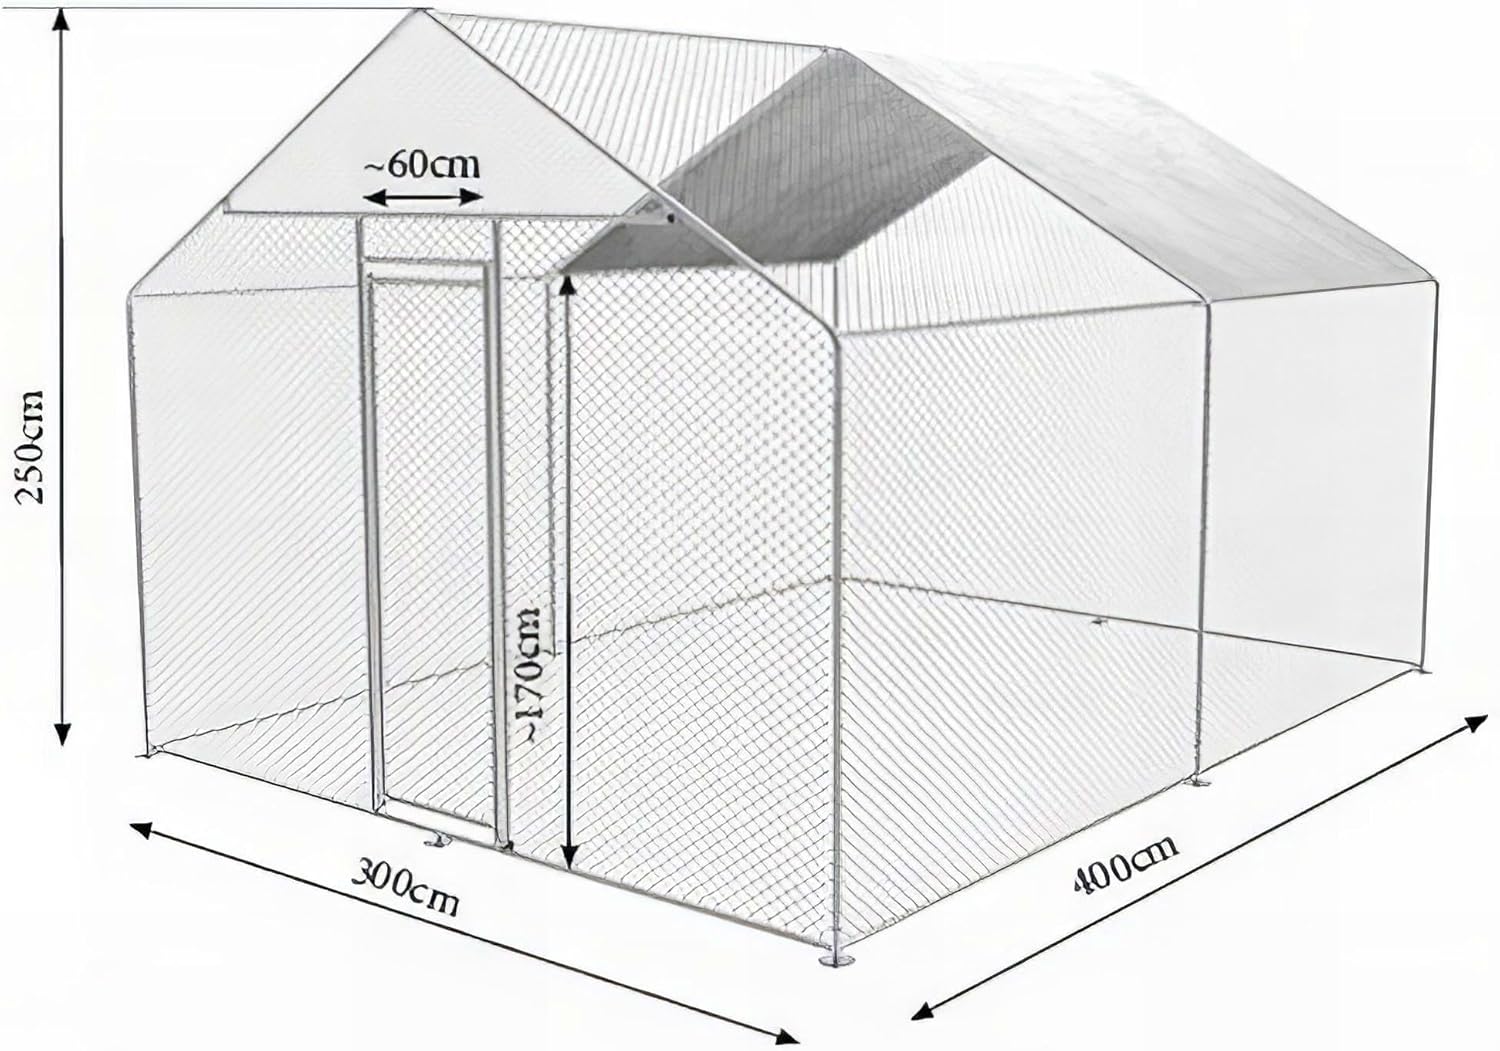
Şəkil 5: Enclosure dimensions. This diagram provides a clear overview of the enclosure's measurements, including its overall length, width, height, and the dimensions of the access door.
9. Zəmanət və Dəstək
The Zipper ZI-CR342 Pet Enclosure comes with a Ehtiyat hissələrinin 2 illik mövcudluğu. For warranty claims, technical support, or to order replacement parts, please contact your retailer or the manufacturer directly. Ensure you have your proof of purchase and model number (ZI-CR342) ready when contacting support.