
1. Məhsul bitdiview
The HOMCOM Model 837-061 shoe cabinet is designed for efficient shoe storage and organization in entryways or hallways. It features three tilt-out compartments for shoes and a side cabinet with a hanging bar for umbrellas or small bags. The top surface can be used for keys, phones, or decorative items.
- Spacious Shoe Storage: Three tilt-out compartments, each accommodating up to 4 pairs of shoes, for a total capacity of 6-12 pairs (depending on shoe size and type).
- Tənzimlənən Bölmələr: Each shoe compartment includes a removable and adjustable divider with two positions to customize storage space.
- Yan şkaf: A dedicated side cabinet with a door and hanging bar, suitable for umbrellas, small bags, or other accessories.
- Davamlı tikinti: Made from resistant engineered wood (MDF) for long-lasting use.
- Uçqun Əleyhinə Təhlükəsizlik: Includes an anti-tip safety system to secure the cabinet to the wall, preventing accidental tipping.

Image 1.1: The HOMCOM shoe cabinet, Model 837-061, shown in a typical home entryway with decorative items on top.
2. Təhlükəsizlik Məlumatı
Quraşdırma və istifadə etməzdən əvvəl bütün təhlükəsizlik təlimatlarını oxuyun və anlayın. Bu təlimatlara əməl edilməməsi məhsulun zədələnməsi və ya zədələnməsi ilə nəticələnə bilər.
- Anti-Trip Cihazı: It is mandatory to install the included anti-tip device to secure the cabinet to a wall. This prevents the cabinet from tipping over, especially if children or pets attempt to climb it.
- Çəki tutumu: Do not exceed the maximum supported weight of 15 kg (33 lbs) on the top surface. Overloading can compromise stability.
- Yığıncaq: Assemble the product on a soft, clean surface to prevent scratches. Ensure all screws and fasteners are tightened securely before use.
- Yerləşdirmə: Place the cabinet on a flat, level surface to ensure stability.
- Uşaqların Təhlükəsizliyi: Quraşdırma zamanı kiçik hissələri və qablaşdırma materiallarını uşaqlardan uzaq saxlayın.

Image 2.1: Illustration of the anti-tip design, showing how to secure the cabinet to the wall for enhanced stability and safety.
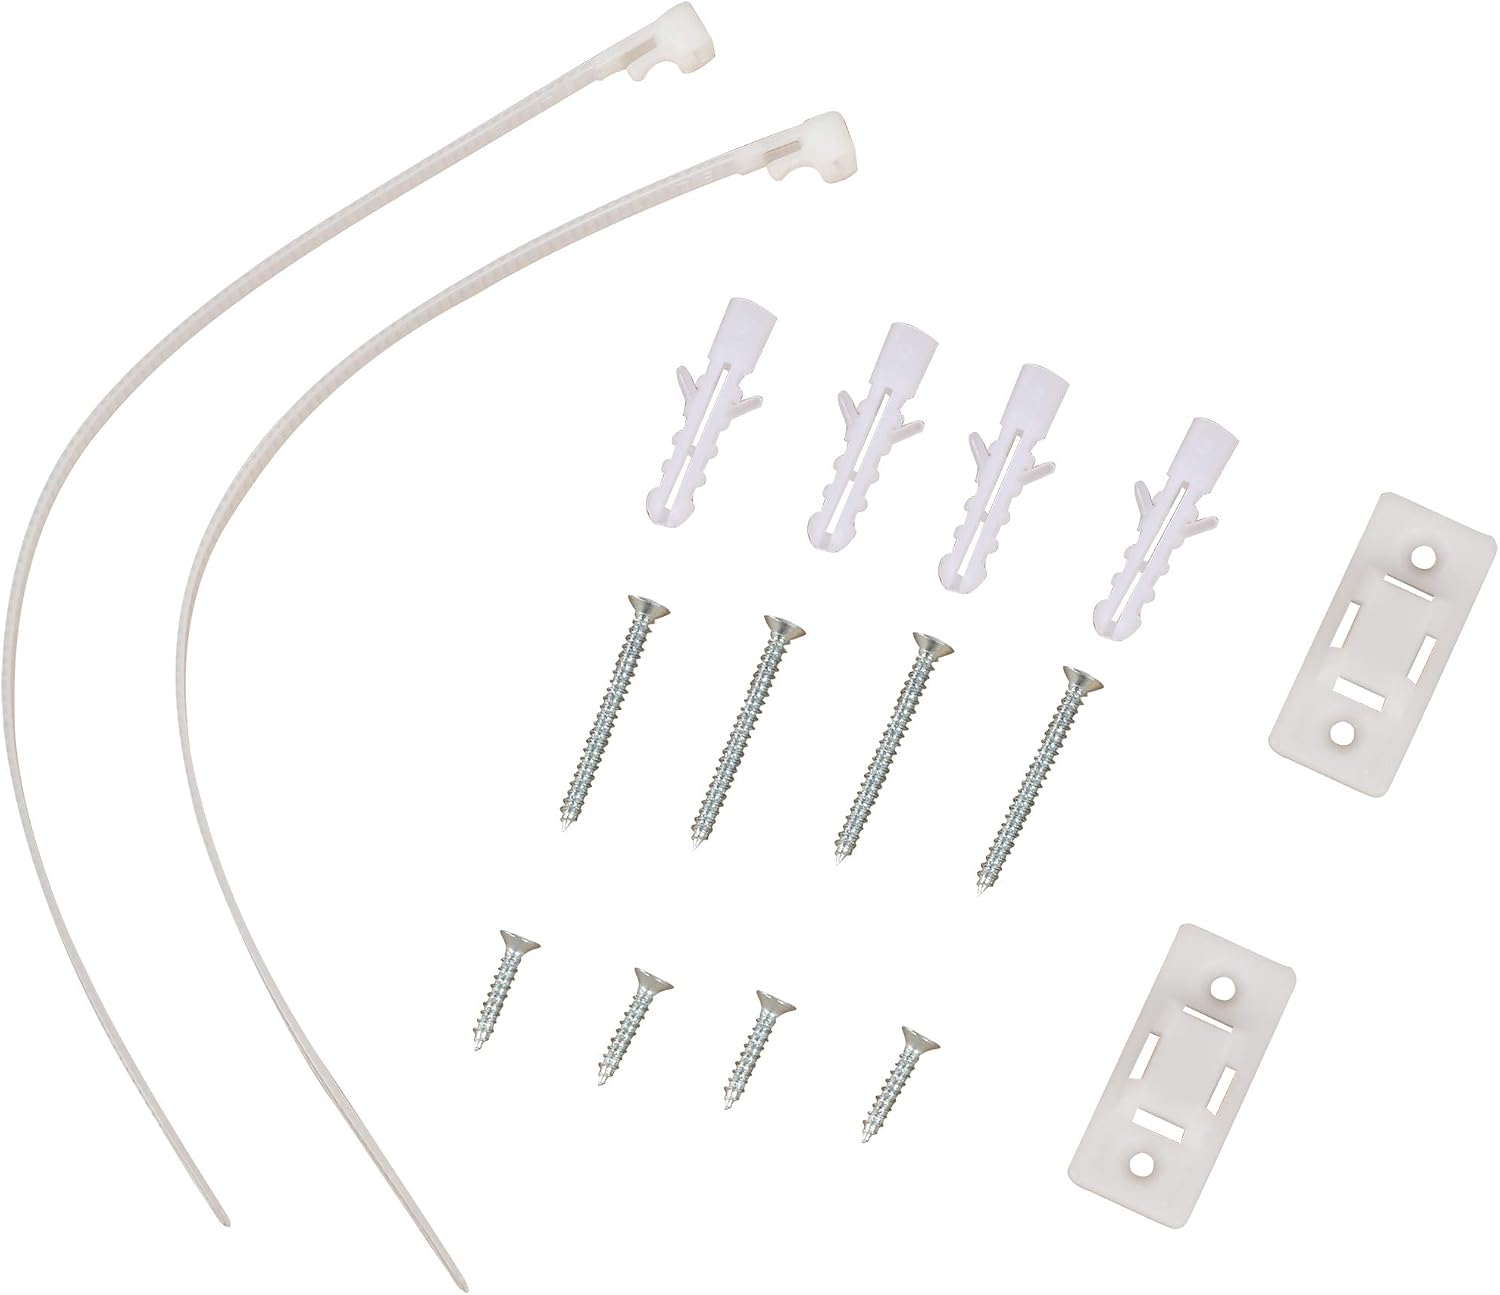
Image 2.2: Detail of the anti-tip bracket installed on the rear panel of the shoe cabinet.
3. Quraşdırma və Quraşdırma
This product requires assembly. It is recommended to have two people for assembly. Please ensure all parts are present before beginning.
3.1. Paketin məzmunu
Verify that all components and hardware are included in the package. Refer to the parts list in your physical instruction manual for detailed identification.

Image 3.1: All screws, wall anchors, and anti-tip straps included for assembly and secure installation.
3.2. Montaj Addımları (Ümumi Təlimatlar)
- Paketdən çıxarın və müəyyən edin: Carefully unpack all components and lay them out on a soft, clean surface. Identify each part using the provided labels or diagrams.
- Əsas çərçivəni yığın: Begin by connecting the main side panels and base using the designated screws and dowels. Ensure connections are snug but do not overtighten initially.
- Install Shoe Compartments: Attach the mechanisms for the tilt-out shoe compartments to the interior of the cabinet. Insert the adjustable dividers into the desired positions.
- Qapıları birləşdirin: Secure the three tilt-out doors to their respective mechanisms. Attach the side cabinet door using hinges.
- Install Side Cabinet Bar: Place the hanging bar inside the side cabinet.
- Son sıxma: Once all components are in place, carefully tighten all screws to ensure structural integrity.
- Tapılmaya Qarşı Cihazı Quraşdırın: Attach the anti-tip brackets to the top rear of the cabinet. Secure the straps to a wall stud or use appropriate wall anchors (provided) to prevent tipping.
Note: For detailed, step-by-step assembly instructions, please refer to the printed manual included with your product.
4. Əməliyyat Təlimatları
4.1. Storing Shoes
To store shoes, gently pull the handle of a tilt-out compartment. The door will tilt forward, revealing the internal shelves. Place shoes on the shelves, ensuring they fit within the compartment's depth and height. Push the door back until it closes securely.

Image 4.1: The shoe cabinet with all three tilt-out compartments open, demonstrating the three-level hanging shelves and capacity for up to 12 pairs of regular-sized shoes.
4.2. Adjusting Dividers
Each tilt-out compartment features an adjustable divider. To adjust, open the compartment door. The divider can be moved between two positions or removed entirely to accommodate different shoe sizes or types (e.g., boots, high heels). Carefully lift and reposition the divider as needed.

Şəkil 4.2: Yaxın plan view illustrating the adjustable divider mechanism within a shoe compartment, allowing for flexible storage configurations.
4.3. Using the Side Cabinet
The side cabinet provides additional storage. Open the door to access the interior, which includes a hanging bar. This space is ideal for storing umbrellas, small bags, or other entryway essentials.
5. Baxım
Proper maintenance will ensure the longevity and appearance of your HOMCOM shoe cabinet.
- Təmizləmə: Səthləri yumşaq bir parça ilə silin, damp parça. Güclü kimyəvi maddələrdən, aşındırıcı təmizləyicilərdən və ya həddindən artıq nəmdən istifadə etməkdən çəkinin, çünki bunlar işlənmiş ağac səthinə zərər verə bilər.
- Toz alma: Toz yığılmasının qarşısını almaq üçün kabineti mütəmadi olaraq quru və yumşaq bir parça ilə silin.
- Döküntülər: Nəmin zədələnməsinin və ya ləkələnməsinin qarşısını almaq üçün tökülən mayeni dərhal silin.
- Avadanlıq yoxlanışı: Bütün vintləri və bərkidiciləri vaxtaşırı yoxlayın ki, möhkəm qalsınlar. Lazım gələrsə yenidən sıxın.
- Birbaşa günəş işığından çəkinin: Birbaşa günəş işığına uzun müddət məruz qalma ağac örtüyünün solmasına və ya rənginin dəyişməsinə səbəb ola bilər.
- Rütubətə Nəzarət: Ağacın əyilməsinin və çatlamasının qarşısını almaq üçün sabit otaq temperaturu və rütubət səviyyəsini qoruyun.

Image 5.1: A close-up showing the layers of engineered wood (MDF) used in the construction of the cabinet, highlighting its natural and resistant properties.
6. Giderme
If you encounter any issues with your shoe cabinet, refer to the following common problems and solutions:
- Kabinet özünü qeyri-sabit hiss edir:
- Şkafın düz, düz bir səthə qoyulduğundan əmin olun.
- Verify that all assembly screws are securely tightened.
- Confirm the anti-tip device is correctly installed and anchored to the wall.
- Tilt-out doors do not close properly:
- Check if shoes are obstructing the closing mechanism.
- Ensure the internal dividers are correctly positioned and not interfering with the door.
- Verify that the door hinges and mechanisms are properly aligned and tightened.
- Side cabinet door is misaligned:
- Adjust the hinges if they are adjustable.
- Şkafın düz olduğundan əmin olun.
- İtkin hissələr və ya zədələnmiş komponentlər:
- Contact HOMCOM customer service with your model number and a description of the issue.
7. Spesifikasiyalar
| Brend | HOMCOM |
| Model nömrəsi | 837-061 |
| Material | Mühəndis Taxta (MDF) |
| Rəng | Təbii |
| Ümumi Ölçülər (U x G x Y) | 79 sm x 26 sm x 120 sm (31.1" x 10.2" x 47.2") |
| Max. Weight Capacity (Top Surface) | 15 kq (33 funt) |
| Ayaqqabı Tutumu | 6-12 pairs (depending on shoe size/type) |
| Montaj Tələb olunur | Bəli |

Image 7.1: Detailed dimensions of the shoe cabinet: 79 cm width, 26 cm depth, and 120 cm height.
8. Zəmanət və Dəstək
For warranty information, product support, or to order replacement parts, please contact HOMCOM customer service. Refer to your purchase documentation or the HOMCOM official webəlaqə məlumatları üçün sayt.
Please have your model number (837-061) and purchase date ready when contacting support.