
Saooer BLUE 20A
Saooer 20A Solar Charge Controller User Manual
Model: BLUE 20A
Giriş
This manual provides essential information for the safe and efficient operation of your Saooer 20A Solar Charge Controller. This intelligent regulator is designed to manage the working of solar panels and batteries in a solar system, featuring dual USB ports for mobile device charging. It is compatible with 12V and 24V systems and includes multiple protection functions to ensure system efficiency and prolong battery lifespan.

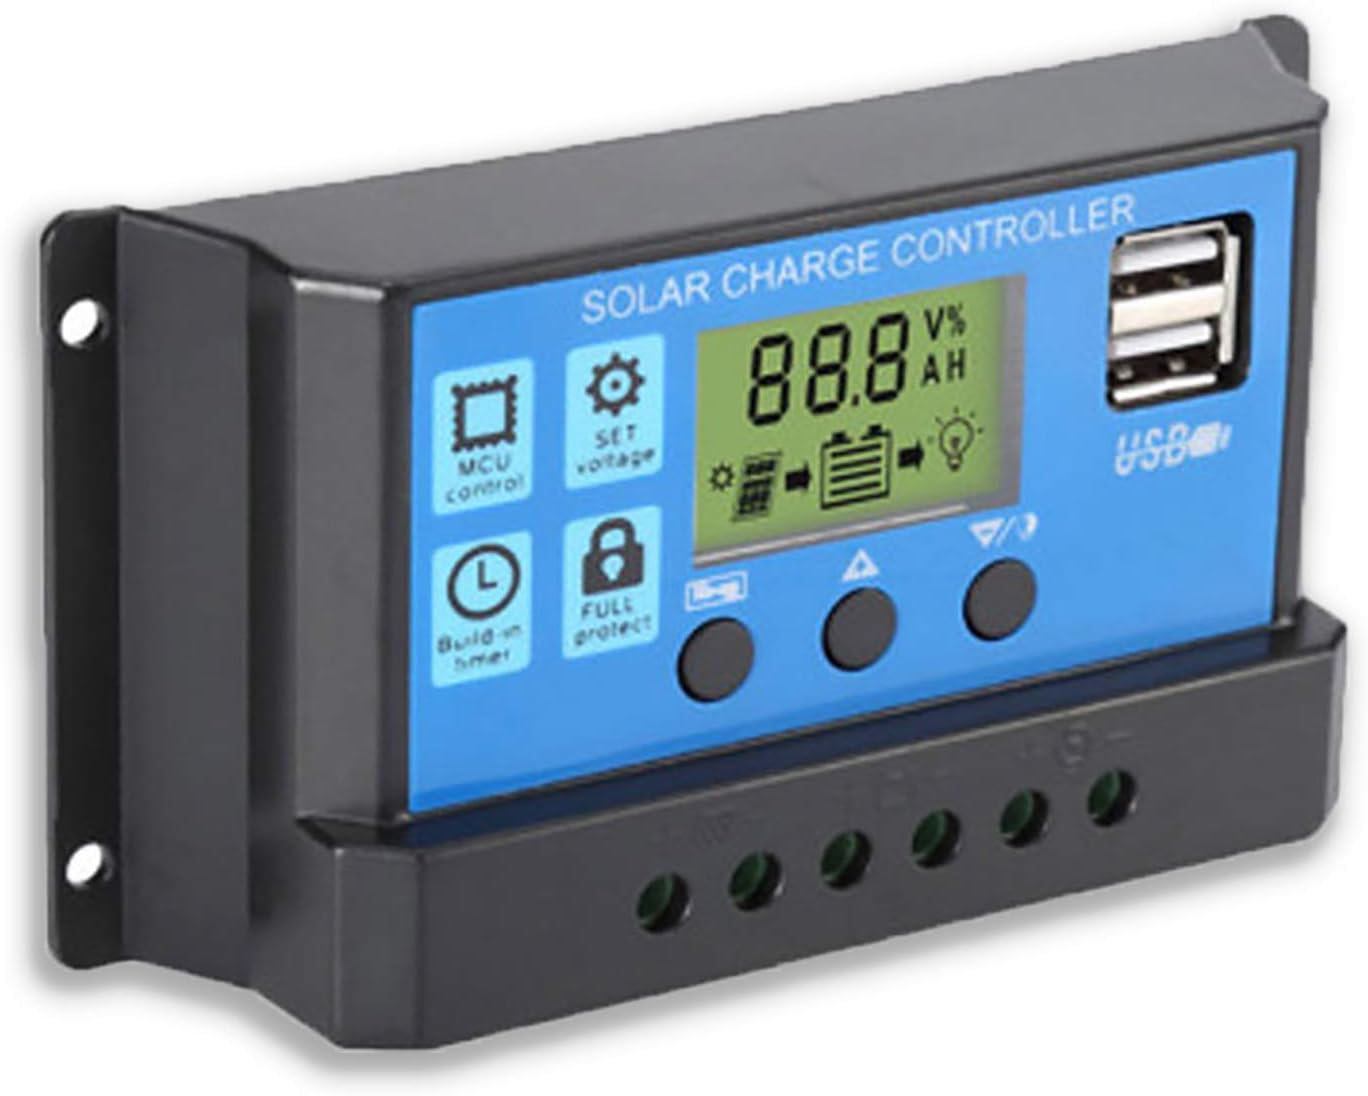
Şəkil 1: Ön view of the Saooer 20A Solar Charge Controller.
Təhlükəsizlik Təlimatları
- Ensure all connections are correct before powering on the controller. Incorrect wiring can damage the device or connected components.
- The controller is designed for indoor use or in a protected environment. Avoid exposure to direct sunlight, high temperatures, or moisture.
- Nəzarət cihazını özünüz sökməyə və ya təmir etməyə çalışmayın. Xidmət üçün ixtisaslı mütəxəssislərə müraciət edin.
- Uşaqların əli çatmayan yerdə saxlayın.
- This controller is only suitable for lead-acid batteries: OPEN, AGM, GEL. Do not use with other battery types like Lithium-ion or LiFePO4, as this may cause damage or safety hazards.
- Always connect the battery first, then the solar panel, and finally the load. When disconnecting, reverse the order: disconnect the load, then the solar panel, and finally the battery.
Məhsul Xüsusiyyətləri
- Automatic System Voltage İdentifikasiya: Automatically detects 12V/24V system voltage.
- PWM Charging: Efficient Pulse Width Modulation charging mode.
- Dual USB Portlar: Provides 5V/2A output for charging mobile devices.
- LCD displey: Clear display of status and data, allowing for convenient mode switching and parameter configuration.
- Çoxsaylı qorunma funksiyaları: Includes short-circuit protection, open-circuit protection, reverse protection, and over-load protection.
- Tənzimlənən Parametrlər: User-adjustable charge and discharge parameters.
- Temperatur kompensasiyası: Automatic temperature compensation for optimal charging.
Quraşdırma və Quraşdırma
Follow these steps carefully to install your solar charge controller. Incorrect installation can lead to damage or malfunction.
- Naqilləri hazırlayın: Ensure all wires are properly stripped and have appropriate connectors if necessary. Use wires of sufficient gauge for your system's current.
- Batareyanı birləşdirin: Connect the battery to the charge regulator first. Observe correct polarity (+ to + and - to -). The controller will automatically recognize the battery voltage (12V və ya 24V).
Şəkil 2: Yan view showing the connection terminals for battery, solar panel, and load.
- Günəş panelini birləşdirin: Connect the solar panel to the solar charge controller. Ensure correct polarity.
- Connect the Load: Connect the consumer or load to the charge controller regulator. Ensure correct polarity.
Vacib Qeyd: Always connect the battery first, then the solar panel, and finally the load. When disconnecting the controller, please remove the solar panel, then the load, and finally the battery. This sequence helps the controller recognize the battery voltage correctly and prevents damage.
Əməliyyat Təlimatları
LCD displey və düymələr

Şəkil 3: Bucaqlı view showing the LCD display and control buttons.
The controller features an LCD display and three buttons for operation:
- Menyu düyməsi: Used to cycle through display modes and enter parameter setting mode.
- Yuxarı düymə: Used to increase values or navigate upwards in menus.
- Aşağı düymə: Used to decrease values or navigate downwards in menus.
Ekran rejimləri
Press the Menu button to cycle through the following display modes:
- Batareya həcmitage (V)
- Günəş Paneli Cildtage (V)
- Yük cərəyanı (A)
- Battery Temperature (°C)
- Doldurma cərəyanı (A)
- Boşaltma cərəyanı (A)
- Load Working Mode (24H, 0-23H, 0H)
Parametr Parametrləri
To enter parameter setting mode, press and hold the Menu button for 5 seconds. Use the Up and Down buttons to adjust values, and the Menu button to confirm and move to the next parameter. Press and hold Menu again to exit setting mode.
| Parametr | Təsvir | Default (12V) | Range (12V) |
|---|---|---|---|
| B01/B02/B03 | Battery Type Selection (B01=Lead-acid, B02=Lithium Ion, B03=LiFePO4) | B01 | Yoxdur |
| Charge Off Voltage | Cildtage at which charging stops | 14.4V | 13.0V - 15.0V |
| Discharge Reconnect Voltage | Cildtage at which load reconnects after low voltage ayırın | 12.6V | 11.0V - 13.5V |
| Discharge Stop Voltage | Cildtage at which load disconnects to protect battery | 10.7V | 9.0V - 11.5V |
| Load Working Time | Timer for load output (24H, 0-23H, 0H) | 24H | Yoxdur |
Note: For 24V systems, multiply the 12V values by two.
Baxım
- Daimi Yoxlama: Bütün naqil birləşmələrini vaxtaşırı möhkəmlik və korroziya üçün yoxlayın.
- Təmizlik: Keep the controller clean and free from dust. Use a dry cloth for cleaning.
- Havalandırma: Həddindən artıq istiləşmənin qarşısını almaq üçün nəzarətçinin ətrafında kifayət qədər havalandırma təmin edin.
- Batareya Sağlamlığı: Monitor batareya həcmitage and health regularly. Replace batteries as needed.
Problemlərin aradan qaldırılması
| Problem | Mümkün Səbəb | Həll |
|---|---|---|
| Controller not powering on / LCD blank | Battery not connected or reverse polarity; Battery voltage çox aşağı. | Check battery connections and polarity. Ensure battery has sufficient charge. |
| Solar panel not charging battery | Solar panel not connected or reverse polarity; Insufficient sunlight; Damaged solar panel. | Check solar panel connections and polarity. Ensure panel is in direct sunlight. Test solar panel output. |
| Yükləmə işləmir | Load not connected or reverse polarity; Battery voltage too low (low voltage disconnect); Overload protection activated. | Check load connections and polarity. Charge battery. Reduce load or check for short circuit. |
| USB portları doldurulmur | Batareya həcmitage too low; Device not compatible; Faulty USB cable. | Ensure battery is charged. Try a different device or cable. |
| Controller gets hot | Overload; Poor ventilation. | Reduce load. Ensure controller has adequate airflow and is not in an enclosed space. |
Spesifikasiyalar
| Xüsusiyyət | Detal |
|---|---|
| Model | MAVİ 20A |
| Sistem Cildtage | 12V / 24V Auto |
| Maksimum doldurma/boşaltma cərəyanı | 20A |
| USB çıxışı | Dual USB, 5V/2A (Max) |
| Batareya Tipi Uyğunluq | Lead-acid (OPEN, AGM, GEL) |
| Məhsul Ölçüləri | 5.12 x 2.76 x 1.5 inches (133mm x 70mm x 38mm approx.) |
| Maddə Çəkisi | 5 unsiya |
| Ekran | LCD |
| İşləmə temperaturu | -35°C-dən +60°C-dək |

Figure 4: Product dimensions of the solar charge controller.
Zəmanət və Dəstək
For warranty information or technical support, please contact the manufacturer, Saooer, through their official channels. Refer to your purchase documentation for specific warranty terms and contact details.
İstehsalçı: Saooer
ASIN: B095764VB7
UPC: 605832982977
ziyarət edə bilərsiniz Saooer Store on Amazon əlavə məlumat üçün və ya dəstək üçün əlaqə saxlayın.
Ask a question about this manual
Ask about setup, troubleshooting, compatibility, parts, safety, or missing instructions. Manuals+ will review the question and use this page’s manual context to help answer it.