1. Giriş
This manual provides essential information for the safe and efficient operation of your TechniSat DIGITRADIO 370 IR. Please read these instructions carefully before using the device and retain them for future reference.
2. Təhlükəsizlik Təlimatları
- Yanğın və ya elektrik şokunun qarşısını almaq üçün cihazı yağışa və ya nəmə məruz qoymayın.
- Havalandırma dəliklərini bağlamayın. Düzgün hava axını üçün cihazın ətrafında kifayət qədər boşluq olduğundan əmin olun.
- Yalnız cihazla birlikdə verilən güc adapterindən istifadə edin.
- Cihazı radiatorlar, istilik cihazları, sobalar və ya digər cihazlar (o cümlədən, istilik cihazları) kimi istilik mənbələrinin yaxınlığında yerləşdirməyin. ampistilik əmələ gətirən qaldırıcılar).
- Elektrik kabelini, xüsusən də tıxaclarda, prizlərdə və onların aparatdan çıxdığı yerdə gəzməkdən və ya sıxılmaqdan qoruyun.
- İldırım fırtınası zamanı və ya uzun müddət istifadə edilmədikdə bu cihazı elektrik şəbəkəsindən ayırın.
- Bütün xidmətlər üçün ixtisaslı xidmət personalına müraciət edin. Aparat hər hansı şəkildə zədələndikdə, məsələn, enerji təchizatı kabeli və ya tıxacı zədələndikdə, maye töküldükdə və ya cihazın içərisinə əşyalar düşdükdə, cihaz yağışa və ya nəmə məruz qaldıqda, normal işləmədikdə xidmət tələb olunur. , ya da atılıb.
3. Paketin məzmunu
Bütün əşyaların paketdə olduğunu yoxlayın:
- TechniSat DIGITRADIO 370 IR (Black)
- Uzaqdan İdarəetmə
- Güc adapteri
- İstifadəçi Təlimatı (bu sənəd)
4. Nəzarət və əlaqələr

Şəkil 4.1: Ön Panel Üstüview
The image above displays the front panel of the DIGITRADIO 370 IR, featuring the central display, volume and tuning/OK rotary knobs, and various control buttons such as Power, Mode, Preset, Scan, and Back.
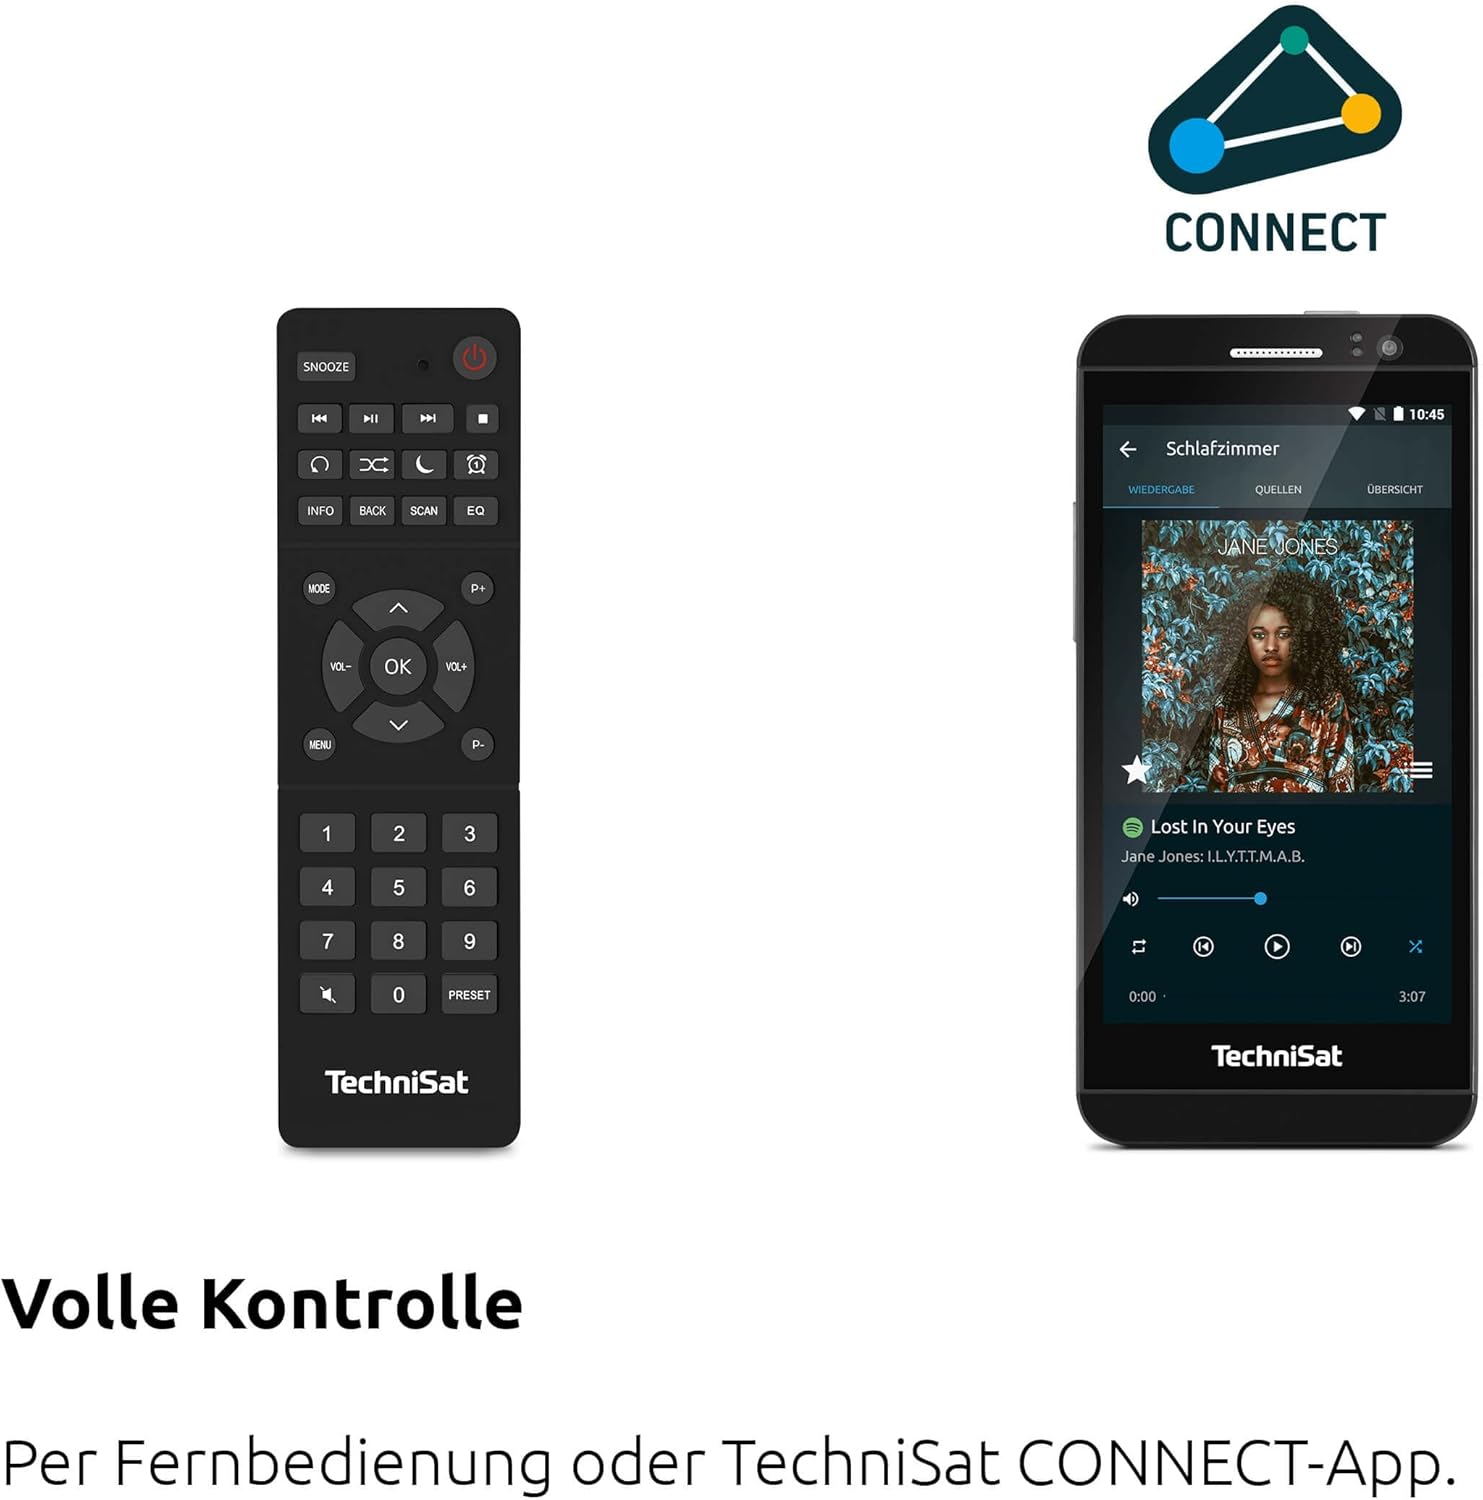
Figure 4.2: Remote Control and App Interface
This image shows the included remote control with buttons for power, snooze, mode, info, scan, EQ, preset numbers, volume, and navigation. It also illustrates the TechniSat CONNECT app interface on a smartphone, providing an alternative control method.
Ön Panel Nəzarətləri:
- Güc düyməsi: Cihazı yandırır/söndürür.
- Rejim düyməsi: Switches between DAB+, FM, Internet Radio, Bluetooth, AUX, and USB modes.
- Əvvəlcədən təyin düyməsi: Accesses stored radio station presets.
- Səs düyməsi: Audio çıxış səviyyəsini tənzimləyir.
- Tuning/OK Knob: Menyularda naviqasiya edir və seçimləri təsdiqləyir.
- Skan düyməsi: Initiates station scanning in radio modes.
- Geri düyməsi: Əvvəlki menyuya və ya ekrana qayıdır.
- Ekran: 2.4-inch TFT color display for information and menu navigation.
Arxa Panel Əlaqələri:
- Güc Girişi: Təchiz olunan güc adapterini qoşun.
- AUX-IN: Xarici audio cihazlarını birləşdirmək üçün 3.5 mm jak.
- Qulaqlıq Jack: Şəxsi dinləmə üçün 3.5 mm jak.
- USB Port: For MP3 playback from USB drives and charging external devices.
5. Quraşdırma
5.1 İlkin Gücləndirmə
- Place the DIGITRADIO 370 IR on a stable, flat surface.
- Extend the telescopic antenna for optimal DAB+ and FM reception.
- Connect the power adapter to the DC IN port on the rear of the radio and then to a wall outlet.
- Press the Power button on the front panel or remote control to turn on the device.
- Dil seçimi və şəbəkə konfiqurasiyası da daxil olmaqla, ilkin quraşdırma üçün ekrandakı təlimatları izləyin.
5.2 Network Configuration (WLAN)
To access Internet Radio and app control, the device must be connected to a Wi-Fi network.
- Navigate to the 'Settings' menu using the Tuning/OK knob.
- Select 'Network' and then 'Wi-Fi Setup'.
- The radio will scan for available networks. Select your desired network from the list.
- Enter the Wi-Fi password using the on-screen keyboard and the Tuning/OK knob.
- Bağlantını təsdiqləyin. Qoşulduqdan sonra ekranda Wi-Fi işarəsi görünəcək.
6. Əməliyyat Təlimatları

Figure 6.1: Radio Diversity
This image highlights the multiple radio reception options available: DAB+ Digital Radio, Internet Radio via WLAN, and UKW/FM analog radio.
6.1 DAB+ Radio
- Press the 'Mode' button until 'DAB+' is selected.
- The radio will automatically scan for available DAB+ stations during the first use. To initiate a scan manually, press the 'Scan' button.
- Use the Tuning/OK knob to scroll through the list of available stations. Press the knob to select a station.
- To save a station as a preset, press and hold the 'Preset' button, then select a preset number and confirm.
6.2 FM Radio
- Press the 'Mode' button until 'FM' is selected.
- Press the 'Scan' button to automatically search for and store FM stations.
- Alternatively, use the Tuning/OK knob to manually tune to a frequency.
- To save a station as a preset, press and hold the 'Preset' button, then select a preset number and confirm.
6.3 İnternet radiosu
Radionun Wi-Fi şəbəkəsinə qoşulduğundan əmin olun (5.2-cü bölməyə baxın).
- "İnternet Radiosu" seçilənə qədər "Rejim" düyməsini basın.
- Stansiyalara yeri, janrı üzrə baxa və ya müəyyən stansiyaları axtara bilərsiniz.
- Use the Tuning/OK knob to navigate and select stations.
- To save a station as a preset, press and hold the 'Preset' button, then select a preset number and confirm.
6.4 Bluetooth Audio Axını

Şəkil 6.2: Bluetooth Audio Axını
This image demonstrates a smartphone wirelessly streaming music to the radio via Bluetooth, indicating the device's capability for wireless music enjoyment.
- "Bluetooth" seçilənə qədər "Rejim" düyməsini basın. Radio qoşalaşma rejiminə keçəcək.
- Smartfonunuzda və ya digər Bluetooth cihazınızda Bluetooth-u aktivləşdirin və mövcud cihazları axtarın.
- Select 'DIGITRADIO 370 IR' from the list to pair.
- Qoşalaşdıqdan sonra cihazınızdakı səsi radio vasitəsilə səsləndirə bilərsiniz.
6.5 USB Oxutma və Şarj

Figure 6.3: USB Playback and Charging Function
This image illustrates the dual functionality of the USB port: connecting USB storage devices for MP3 playback and using the port to charge compatible devices like smartphones.
- MP3 olan USB flash sürücüsünü daxil edin fileradionun arxasındakı USB portuna qoşun.
- "USB" seçilənə qədər "Rejim" düyməsini basın.
- Use the Tuning/OK knob to navigate through folders and select tracks for playback.
- The USB port can also be used to charge compatible smartphones and other devices. Connect your device's charging cable to the USB port.
6.6 Simsiz Doldurma

Figure 6.4: Wireless Charging Function
This image shows a hand placing a smartphone on the top surface of the radio, demonstrating the wireless charging capability for compatible smartphones.
The DIGITRADIO 370 IR features a wireless charging surface on its top panel.
- Ensure your smartphone or device supports Qi wireless charging.
- Place your compatible device centrally on the designated wireless charging area on top of the radio.
- The device should indicate that charging has begun.
6.7 Alarm Clock, Sleep Timer, and Snooze
The radio includes an alarm clock, sleep timer, and snooze function.
- Zəngli saat: Set up to two independent alarms with customizable sources (buzzer, DAB+, FM, Internet Radio) and volume. Access via the 'Settings' menu.
- Yuxu Taymeri: Allows the radio to turn off automatically after a set period (e.g., 15, 30, 60 minutes). Access via the 'Settings' menu.
- Mürgüləmək: When an alarm sounds, press the 'Snooze' button on the remote control to temporarily pause the alarm.
6.8 App Control (UNDOK App)
The DIGITRADIO 370 IR can be controlled via the UNDOK app on your smartphone or tablet.
- Download the 'UNDOK' app from your device's app store.
- Ensure your smartphone/tablet and the radio are connected to the same Wi-Fi network.
- Open the UNDOK app; it should automatically detect your DIGITRADIO 370 IR.
- You can now control all major functions of the radio, including mode selection, station tuning, volume, and presets, directly from the app.
7. Baxım
7.1 Təmizləmə
- Təmizləməzdən əvvəl həmişə cihazı elektrik rozetkasından ayırın.
- Xarici səthləri silmək üçün yumşaq, quru bir parça istifadə edin.
- Do not use liquid cleaners, aerosol cleaners, or strong chemical solvents, as these may damage the finish.
7.2 Saxlama
If storing the device for an extended period, unplug it from the power source and store it in a cool, dry place, away from direct sunlight and extreme temperatures.
8. Giderme
| Problem | Mümkün Səbəb | Həll |
|---|---|---|
| Güc yoxdur | Elektrik kabeli qoşulmayıb; Elektrik rozetkası nasazdır | Elektrik kabeli bağlantısını yoxlayın; Fərqli bir elektrik rozetkasına qoşun. |
| Səs yoxdur | Səs çox aşağıdır; Səssiz rejim aktivdir; Səhv mənbə seçilib | Increase volume; Check if mute is active; Select the correct input source (DAB+, FM, Internet, Bluetooth, USB, AUX). |
| Zəif radio qəbulu (DAB+/FM) | Antenna not extended; Weak signal; Interference | Fully extend the telescopic antenna; Reposition the radio; Avoid placing near other electronic devices. |
| Internet Radio not working | No Wi-Fi connection; Incorrect Wi-Fi password; Router issue | Check Wi-Fi connection in settings; Re-enter Wi-Fi password; Restart your Wi-Fi router. |
| Bluetooth cütləşməsi uğursuz oldu | Radio not in pairing mode; Device too far; Bluetooth off on source device | Ensure radio is in Bluetooth mode; Move devices closer; Enable Bluetooth on your source device. |
| Simsiz şarj işləmir | Device not Qi-compatible; Device not placed correctly; Phone case too thick | Verify device supports Qi charging; Adjust device position on charging pad; Remove thick phone cases. |
9. Spesifikasiyalar
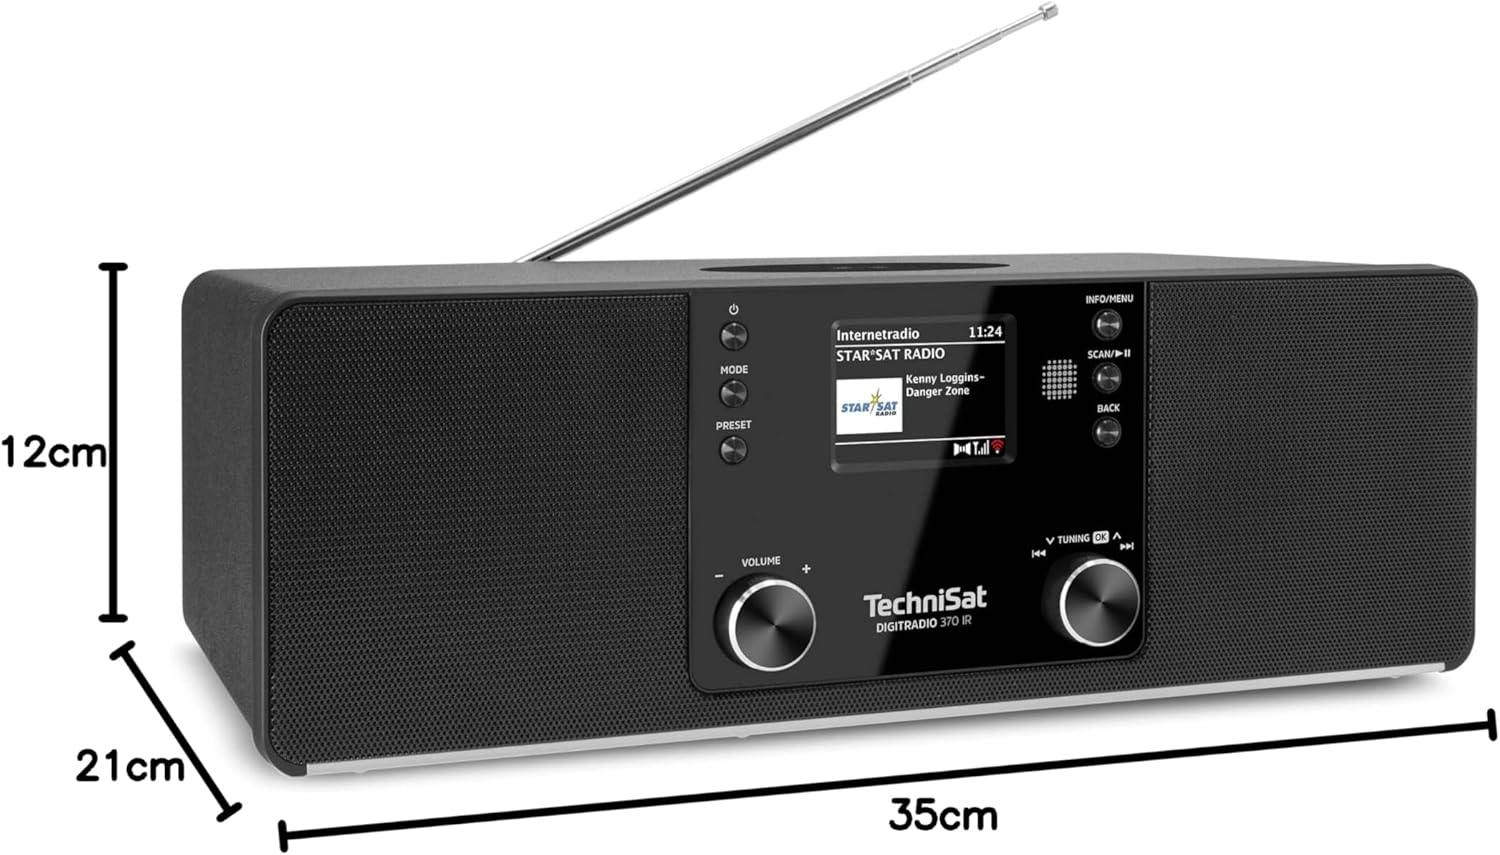
Şəkil 9.1: Məhsulun Ölçüləri
This image provides a visual representation of the radio's dimensions: 35 cm (length), 12 cm (height), and 21 cm (depth).
| Xüsusiyyət | Detal |
|---|---|
| Model nömrəsi | 0000/3971 |
| Brend | TechniSat |
| Radio Qrupları Dəstəklənir | DAB+, FM, İnternet Radiosu |
| Bağlantı texnologiyası | Bluetooth, USB, Wireless-Charging, WLAN (2.4 GHz & 5 GHz) |
| Xüsusi Xüsusiyyətlər | Wireless Charging, Bluetooth Audio Streaming, USB Playback & Charging, Alarm Clock, Sleep Timer, Snooze, App Control (UNDOK) |
| Səs Çıxış Modu | Stereo |
| Dinamik Çıxış Gücü | 2 x 5 Watts RMS (10 Watts total) |
| Ekran növü | 2.4 düymlük TFT Rəngli LCD |
| Güc mənbəyi | Electric Cord (230 Volts, 60 Hz) |
| Ölçülər (U x G x Y) | 35 x 21 x 12 sm |
| Çəki | 2.7 kiloqram |
| Korpus materialı | Taxta |
| Uyğun Cihazlar | Smartphone, MP3 player, tablet, laptop, headphones |
| İnterfeyslər | 3.5 mm Audio (AUX-IN), USB 2.0, 3.5 mm Headphone |
10. Zəmanət və Dəstək
10.1 Zəmanət Məlumatı
This product comes with a 2-year warranty (Gewährleistung) from the date of purchase. Please retain your proof of purchase for any warranty claims. The warranty covers manufacturing defects and malfunctions under normal use. It does not cover damage caused by misuse, accidents, unauthorized modifications, or normal wear and tear.
10.2 Müştəri dəstəyi
For technical assistance, troubleshooting beyond this manual, or warranty inquiries, please contact TechniSat customer support. Refer to the TechniSat official webBölgəniz üçün xüsusi əlaqə məlumatları üçün sayt.
Onlayn Resurslar: Visit the official TechniSat website for updated manuals, FAQs, and support information.