
Gioteck SC3
Gioteck SC3 Wireless Pro Controller User Manual
For Nintendo Switch, PC, and Mobile Devices
Giriş
This manual provides detailed instructions for the setup, operation, and maintenance of your Gioteck SC3 Wireless Pro Controller. Designed for use with Nintendo Switch, PC, and mobile devices, this controller features programmable back buttons, customizable RGB lighting, and changeable magnetic thumb sticks for an enhanced gaming experience.
1. Quraşdırma
1.1 Paketin məzmunu
- Gioteck SC3 Wireless Pro Controller
- USB şarj kabeli
- Additional Magnetic Thumb Sticks (if included)
- İstifadəçi Təlimatı (bu sənəd)
1.2 Nəzarətçinin doldurulması
Before initial use, fully charge the controller. Connect the supplied USB charging cable to the controller's charging port and the other end to a USB power source (e.g., Nintendo Switch dock, PC USB port, or USB wall adapter).
- LED göstəricisi şarj vəziyyətini göstərəcək.
- Tam şarj adətən təxminən 2-3 saat çəkir.
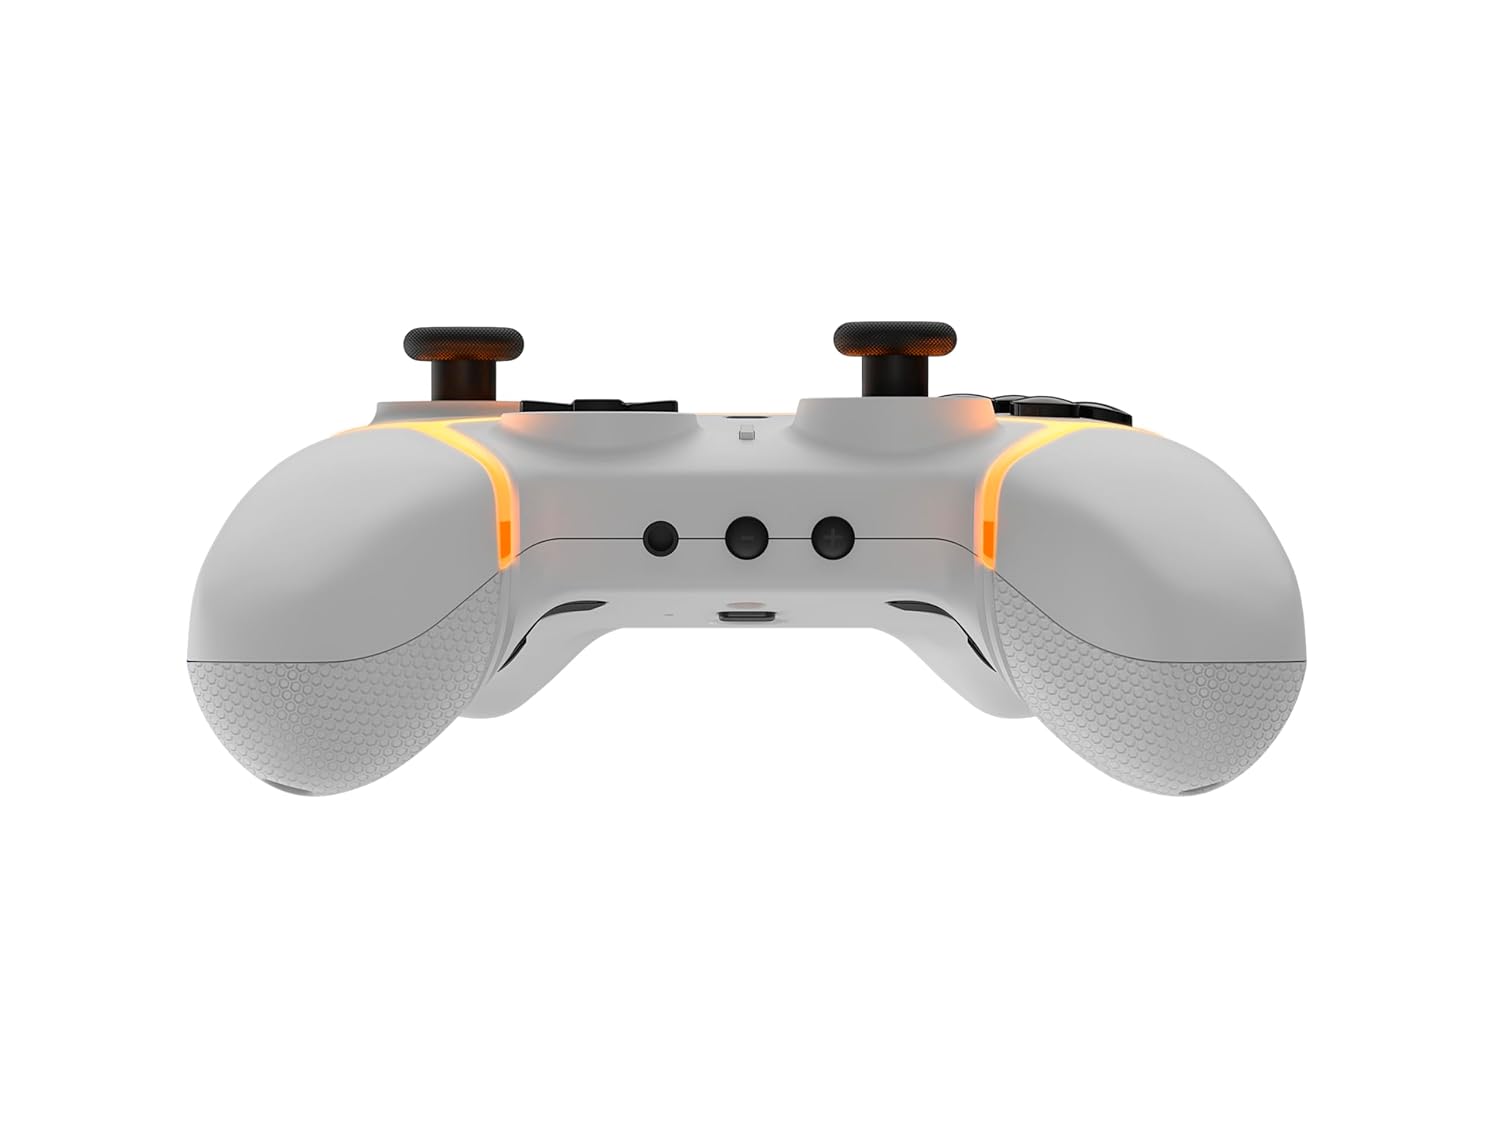
Şəkil: Aşağı view of the Gioteck SC3 controller, highlighting the USB-C charging port located between the two textured grips.
1.3 Pairing with Nintendo Switch
- Nintendo Switch HOME Menyusundan seçin Nəzarətçilər, sonra Tutma / Sifarişi dəyişdirin.
- On the SC3 controller, press and hold the Cütləşdirmə düyməsi (usually a small button on the top or back) for a few seconds until the LED indicators begin to flash rapidly.
- Once the controller is recognized by the Switch, the player LED(s) on the controller will illuminate solid, indicating successful pairing.
- düyməsini basın Bir düymə təsdiq etmək.
Note: For subsequent uses, the controller should automatically reconnect to the last paired Switch console when powered on.
1.4 Connecting to PC/Mobile (Bluetooth)
- Ensure Bluetooth is enabled on your PC or mobile device.
- On the SC3 controller, press and hold the Cütləşdirmə düyməsi for a few seconds until the LED indicators flash rapidly.
- On your PC/mobile device, navigate to Bluetooth settings and search for new devices.
- Select "Gioteck SC3" or similar from the list of available devices to pair.
- The controller's LED will become solid upon successful connection.
1.5 Installing Magnetic Thumb Sticks
The SC3 controller features changeable magnetic thumb sticks. To replace them:
- Gently pull the existing thumb stick straight up to remove it.
- Align the desired magnetic thumb stick with the base and gently push it down until it snaps into place.

Şəkil: Ön view of the Gioteck SC3 controller, showcasing the magnetic thumb sticks and button layout.
2. Əməliyyat Təlimatları
2.1 Düymələrin düzülüşü
The SC3 controller features a traditional button layout. Refer to the image below for button identification.

Şəkil: Bucaqlı ön view of the Gioteck SC3 controller, displaying the full button layout including face buttons, D-pad, analog sticks, and shoulder buttons.
- Sol/Sağ Analoq Çubuqlar: Hərəkət və kamera nəzarəti üçün.
- D-Pad: İstiqamətli giriş.
- A/B/X/Y Düymələri: Fəaliyyət düymələri.
- L/R/ZL/ZR Buttons: Çiyin və tətik düymələri.
- +/- Düymələr: Start/Select equivalents.
- Ev düyməsi: Returns to the console's home menu.
- Çəkmə düyməsi: Ekran görüntüləri çəkir.
2.2 Programmable Back Buttons
The SC3 controller includes programmable back buttons (M1, M2, M3, M4) for custom assignments.

Şəkil: arxa view of the Gioteck SC3 controller, clearly showing the four programmable back buttons (M1, M2, M3, M4) and textured grips.
Proqramlaşdırma addımları:
- basın və saxlayın Proqram düyməsi (refer to diagram if available, usually a small button on the back) until the LED indicator flashes.
- düyməsini basın Geri düyməsi (M1, M2, M3, or M4) you wish to program. The LED will flash slowly.
- düyməsini basın Daxiletmə düyməsi (e.g., A, B, X, Y, L, R, ZL, ZR, D-pad direction) you want to assign to the back button.
- düyməsini basın Proqram düyməsi again to save the assignment. The LED will stop flashing.
- Repeat for other back buttons as desired.
To clear a programmed button, follow steps 1-2, then press the Program Button again without pressing an input button.
2.3 RGB İşıqlandırmanın Fərdiləşdirməsi
The controller features customizable RGB lighting. Specific instructions for changing colors or effects are typically found in the product's quick start guide or by pressing a dedicated button combination (e.g., Function + R3).
Consult the quick start guide included with your controller for precise button combinations to adjust RGB lighting.
2.4 Motion Controls
The SC3 controller supports motion controls, allowing for immersive gameplay in compatible Nintendo Switch titles. No special setup is usually required; motion controls activate automatically when supported by the game.
2.5 Audio Headset Jack
A 3.5mm audio headset jack is located on the controller for connecting compatible headsets. It includes dedicated mute and volume control buttons.
- Səs artır/aşağı: Audio çıxışı tənzimləyin.
- Səssiz düymə: Mute/unmute microphone input.

Şəkil: Üst view of the Gioteck SC3 controller, highlighting the 3.5mm audio jack, volume controls, and mute button.
3. Baxım
3.1 Təmizləmə
To clean your controller, use a soft, dry cloth. For stubborn dirt, slightly dampParçanı su ilə yuyun. Sərt kimyəvi maddələrdən, aşındırıcı təmizləyicilərdən və ya həlledicilərdən istifadə etməkdən çəkinin, çünki bunlar kontrollerin səthinə və daxili komponentlərinə zərər verə bilər.
- Do not immerse the controller in water or any other liquid.
- Cihazları doldurmadan və ya qoşmadan əvvəl bütün portların quru olduğundan əmin olun.
3.2 Saxlama
Kontrolleri sərin, quru yerdə, birbaşa günəş işığından və həddindən artıq temperaturdan uzaq saxlayın. Zədələnməmək üçün kontrollerin üzərinə ağır əşyalar qoymaqdan çəkinin.
3.3 Batareya Baxımı
The controller contains a rechargeable battery. To prolong battery life:
- Tez-tez batareyanı tam boşaltmaqdan çəkinin.
- Charge the controller regularly, even if not in use for extended periods (e.g., once every 3-6 months).
- Do not expose the controller to temperatures above 60°C (140°F).
4. Giderme
4.1 Kontroller Qoşulmur/Cütlənmir
- Batareyanı yoxlayın: Nəzarətçinin kifayət qədər doldurulduğundan əmin olun.
- Yenidən cütləşdirin: Follow the pairing instructions in Section 1.3 or 1.4.
- Müdaxilə: Move closer to the console/device and away from potential sources of wireless interference (e.g., Wi-Fi routers, other Bluetooth devices).
- Reset Controller: Locate a small reset button (often a pinhole) on the back of the controller. Use a paperclip to press and hold it for a few seconds. Then attempt to re-pair.
- Update Console/Device Software: Ensure your Nintendo Switch, PC, or mobile device's operating system is up to date.
4.2 Buttons/Sticks Not Responding
- Yenidən sinxronizasiya: Nəzarətçini ayırın və yenidən qoşun.
- Təmiz: Düymələrin və ya çubuqların ətrafında heç bir zibil yığılmadığından əmin olun.
- Test in another game/menu: Determine if the issue is specific to a game or system-wide.
- Reset Controller: Perform a hard reset as described above.
4.3 Motion Controls Not Working
- Oyun Uyğunluğu: Verify that the game you are playing supports motion controls.
- Yenidən kalibrləmə: On Nintendo Switch, you can recalibrate motion controls in the system settings.
- Reset Controller: Sərt sıfırlama həyata keçirin.
5. Spesifikasiyalar
| Model: | Gioteck SC3 Wireless Pro Controller |
| Uyğunluq: | Nintendo Switch (Original, Lite, OLED), PC, Mobile Devices |
| Bağlantı: | Bluetooth Simsiz |
| Ölçülər (təxminən): | 2.87 x 5.35 x 6.34 düym (7.29 x 13.59 x 16.1 sm) |
| Çəki (təxminən): | 10.6 unsiya (300 qram) |
| Audio jak: | 3.5mm with mute and volume controls |
| Xüsusi Xüsusiyyətlər: | Programmable back buttons, Magnetic thumb sticks, RGB lighting, Motion controls |
6. Zəmanət Məlumatı
The Gioteck SC3 Wireless Pro Controller comes with a manufacturer's warranty. For specific details regarding warranty coverage, duration, and claims process, please refer to the warranty card included with your product or visit the official Gioteck websayt.
Zəmanət məqsədləri üçün satınalma sübutunuzu özünüzdə saxlayın.
7. Müştəri dəstəyi
If you encounter any issues or have questions not covered in this manual, please contact Gioteck customer support. Contact information can typically be found on the product packaging or the official Gioteck websayt.
Gioteck Official Websayt: www.gioteck.com
Ask a question about this manual
Ask about setup, troubleshooting, compatibility, parts, safety, or missing instructions. Manuals+ will review the question and use this page’s manual context to help answer it.