
1. Giriş
This manual provides detailed instructions for the setup, operation, and maintenance of your DOACT Projection Alarm Clock. Please read this manual thoroughly before using the device to ensure proper function and to avoid damage.
2. Təhlükəsizlik Məlumatı
- Cihazı həddindən artıq temperatura, birbaşa günəş işığına və ya yüksək rütubətə məruz qoymayın.
- Cihazı sudan və digər mayelərdən uzaq saxlayın.
- Use only the specified power supply (AAA*2 batteries or 5V USB).
- Cihazı özünüz sökməyə və ya təmir etməyə çalışmayın. Xidmət üçün ixtisaslı mütəxəssislərlə əlaqə saxlayın.
- Batareyaları uşaqların əli çatmayan yerdə saxlayın.
3. Paketin məzmunu
Bütün əşyaların paketdə olduğunu yoxlayın:
- 1 x DOACT Projection Alarm Clock
- 1 x USB kabel
- 1 x İstifadəçi Təlimatı (bu sənəd)
4. Məhsul bitdiview
Familiarize yourself with the components of your projection alarm clock.

Şəkil 4.1: Arxa View və Nəzarətlər
This image displays the back of the projection clock, highlighting key controls and ports. These include the Mode button, UP/DOWN buttons for time adjustment, MAX/MIN button for temperature/humidity display, SNZ (snooze) button, probe hole, AAA battery compartment, external power interface, and supporting base.
- Ekran Ekranı: Shows time, temperature, humidity, and weather forecast icons.
- Proyeksiya linzaları: Zamanı bir səthə proyeksiyalayır.
- Rejim düyməsi: Used to enter setup modes for time, alarm, etc.
- UP/DOWN düymələri: Adjust values during setup or switch display modes.
- MAX/MIN Düyməsi: Cari, maksimum və minimum temperatur/rütubət oxunuşları arasında keçid edir.
- SNZ (Snooze) Button: Activates snooze function for the alarm.
- Batareya bölməsi: 2 ədəd AAA batareya saxlayır (daxil deyil).
- USB güc portu: For continuous power supply via USB cable.
5. Quraşdırma
5.1 Cihazın enerji təchizatı
- Batareyanın quraşdırılması: Open the battery compartment on the back of the clock. Insert 2 x AAA batteries (not included), ensuring correct polarity (+/-). Note: When using only batteries, the display will not be continuously on to conserve power. The display will be black when off and difficult to see.
- USB Gücü: For continuous display and optimal functionality, connect the provided USB cable to the USB power port on the back of the clock and plug the other end into a 5V USB power adapter (not included) or a USB port. The display will remain continuously on when powered via USB.
5.2 İlkin vaxt və tarix təyini
- basın və saxlayın MODE button for approximately 3 seconds to enter time setting mode. The hour digits will flash.
- istifadə edin UP or AŞAĞI saatı tənzimləmək üçün düymələr.
- basın MODE Saatı təsdiqləmək və dəqiqə parametrinə keçmək üçün yenidən basın. Dəqiqə rəqəmləri yanıb-sönəcək.
- istifadə edin UP or AŞAĞI dəqiqələri tənzimləmək üçün düymələr.
- Basmağa davam edin MODE to cycle through and set other parameters such as year, month, and day, adjusting each with the UP or AŞAĞI düymələri.
- basın MODE one last time or wait for 10 seconds without input to exit the setting mode.
6. Əməliyyat Təlimatları
6.1 Time Projection Function
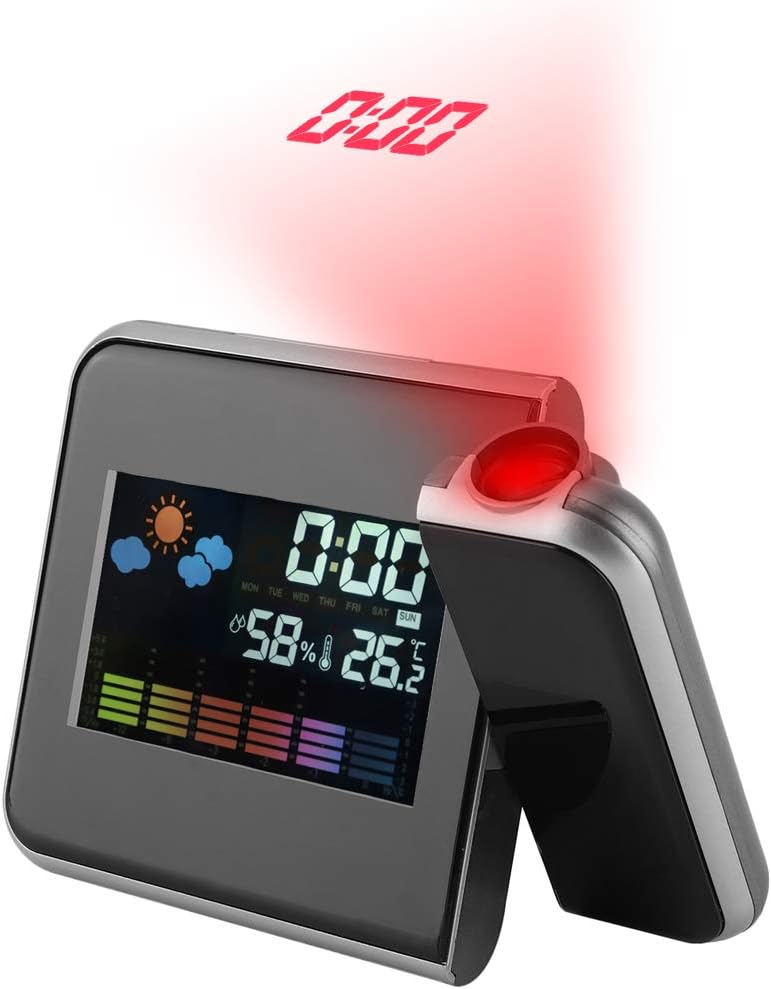
Figure 6.1: Time Projection
This image shows the projection clock actively displaying the time onto a surface, illustrating its projection capability. The projection distance is approximately 1 to 5 meters.
- The clock can project the time onto a ceiling or wall. The optimal projection distance is 1-5 meters.
- To activate the projection, ensure the clock is powered via USB or press a button if using batteries (projection is not continuous on battery power).
- Proyeksiya Bucağının Tənzimlənməsi: The projection lens can be rotated 180 degrees to direct the time display to your desired surface. Gently rotate the projection arm to adjust.
6.2 Temperatur və Rütubət Göstəricisi
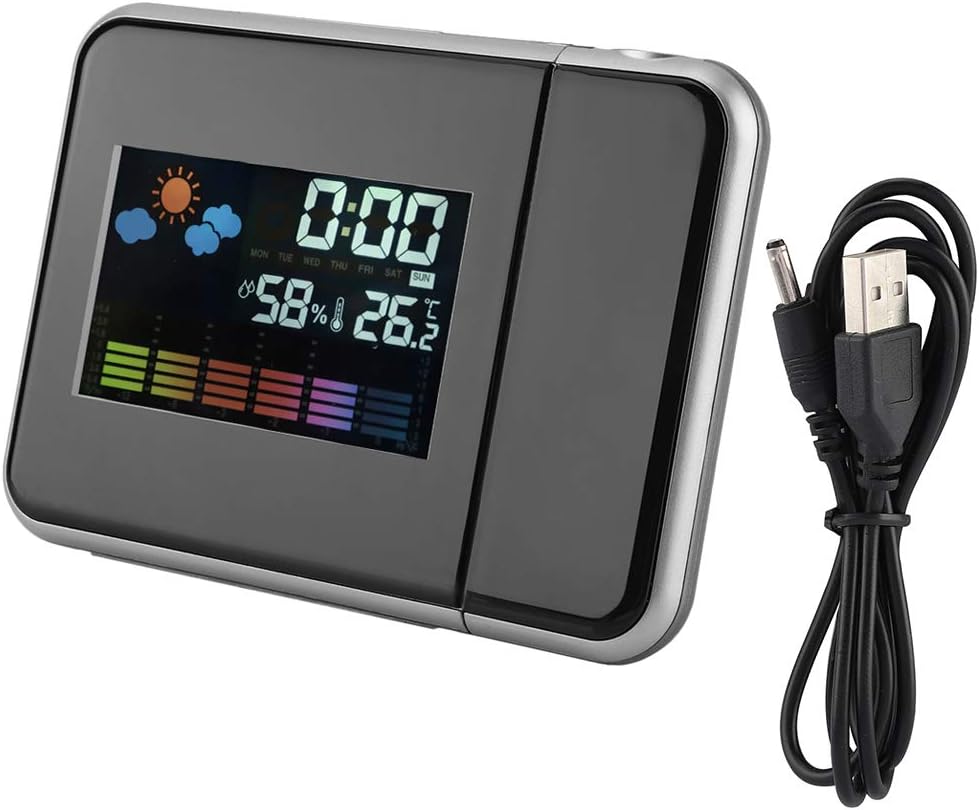
Figure 6.2: Main Display
A aydın view of the clock's front display, showing the digital time, current temperature, humidity percentage, and weather forecast icons. This illustrates the multi-functional display capabilities.
- The main display shows the current indoor temperature and humidity.
- Temperatur vahidi: To switch between Celsius (°C) and Fahrenheit (°F), press the AŞAĞI düyməsini qısaca.
- Maximum/Minimum Readings: düyməsini basın MAX/MIN düyməsini basın view the maximum recorded temperature and humidity. Press again to view the minimum recorded temperature and humidity. Press a third time to return to current readings. The readings reset daily or when the device is reset.
6.3 Alarm Clock and Snooze Function
- Siqnalın qurulması:
- düyməsini basın MODE button once to enter alarm setting mode. The alarm time will flash.
- istifadə edin UP or AŞAĞI zəngli saatı tənzimləmək üçün düymələr.
- basın MODE again to confirm the hour and set the alarm minutes.
- istifadə edin UP or AŞAĞI siqnal dəqiqələrini tənzimləmək üçün düymələr.
- basın MODE again or wait for 10 seconds to exit alarm setting.
- Siqnalın Aktivləşdirilməsi/Söndürülməsi: Normal vaxt göstərmə rejimində düyməsini basın UP button briefly to toggle the alarm on or off. An alarm icon will appear on the display when activated.
- Mürgüləmə funksiyası: Siqnal səslənəndə, düyməsini basın SNZ button to activate the snooze function. The alarm will temporarily stop and sound again after a few minutes (default snooze time is typically 5-10 minutes, refer to specific model details if available). To turn off the alarm completely, press any other button.
7. Baxım
- Cihazı yumşaq, quru bir parça ilə təmizləyin. Aşındırıcı təmizləyicilərdən və ya həlledicilərdən istifadə etməyin.
- Ensure the projection lens is clean for clear time projection.
- Cihazı uzun müddət istifadə etməsəniz, sızmanın qarşısını almaq üçün batareyaları çıxarın.
8. Giderme
| Problem | Mümkün Səbəb | Həll |
|---|---|---|
| Display is off or dim (on battery power) | Batteries are low or display is designed to turn off to save power. | Replace AAA batteries or connect the device to a USB power source for continuous display. |
| No time projection | Projection function not activated or device not powered via USB. | Ensure USB power is connected. If on battery, press a button to temporarily activate projection. Check if the projection lens is obstructed. |
| Yanlış vaxt/tarix | Time/date not set correctly or power interruption. | Refer to Section 5.2 to reset the time and date. |
| Siqnal səslənmir | Siqnal aktivləşdirilməyib və ya səhv qurulub. | Refer to Section 6.3 to ensure the alarm is set and activated (alarm icon visible). |
9. Spesifikasiyalar
| Xüsusiyyət | Detal |
|---|---|
| Model nömrəsi | DOACTcuf6pq3yvr-01 |
| Ekran növü | Digital, LED Color Screen |
| Güc mənbəyi | 2 x AAA Batteries (not included), USB 5V (cable included) |
| Temperatur Göstərici Aralığı | -9.9°C - +60°C (14.2°F - 140°F) |
| Rütubətin göstərilməsi diapazonu | 20% RH ilə 90% RH arasında |
| Proyeksiya məsafəsi | 1-5 metr |
| Proyeksiya bucağı | 180° fırlanan |
| Məhsul Ölçüləri | 15 cm (5.9 in) W x 11 cm (4.3 in) H x 2 cm (0.8 in) D |
| Material | plastik |
| Çəki | təqribən. 246 q (8.7 unsiya) |
| Xüsusi Xüsusiyyətlər | Alarm, Snooze, Temperature Display, Humidity Display, Weather Forecast, Digital Time Display, Max/Min Temperature/Humidity |

Şəkil 9.1: Məhsulun Ölçüləri
This image provides a visual representation of the clock's dimensions, indicating its width (15cm / 5.9in), height (11cm / 4.3in), and depth (2cm / 0.8in).
10. Zəmanət və Dəstək
For warranty information or technical support, please refer to the retailer's policy or contact the manufacturer directly. Keep your purchase receipt as proof of purchase.