
1. Giriş
The Ortis Hi-Lo Sump Pump Switch Controller KJ-033 is an electronic adjustable float switch designed for automatic water level management in various applications such as sewage pits, fish tanks, and water tanks. It features stainless steel anti-corrosion dual sensors and supports both 220V and 110V AC power inputs. This manual provides detailed instructions for installation, operation, maintenance, and troubleshooting to ensure optimal performance and longevity of your device.
2. Təhlükəsizlik Məlumatı
Quraşdırma və istismardan əvvəl bütün təhlükəsizlik təlimatlarını diqqətlə oxuyun. Bu təlimatlara əməl edilməməsi elektrik şoku, yanğın və ya ciddi xəsarətlə nəticələnə bilər.
- Elektrik təhlükəsi: Ensure the power supply is disconnected before performing any installation, maintenance, or troubleshooting.
- Cildtage Uyğunluq: Enerji təchizatı voltage matches the controller's specifications (220V/110V AC).
- Düzgün torpaqlama: Always connect the device to a properly grounded outlet.
- Suya məruz qalma: Do not immerse the controller unit in water. The controller unit is designed to be mounted above the water level.
- İxtisaslı Kadrlar: Əgər əmin deyilsinizsə, quraşdırma və elektrik birləşmələri ixtisaslı işçilər tərəfindən aparılmalıdır.
- Ekoloji Şərtlər: Do not operate the device in explosive atmospheres or where flammable liquids or gases are present.
3. Məhsulun xüsusiyyətləri
The Ortis KJ-033 controller offers several features for reliable water level management:
- Dual Stainless Steel Sensors: Anti-corrosion sensors for accurate water level detection.
- Adjustable Sensor Range: Sensors can be adjusted from 1/2 inch to 20 inches to define high and low water levels.
- Birdən çox iş rejimi: Supports Drain Mode (for emptying) and Water Mode (for filling).
- LED göstəriciləri: Visual feedback for power, load status, and alarm conditions.
- Həddindən artıq yükdən qorunma: Integrated protection for connected pumps.
- Səssiz funksiyası: Allows silencing of the alarm.
- Geniş tətbiq: Suitable for sewage pits, fish tanks, water tanks, and other water management systems.
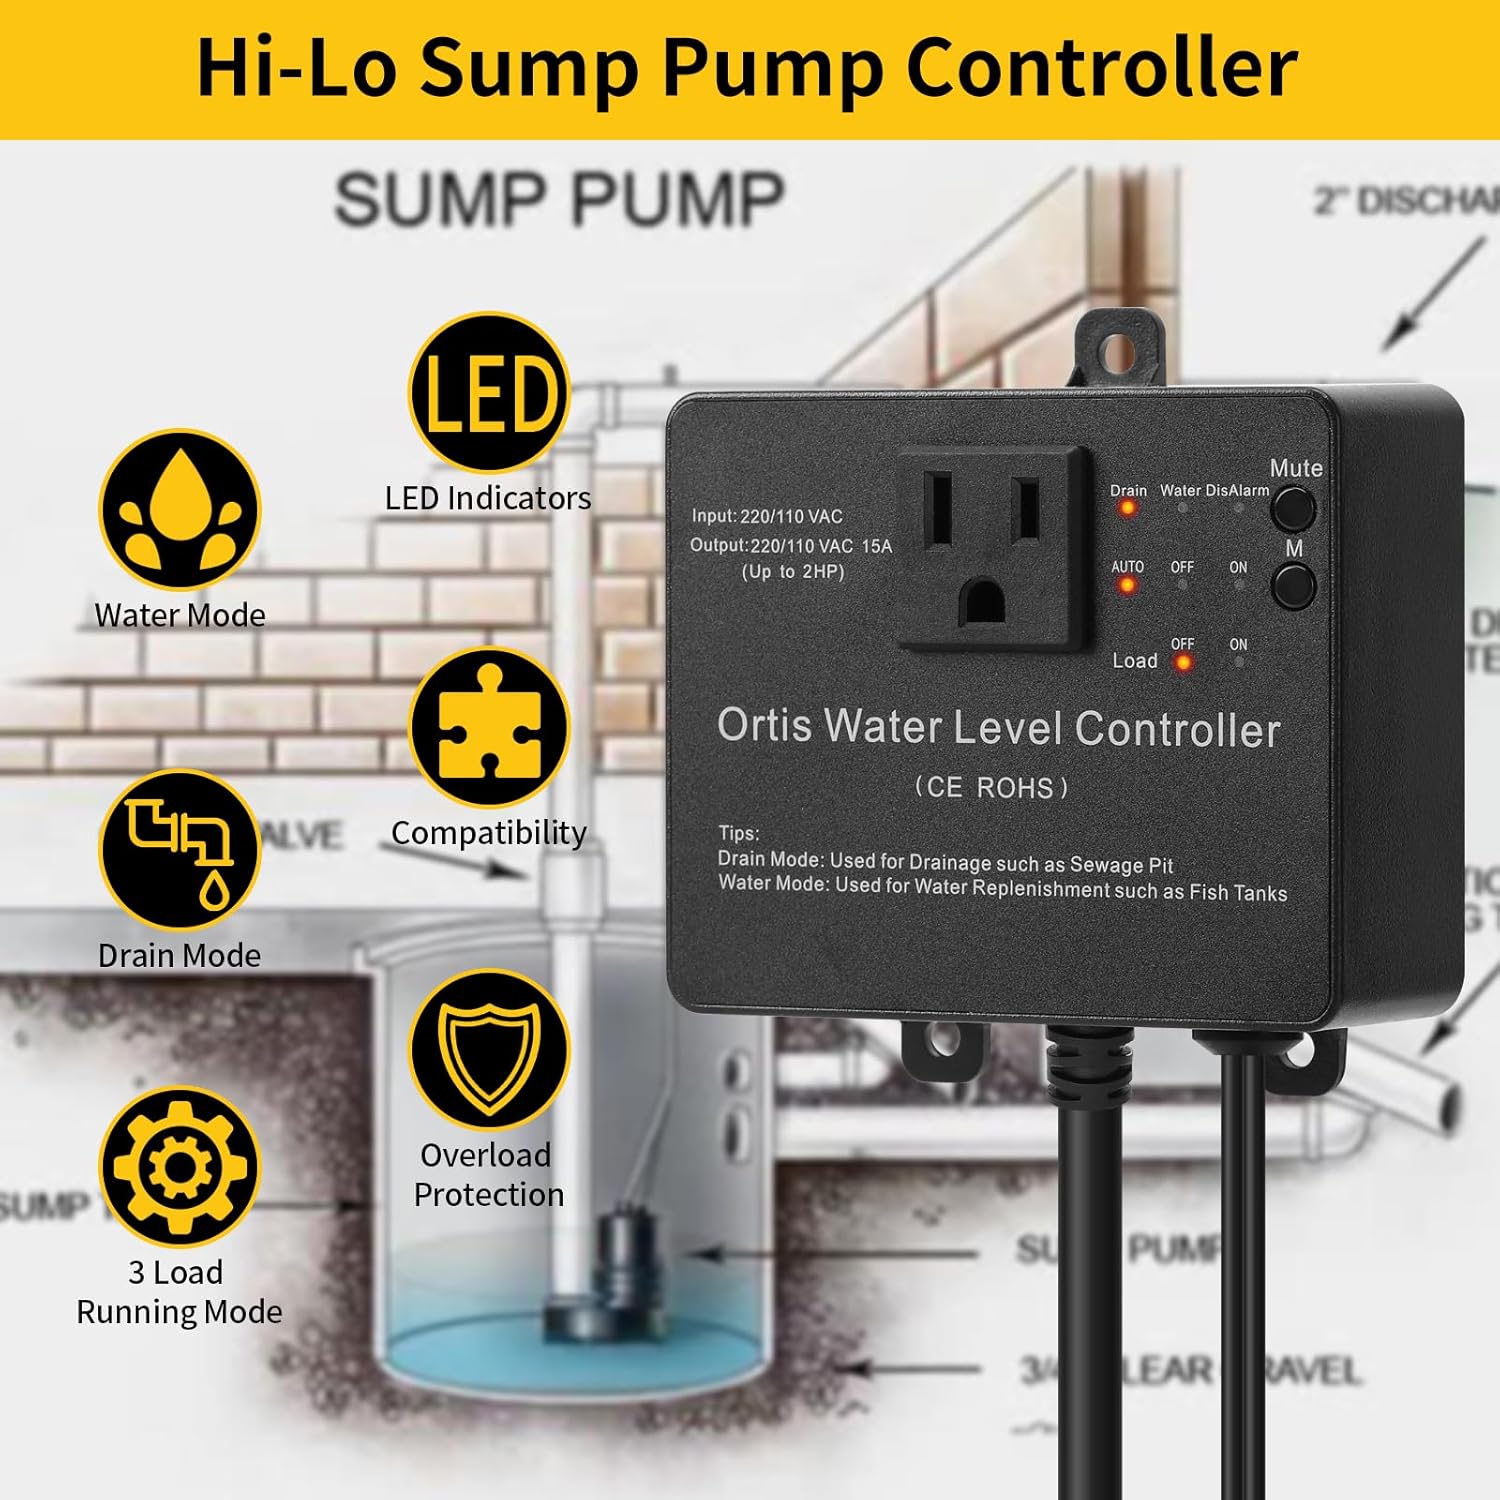
Şəkil 3.1: Ortis Water Level Controller Overview with Key Features.
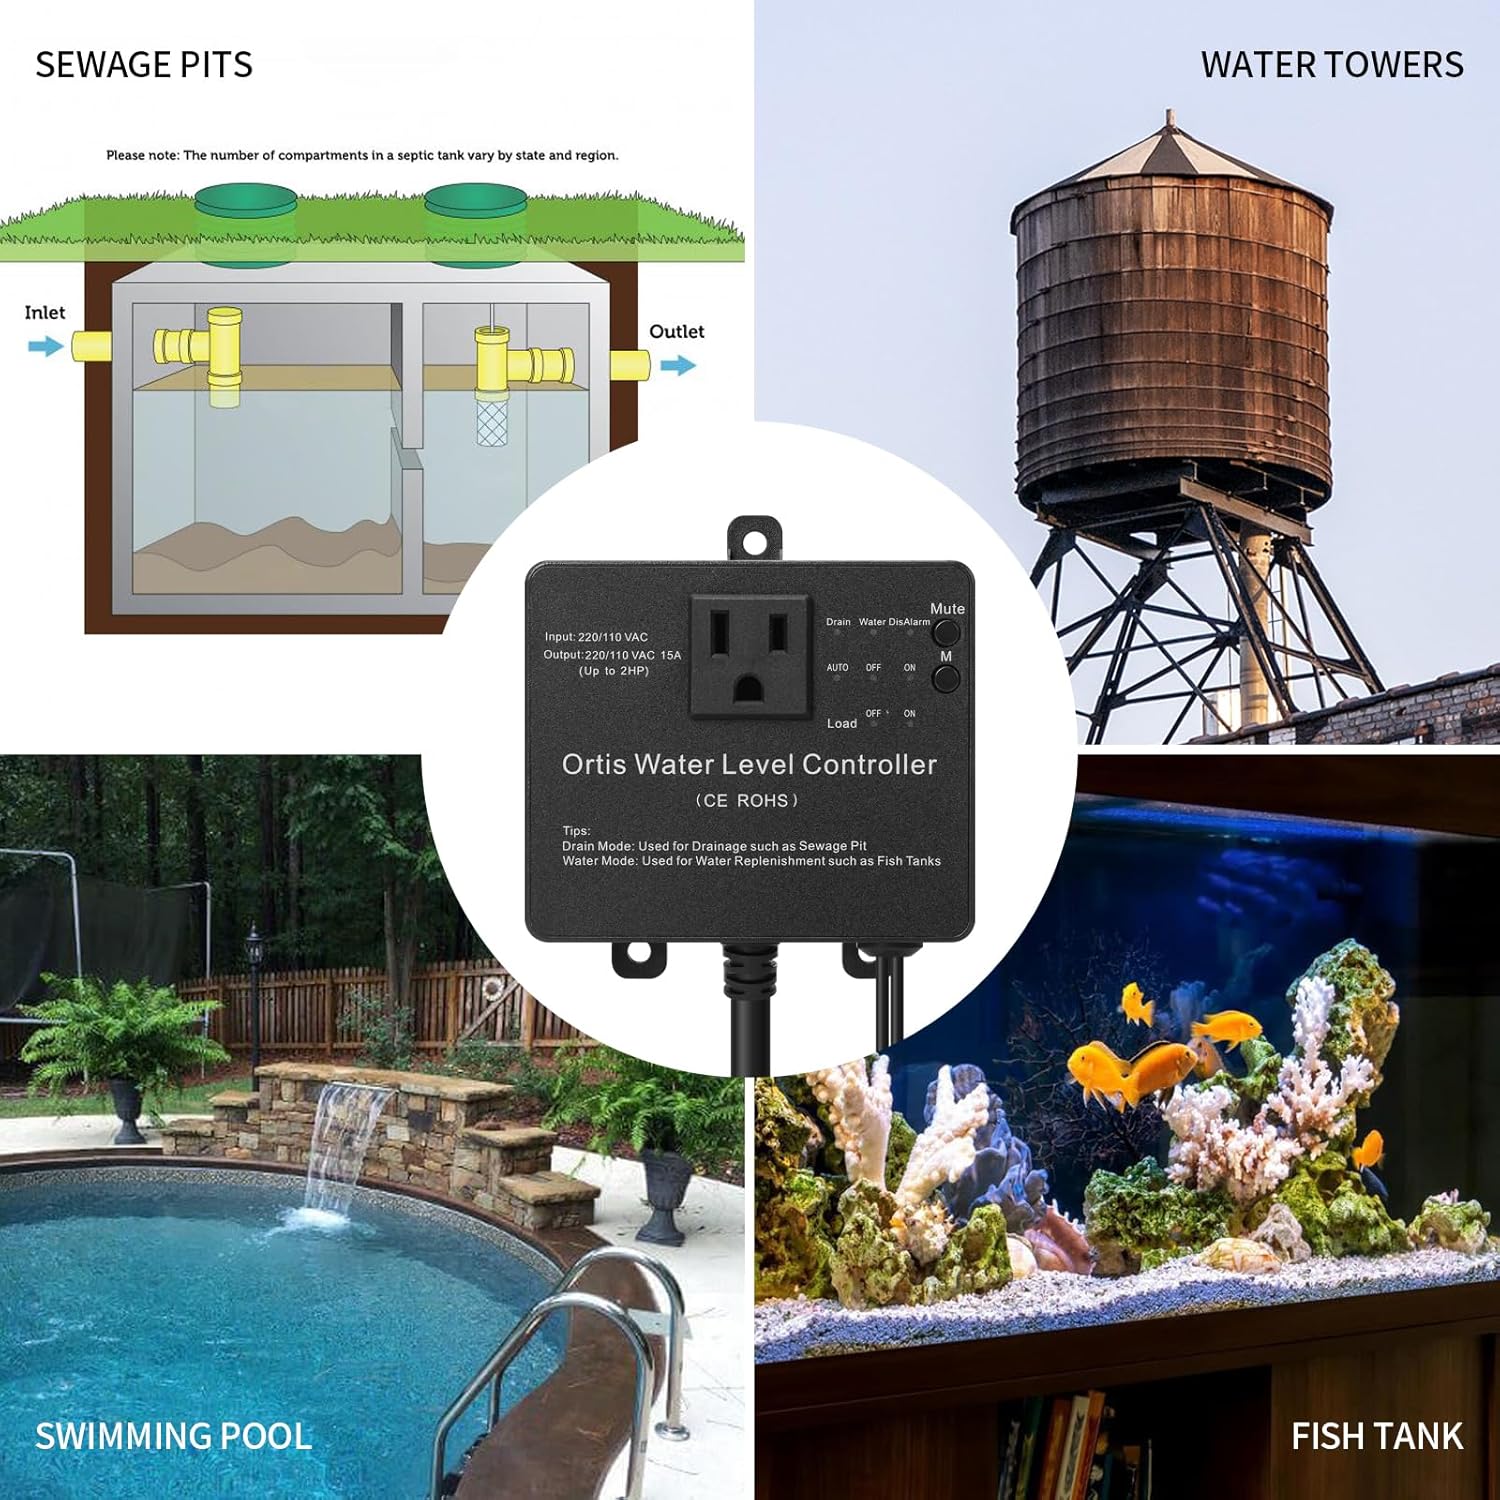
Şəkil 3.2: Various Application Scenarios for the Controller.
4. Quraşdırma və Quraşdırma
Proper installation is crucial for the reliable operation of the controller.
4.1 Controller Mounting
The controller unit should be mounted in a dry location, above the maximum water level, and within reach of a grounded power outlet.
- Vida montajı: Use appropriate screws and anchors to secure the controller to a wall or stable surface through the mounting tabs.
- Emiş kubokunun quraşdırılması: For temporary or non-permanent installations, a suction cup can be used to attach the controller to a smooth, clean surface.

Şəkil 4.1: Controller Installation Methods.
4.2 Sensor Installation and Adjustment
The dual sensors detect the high and low water levels. Their position determines the operating range of your pump.
- Sensor Yerləşdirmə: Position the sensors vertically in the water, ensuring they are securely fastened and will not move. The lower sensor defines the 'low' water level, and the upper sensor defines the 'high' water level.
- Tənzimlənən Aralıq: The sensors can be adjusted along their cables to set the desired water level range, from 1/2 inch to 20 inches apart. Ensure both sensors are submerged at the desired 'on' level and the lower sensor is exposed at the desired 'off' level for drain mode, or vice versa for water mode.
- Kabel İdarəetmə: Route sensor cables to prevent entanglement or damage.

Şəkil 4.2: Adjustable Sensor Installation.
4.3 Elektrik bağlantısı
- Elektrik prizi: Plug the controller's power cord into a grounded 220V or 110V AC outlet.
- Nasos bağlantısı: Plug your sump pump or other load device into the outlet on the front of the controller. Ensure the pump's power requirements do not exceed the controller's output capacity (15A, up to 2HP).

Şəkil 4.3: Example Sump Pit Installation.
5. Əməliyyat Təlimatları
The controller features a simple interface for selecting operating modes and managing alarms.

Şəkil 5.1: İdarəetmə Paneli bitdiview.
5.1 Rejimin seçimi
Use the 'Drain' and 'Water' buttons to select the desired operating mode:
- Drenaj rejimi: (LED indicator 'Drain' illuminates) In this mode, the controller activates the pump when the water level reaches the upper (high) sensor and deactivates it when the water level drops below the lower (low) sensor. This mode is typically used for emptying sewage pits or sumps.
- Su rejimi: (LED indicator 'Water' illuminates) In this mode, the controller activates the pump when the water level drops below the lower (low) sensor and deactivates it when the water level reaches the upper (high) sensor. This mode is typically used for replenishing water in fish tanks or water tanks.
5.2 Power and Operation Switch
The main switch controls the power and operational state of the connected load:
- AVTO: (LED indicator 'AUTO' illuminates) The controller operates automatically based on the selected mode (Drain or Water) and sensor readings.
- QAPALI: (LED indicator 'OFF' illuminates) The connected pump is turned off, regardless of water levels.
- AÇIQ: (LED indicator 'ON' illuminates) The connected pump is continuously turned on, regardless of water levels. Use this for manual override or continuous operation.
5.3 Səssiz funksiyası
Press the 'Mute' button to silence any active alarms. The 'DisAlarm' LED will illuminate when the alarm is muted.

Şəkil 5.2: Operational Logic in Drain Mode (Sewage Pit Example).
6. Baxım
Regular maintenance ensures the longevity and reliable operation of your Ortis controller.
- Sensorun təmizlənməsi: Periodically inspect and clean the stainless steel sensors to remove any buildup of debris, algae, or mineral deposits that could affect their accuracy. Disconnect power before cleaning.
- Kabel yoxlaması: Check all cables and connections for signs of wear, damage, or corrosion. Replace any damaged components immediately.
- Controller Unit: Keep the controller unit clean and dry. Avoid exposing it to direct sunlight or extreme temperatures.
- Test əməliyyatı: Periodically test the controller's operation by manually raising or lowering water levels to ensure the pump activates and deactivates as expected in the selected mode.
7. Giderme
Ümumi problemlər və onların həlli yolları üçün aşağıdakı cədvələ baxın.
| Problem | Mümkün Səbəb | Həll |
|---|---|---|
| Pump does not turn on/off automatically. | 1. Controller not in AUTO mode. 2. Sensors are dirty or improperly positioned. 3. Pump is not plugged in or is faulty. | 1. Ensure the switch is set to 'AUTO'. 2. Clean sensors and verify their high/low positions. 3. Check pump connection and functionality. |
| Siqnal tez-tez səslənir. | 1. Water level not reaching desired sensor within expected time. 2. Sensor nasazlığı. 3. Alarm sensitivity setting (if applicable, check product documentation). | 1. Check pump operation and water flow. Adjust sensor positions if needed. 2. Inspect sensors for damage or debris. Replace if faulty. 3. Use the 'Mute' button temporarily. Consult manufacturer for alarm logic details. |
| Nəzarətçinin gücü yoxdur. | 1. Elektrik kabeli elektrik şəbəkəsindən çıxarılıb. 2. Çıxışın gücü yoxdur. 3. Daxili qoruyucu yanmışdır. | 1. Ensure power cord is securely plugged in. 2. Test the outlet with another device. Check circuit breaker. 3. Yardım üçün müştəri dəstəyi ilə əlaqə saxlayın. |
| Pump runs continuously in AUTO mode. | 1. Sensor stuck in 'on' position (e.g., upper sensor always wet in Drain Mode). 2. Controller malfunction. | 1. Clean and reposition sensors. Ensure they can freely detect water level changes. 2. Disconnect power and reconnect. If issue persists, contact support. |
8. Spesifikasiyalar

Şəkil 8.1: Controller Dimensions.
| Xüsusiyyət | Spesifikasiya |
|---|---|
| Model | KJ-033 |
| Brend | Ortis |
| Giriş həcmitage | 220V / 110V AC |
| Çıxış cərəyanı | 15A |
| Maksimum yük gücü | 2 at gücünə qədər |
| Sensor materialı | Paslanmayan Polad |
| Adjustable Sensor Range | 1/2 düymdən 20 düymə qədər |
| İstehsalçı | FJKJ INC. |
9. Zəmanət və Dəstək
For warranty information and technical support, please refer to the product packaging or contact the seller/manufacturer directly. Keep your purchase receipt as proof of purchase.
İstehsalçı: FJKJ INC.


