
1. Giriş
This manual provides essential information for the proper setup, operation, and maintenance of your Pisichen 24 Inch Touchscreen Monitor (Model 24INSXT-1080P). Please read this manual thoroughly before using the product to ensure optimal performance and safety. Keep this manual for future reference.

Image 1.1: The Pisichen 24 inch touchscreen monitor, featuring a built-in webcam and a sleek design.
2. Paketin məzmunu
Verify that all items are present in the package. If any items are missing or damaged, contact your retailer for assistance.
- Pisichen 24 Inch Touchscreen Monitor
- Power Adapter (DC)
- HDMI Kabel
- VGA Kabel
- USB-C kabeli
- İstifadəçi təlimatı
3. Quraşdırma Təlimatları
3.1 Fiziki Quraşdırma
Stendin quraşdırılması: Carefully place the monitor face down on a soft, clean surface. Align the stand base with the monitor's mounting points and secure it with the provided screws. Ensure the stand is firmly attached before proceeding.
VESA montajı: This monitor supports VESA 100mm x 100mm mounting. If you plan to use a VESA-compatible arm or wall bracket, remove the stand and attach the monitor to your VESA mount according to the mount's instructions.

Image 3.1: The monitor's adjustable stand allows for height, tilt, swivel, and 90-degree pivot adjustments.
3.2 Cihaza qoşulma
The monitor offers multiple connectivity options. Ensure the monitor is powered off before making any connections.
- Enerji bağlantısı: Connect the DC power adapter to the monitor's DC Power Port and then plug it into a power outlet.
- Video bağlantısı: Aşağıdakı variantlardan birini seçin:
- HDMI: Connect one end of the HDMI cable to the monitor's HDMI Port and the other end to your computer's HDMI output.
- VGA: Connect one end of the VGA cable to the monitor's VGA Port and the other end to your computer's VGA output.
- USB-C: Connect one end of the USB-C cable to the monitor's Type C Port and the other end to your computer's USB-C port. Ensure your computer's USB-C port supports DisplayPort Alternate Mode for video output. This connection also supports touch functionality and data transfer.
- Səs bağlantısı: If using HDMI or USB-C, audio will typically transmit automatically. For other setups or external speakers, use the Audio Port.

Şəkil 3.2: Ətraflı view of the monitor's rear ports, including HDMI, VGA, Type C, DC Power, and Audio ports.
3.3 Touchscreen and Webkamera Quraşdırma
For touchscreen functionality and webcam operation, ensure the USB-C cable is connected between the monitor and your computer, or a separate USB-A to USB-B cable (not always included, check package contents) is connected from the monitor's upstream USB port to your computer. Most operating systems will automatically detect and install the necessary drivers.

Image 3.3: Compatibility chart for touchscreen functionality. Multi-touch is supported on laptops, smartphones, tablets, all-in-one PCs, and desktop hosts. Single-touch is supported on MacBooks. Touch functionality is not supported on iPhones, iPads, Nintendo Switch, Xbox, PlayStation consoles, Fire TV devices, and Steam Deck.
4. Əməliyyat Təlimatları
4.1 Yandırma/Söndürmə
Monitoru yandırmaq və ya söndürmək üçün üzərində yerləşən güc düyməsini basın. Monitor aktiv olduqda güc göstəricisi işığı yanacaq.
4.2 Toxunma ekranından istifadə
The monitor features a 10-point multi-touch screen for intuitive interaction. Use gestures such as tapping, swiping, pinching to zoom, and dragging, similar to a tablet or smartphone. Ensure your operating system is configured for touch input.

Image 4.1: Demonstrating precise and fluid interaction with the 10-point multi-touch screen.
4.3 Webkamera və mikrofon istifadəsi
Daxili webcam and microphone are designed for video conferencing and online communication. Once connected via USB-C or a dedicated USB cable, they should be automatically recognized by your computer's operating system and video conferencing applications. Adjust privacy settings within your operating system or application as needed.

Image 4.2: The integrated webcam facilitates clear video calls and online meetings.
4.4 Ekran Tənzimləmələri
The monitor's stand allows for various ergonomic adjustments:
- Hündürlük tənzimlənməsi: Monitoru istədiyinizə qədər qaldırın və ya endirin viewhündürlüyü.
- Əymək: Adjust the screen's vertical angle (forward or backward) for optimal viewing.
- Fırlanan: Rotate the monitor horizontally (left or right) on its base.
- Pivot: Rotate the screen 90 degrees to switch between landscape and portrait modes. This is useful for coding, document review, or specific creative tasks.
4.5 Ekranda Ekran (OSD) Menyu
The OSD menu allows you to adjust various display settings such as brightness, contrast, color temperature, input source, and audio volume. Access the OSD menu using the buttons located on the monitor (refer to the physical layout for exact button locations).
5. Baxım
5.1 Monitorun təmizlənməsi
Monitor ekranını təmizləmək üçün onu yumşaq, tüysüz parça ilə yumşaq bir şəkildə silin. İnadkar izlər üçün yüngülcə dampen the cloth with water or a non-abrasive screen cleaner. Avoid using alcohol, ammonia, or abrasive cleaners, as these can damage the screen surface. For the monitor casing, yumşaq, quru parça istifadə edin.
5.2 Saxlama
Monitoru uzun müddət saxlayarkən, onun elektrik enerjisindən ayrıldığından və bütün kabellərdən ayrıldığından əmin olun. Tozdan və fiziki zədələrdən qorumaq üçün onu sərin və quru yerdə, tercihen orijinal qablaşdırmasında saxlayın.
6. Giderme
Monitorunuzla bağlı problemlərlə qarşılaşsanız, aşağıdakı ümumi problemlərə və həll yollarına müraciət edin:
| Problem | Mümkün Səbəb | Həll |
|---|---|---|
| Ekranda şəkil yoxdur | Power cable loose; Video cable loose or incorrect input selected; Monitor is off. | Check power connections; Ensure video cable is securely connected and correct input source is selected via OSD; Press power button. |
| Sensorlu ekran cavab vermir | USB-C cable not connected or not supporting data; Drivers not installed; Device not compatible with touch. | Ensure USB-C cable is fully connected and supports data/touch; Check device compatibility (refer to Image 3.3); Restart computer. |
| Webcam/Microphone not working | USB-C cable not connected or not supporting data; Privacy settings blocking access; Drivers not installed. | Verify USB-C connection; Check privacy settings in your operating system and application; Restart computer. |
| Monitor dinamiklərindən səs çıxmır | Volume too low; Incorrect audio output selected on computer; Audio cable not connected (if applicable). | Adjust monitor volume via OSD; Select monitor as audio output in computer settings; Ensure audio cable is connected if using VGA. |
| Screen flickers or displays distorted image | Loose video cable; Incorrect resolution/refresh rate; Interference. | Check video cable connection; Adjust display settings on your computer to 1920x1080 at 60Hz; Move away from other electronic devices. |
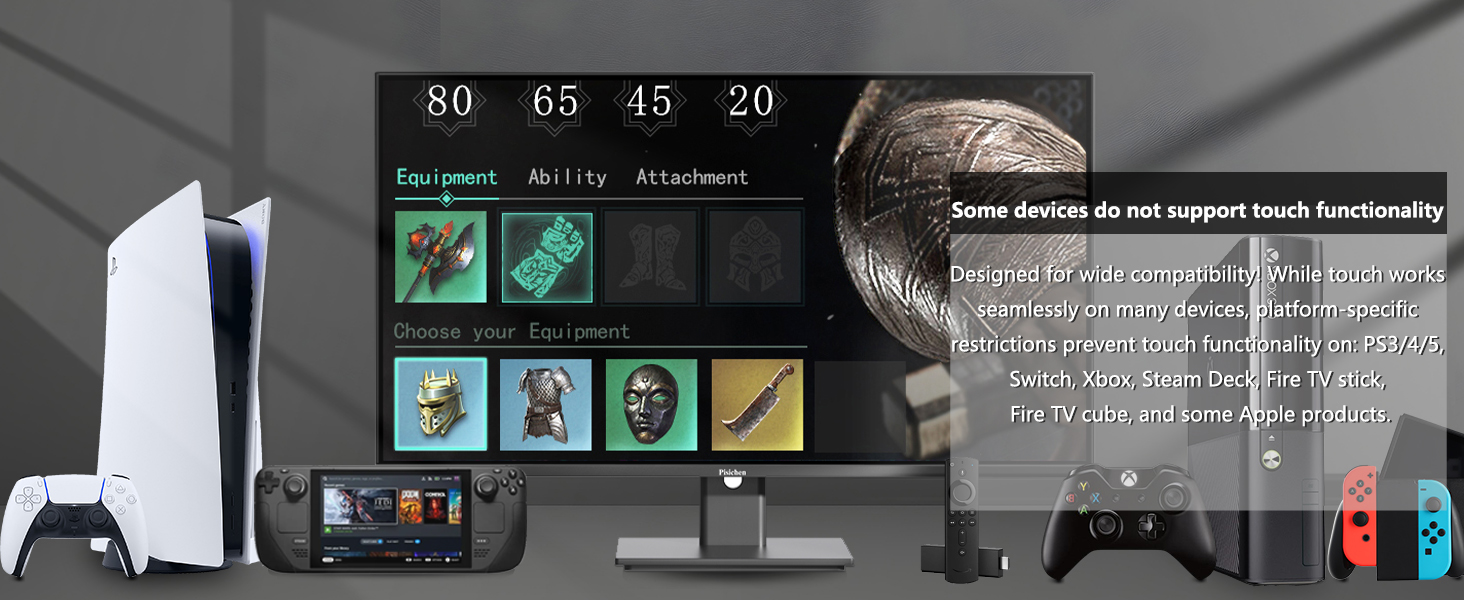
Image 6.1: Some devices, such as specific game consoles (PS3/4/5, Xbox, Steam Deck) and certain Apple products, do not support touch functionality with this monitor due to platform-specific restrictions.
7. Spesifikasiyalar
| Xüsusiyyət | Spesifikasiya |
|---|---|
| Model nömrəsi | 24INSXT-1080P |
| Ekran Ölçüsü | 23.8 düym |
| Qətnamə | FHD 1920 x 1080p |
| Ekran Texnologiyası | IPS LEDlər |
| Yeniləmə dərəcəsi | 60 Hz |
| Parlaqlıq | 400 Kandela |
| Kontrast nisbəti | 3000:1 |
| Cavab vaxtı | 5 Millisaniyə |
| Sensorlu ekran | 10-Point Multi-touch |
| Bağlantı | 1x HDMI, 1x VGA, 1x USB 3.1 Type C, Audio Port, DC Power Port |
| Əlavə Xüsusiyyətlər | Built-In Speakers, Built-In Webcam, Swivel Adjustment, Tilt Adjustment, Height Adjustment, Pivot (90-degree rotation) |
| VESA Uyğunluğu | 100mm x 100mm |
| Ölçülər (D x G x Y) | 1.97"D x 21.26"W x 12.6"H (Monitor only, without stand) |

Image 7.1: Detailed product dimensions for the Pisichen 24 Inch Touchscreen Monitor.
8. Zəmanət və Dəstək
8.1 Zəmanət Məlumatı
This product comes with a limited warranty. Please refer to the warranty card included in your package or contact Pisichen customer support for detailed warranty terms and conditions. The warranty typically covers manufacturing defects for a specified period from the date of purchase.
8.2 Müştəri dəstəyi
For technical assistance, troubleshooting not covered in this manual, or warranty claims, please contact Pisichen customer support. Contact information can usually be found on the product packaging, the official Pisichen websayt və ya satınalma sənədləriniz.