Giriş
Welcome to the user manual for your Waring Pro WPM10 Professional Popcorn Maker. This appliance is designed to provide a convenient and efficient way to prepare fresh popcorn. Please read these instructions carefully before first use to ensure safe operation and optimal performance.
Mühüm Qorunma tədbirləri
Elektrik cihazlarından istifadə edərkən yanğın, elektrik cərəyanı və/və ya insanların yaralanması riskini azaltmaq üçün əsas təhlükəsizlik tədbirlərinə, o cümlədən aşağıdakılara əməl edilməlidir:
- Bütün təlimatları oxuyun.
- İsti səthlərə toxunmayın. Tutacaqlardan və ya düymələrdən istifadə edin.
- Elektrik təhlükələrindən qorunmaq üçün kabeli, tıxacları və ya cihazı suya və ya digər mayeyə batırmayın.
- Hər hansı bir cihaz uşaqlar tərəfindən və ya onun yaxınlığında istifadə edildikdə yaxından nəzarət lazımdır.
- İstifadə etmədiyiniz zaman və təmizləmədən əvvəl rozetkadan ayırın. Parçaları taxmadan və ya çıxarmadan əvvəl soyumağa icazə verin.
- Heç bir cihazı zədələnmiş kabel və ya tıxacla və ya cihaz nasaz olduqdan və ya hər hansı şəkildə zədələndikdən sonra işlətməyin.
- Cihaz istehsalçısı tərəfindən tövsiyə edilməyən aksesuar əlavələrinin istifadəsi xəsarətlərə səbəb ola bilər.
- Çöldə istifadə etməyin.
- Şnurun masanın və ya sayğacın kənarından asılmasına və ya isti səthlərə toxunmasına icazə verməyin.
- İsti qaz və ya elektrik ocağının üzərinə və ya yaxınına və ya qızdırılan sobaya qoymayın.
- Tərkibində isti yağ və ya digər isti mayelər olan cihazı hərəkət etdirərkən son dərəcə ehtiyatlı olmaq lazımdır.
- Həmişə əvvəlcə fişini cihaza, sonra şnurunu rozetkaya qoşun. Ayırmaq üçün istənilən idarəedicini "söndürün", sonra fişini rozetkadan çıxarın.
- Cihazı təyinatından başqa məqsədlə istifadə etməyin.
- Ensure the lid is properly secured during operation.
- Hərəkət edən hissələrlə təmasdan çəkinin.
BU TƏLİMATLARI SAXLAYIN
Məhsul Bitdiview
The Waring Pro WPM10 Professional Popcorn Maker consists of several key components designed for optimal popcorn preparation.
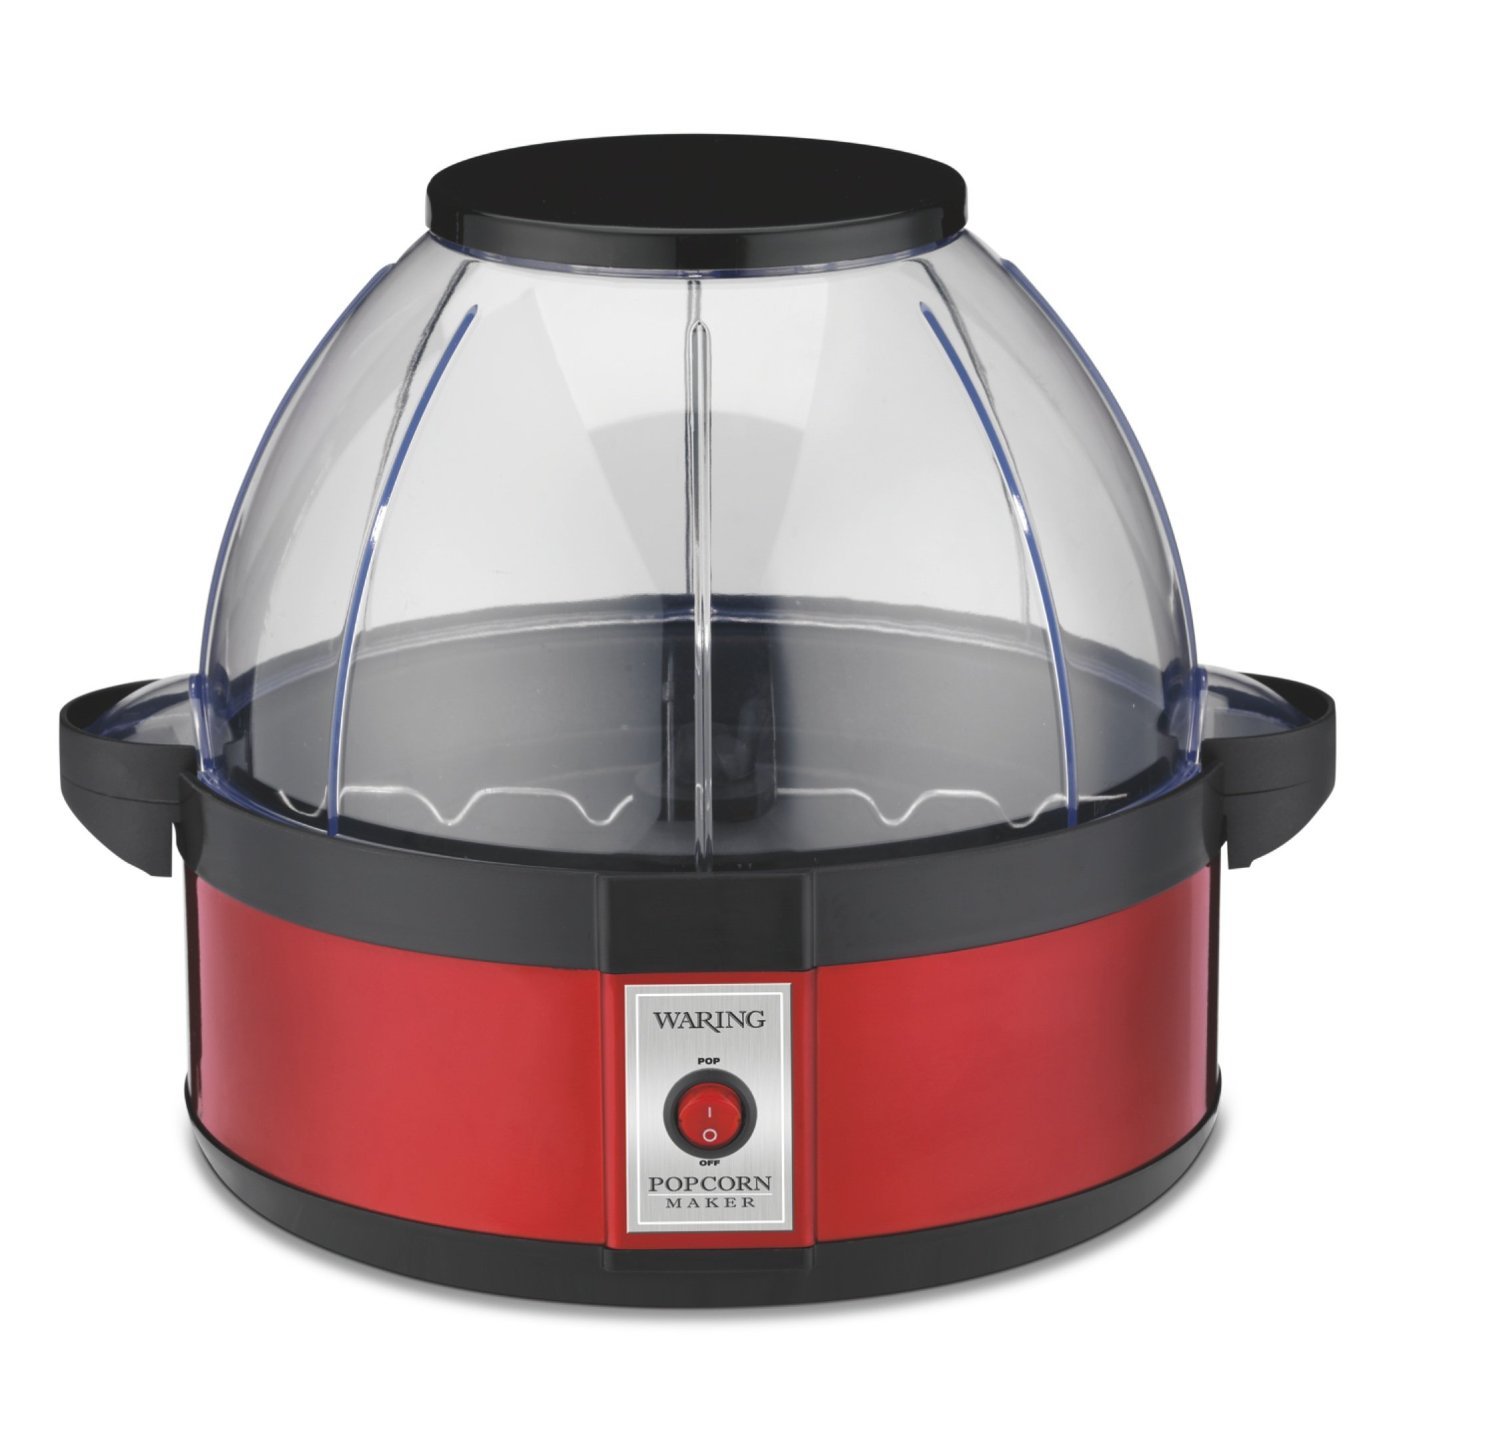
Image: The Waring Pro WPM10 Professional Popcorn Maker, showcasing its red base, clear dome lid, and stirring mechanism.
Əsas komponentlər:
- Baza vahidi: Contains the heating element and motor for the stirring arm.
- Popping Plate: Non-stick surface where kernels are popped.
- Stirring Arm: Rotates to ensure even heating and efficient popping of kernels.
- Dome Lid/Serving Bowl: A clear plastic lid that covers the popping plate during operation and can be inverted to serve as a popcorn bowl.
- Ventilation Vents: Located on the lid to release steam and keep popcorn dry.
Quraşdırma
- Paketdən çıxarın: Bütün qablaşdırma materiallarını və komponentlərini qutudan diqqətlə çıxarın.
- Təmiz: Before first use, wipe the popping plate and stirring arm with a damp cloth. Wash the dome lid/serving bowl in warm, soapy water, then rinse and dry thoroughly.
- Yığmaq: Place the popping plate onto the base unit, ensuring it is securely seated. Attach the stirring arm to the center post of the popping plate. Place the dome lid securely on top of the popping plate.
- Yerləşdirmə: Position the popcorn maker on a stable, flat, heat-resistant surface, away from flammable materials. Ensure there is adequate ventilation around the unit.
- Enerji bağlantısı: Elektrik kabelini standart elektrik rozetkasına qoşun.
Əməliyyat Təlimatları
Follow these steps to make delicious popcorn with your Waring Pro WPM10.
- Tərkibi hazırlayın: Measure the desired amount of popcorn kernels (up to 20 cups capacity). For best results, use fresh, high-quality popcorn kernels.
- Yağ əlavə edin: Add a small amount of cooking oil (e.g., vegetable oil, coconut oil) to the popping plate. The stirring arm allows for efficient popping with less oil.
- Add Kernels: Distribute the popcorn kernels evenly over the popping plate.
- Təhlükəsiz Qapaq: Place the dome lid firmly onto the popping plate.
- Açmağa başlayın: Plug the unit into an electrical outlet and turn the power switch ON. The halogen heater will begin to heat, and the stirring arm will rotate.
- Monitorun partlaması: Popcorn will begin to pop within a few minutes. The stirring arm will continue to move the kernels for even popping.
- Finish Popping: Once the popping slows to approximately 2-3 seconds between pops, turn the power switch OFF and unplug the unit immediately. This prevents burning.
- Xidmət edin: Carefully remove the dome lid using the handles. Invert the lid and use it as a serving bowl. Be cautious as the unit and popcorn will be hot.
- Mövsüm: Season popcorn to taste with salt, butter, or other desired toppings.
Diqqət: The popping plate and base unit will be hot after use. Allow the unit to cool completely before cleaning or handling.
Təmizlik və Baxım
Regular cleaning ensures the longevity and optimal performance of your popcorn maker.
- Elektrik şəbəkəsindən ayırın və sərinləyin: Təmizləməzdən əvvəl həmişə cihazı elektrik rozetkasından ayırın və tam soyumasını gözləyin.
- Remove Popping Plate: Detach the popping plate from the base unit.
- Clean Popping Plate and Stirring Arm: Wipe the non-stick popping plate and stirring arm with a damp cloth. For stubborn residue, use a soft sponge with warm, soapy water. Avoid abrasive cleaners or scouring pads that could damage the non-stick coating.
- Clean Dome Lid/Serving Bowl: Wash the dome lid/serving bowl in warm, soapy water. It can also be placed on the top rack of a dishwasher. Rinse thoroughly and dry.
- Təmiz əsas vahid: Əsas blokun xarici hissəsini reklamla silinamp cloth. Never immerse the base unit, cord, or plug in water or any other liquid.
- Yaddaş: Ensure all parts are clean and dry before storing. Store the popcorn maker in a cool, dry place.
Xəbərdarlıq: Do not use metal scouring pads or abrasive cleaners on any part of the popcorn maker, as they may scratch or damage surfaces.
Problemlərin aradan qaldırılması
| Problem | Mümkün Səbəb | Həll |
|---|---|---|
| Popcorn not popping or popping poorly. | Unit not plugged in; power switch off; insufficient oil; old kernels. | Ensure unit is plugged in and power switch is ON. Use recommended amount of oil. Use fresh popcorn kernels. |
| Popkorn yanır. | Unit left on too long after popping stops. | Turn off and unplug the unit immediately once popping slows significantly (2-3 seconds between pops). |
| Stirring arm not rotating. | Stirring arm not properly attached; obstruction. | Ensure stirring arm is correctly seated on the center post. Check for any obstructions and remove them. |
| Lid does not fit securely. | Lid not aligned correctly. | Ensure the lid is properly aligned with the popping plate and seated firmly. |
| Excessive unpopped kernels. | Old kernels; insufficient oil; too many kernels. | Use fresh kernels. Ensure proper oil amount. Do not exceed maximum kernel capacity. |
| Popcorn is soggy. | Steam trapped in the lid. | The unit has large vents for steam release. Ensure these are not blocked. Remove popcorn promptly after popping. |
| Oil leakage under the black lid. | Excessive oil used; improper cleaning. | Use only recommended amounts of oil. Clean thoroughly after each use, especially around the popping plate and base connection. |
| Bowl cracking. | Physical stress or impact. | Handle the dome lid/serving bowl with care, especially where handles connect. Avoid dropping or applying excessive pressure. |
| Top raises up when 3/4 full. | Normal operation with large batches. | Gently hold down one of the tabs at the bottom of the dome if this occurs, especially during the final seconds of popping. |
Spesifikasiyalar
- Brend: Waring
- Model: WPM10
- Rəng: Qırmızı
- Tutum: Up to 20 Cups (popped popcorn)
- Material: Aluminum (popping plate), Plastic (lid/bowl)
- Ölçülər: 11.75 x 11.75 x 11.5 düym (U x G x Y)
- Çəki: 4.9 funt sterlinq
- Güc: Elektrik
- Xüsusi Xüsusiyyət: Portable, Halogen heater with built-in stirrer system
Zəmanət və Dəstək
For warranty information, product registration, or technical support, please refer to the official Waring websaytına daxil olun və ya müştəri xidməti şöbəsi ilə əlaqə saxlayın. Satınalma qəbzinizi zəmanət iddiaları üçün satınalmanın sübutu kimi saxlayın.
Waring Customer Service: Yardım üçün müraciət edin Waring Commercial Products Support və ya məhsulun qablaşdırmasında göstərilən əlaqə məlumatlarına müraciət edin.
Məhsul qeydiyyatı: Registering your product helps Waring provide you with the most up-to-date product information and support.