1. Giriş
Aldığınız üçün təşəkkür edirikasing the Sharp XL-HF201P Micro Hi-Fi System. This system is designed to provide high-quality audio playback from various sources, including CDs, USB devices, and iPods. This manual provides essential information for the safe and efficient operation of your new audio system. Please read it thoroughly before use and retain it for future reference.
2. Əhəmiyyətli Təhlükəsizlik Məlumatı
- Güc mənbəyi: Cihazı yalnız cərəyanın AC çıxışına qoşuntage specified on the unit's rear panel.
- Havalandırma: Kifayət qədər havalandırma təmin edin. Havalandırma dəliklərini bağlamayın. Cihazı havalandırma dəliklərini bağlaya biləcək yumşaq səthlərə qoymaqdan çəkinin.
- Su və nəm: Cihazı yağışa, nəmə və ya damcı/sıçrayan mayelərə məruz qoymayın. Vaza kimi maye ilə dolu əşyaları cihazın üzərinə qoymayın.
- İstilik: Cihazı radiatorlar, istilik registrləri, sobalar və ya digər cihazlar (o cümlədən) kimi istilik mənbələrindən uzaq saxlayın. ampistilik əmələ gətirən qaldırıcılar).
- Təmizləmə: Təmizləməzdən əvvəl cihazı divar rozetkasından ayırın. Yalnız quru bir parça istifadə edin.
- Xidmət: Bu məhsula özünüz xidmət göstərməyə çalışmayın. Bütün xidmətlər üçün ixtisaslı xidmət personalına müraciət edin.
3. Paketin məzmunu
Zəhmət olmasa, aşağıda sadalanan bütün əşyaların paketinizə daxil olduğunu yoxlayın:
- Main Unit (CD Player/Receiver)
- Left Speaker (x1)
- Right Speaker (x1)
- Uzaqdan İdarəetmə (2 AA batareya ilə)
- FM Antenna
- AM Döngü Antenası
- Elektrik kabeli
- Təlimat kitabçası (bu sənəd)
4. Quraşdırma
4.1 Qabın açılması və yerləşdirilməsi
Carefully remove all components from the packaging. Place the main unit and speakers on a stable, flat surface. Ensure there is sufficient space around the unit for proper ventilation.
4.2 Dinamiklərin Qoşulması
Connect the speaker wires to the corresponding terminals on the main unit and speakers. Match the positive (+) and negative (-) terminals. For optimal sound, ensure the wires are securely connected. If the speaker wires do not insert directly into the screw-knobs, wrap the bare wire ends around the terminal posts and then tighten the screw-knobs to secure them.
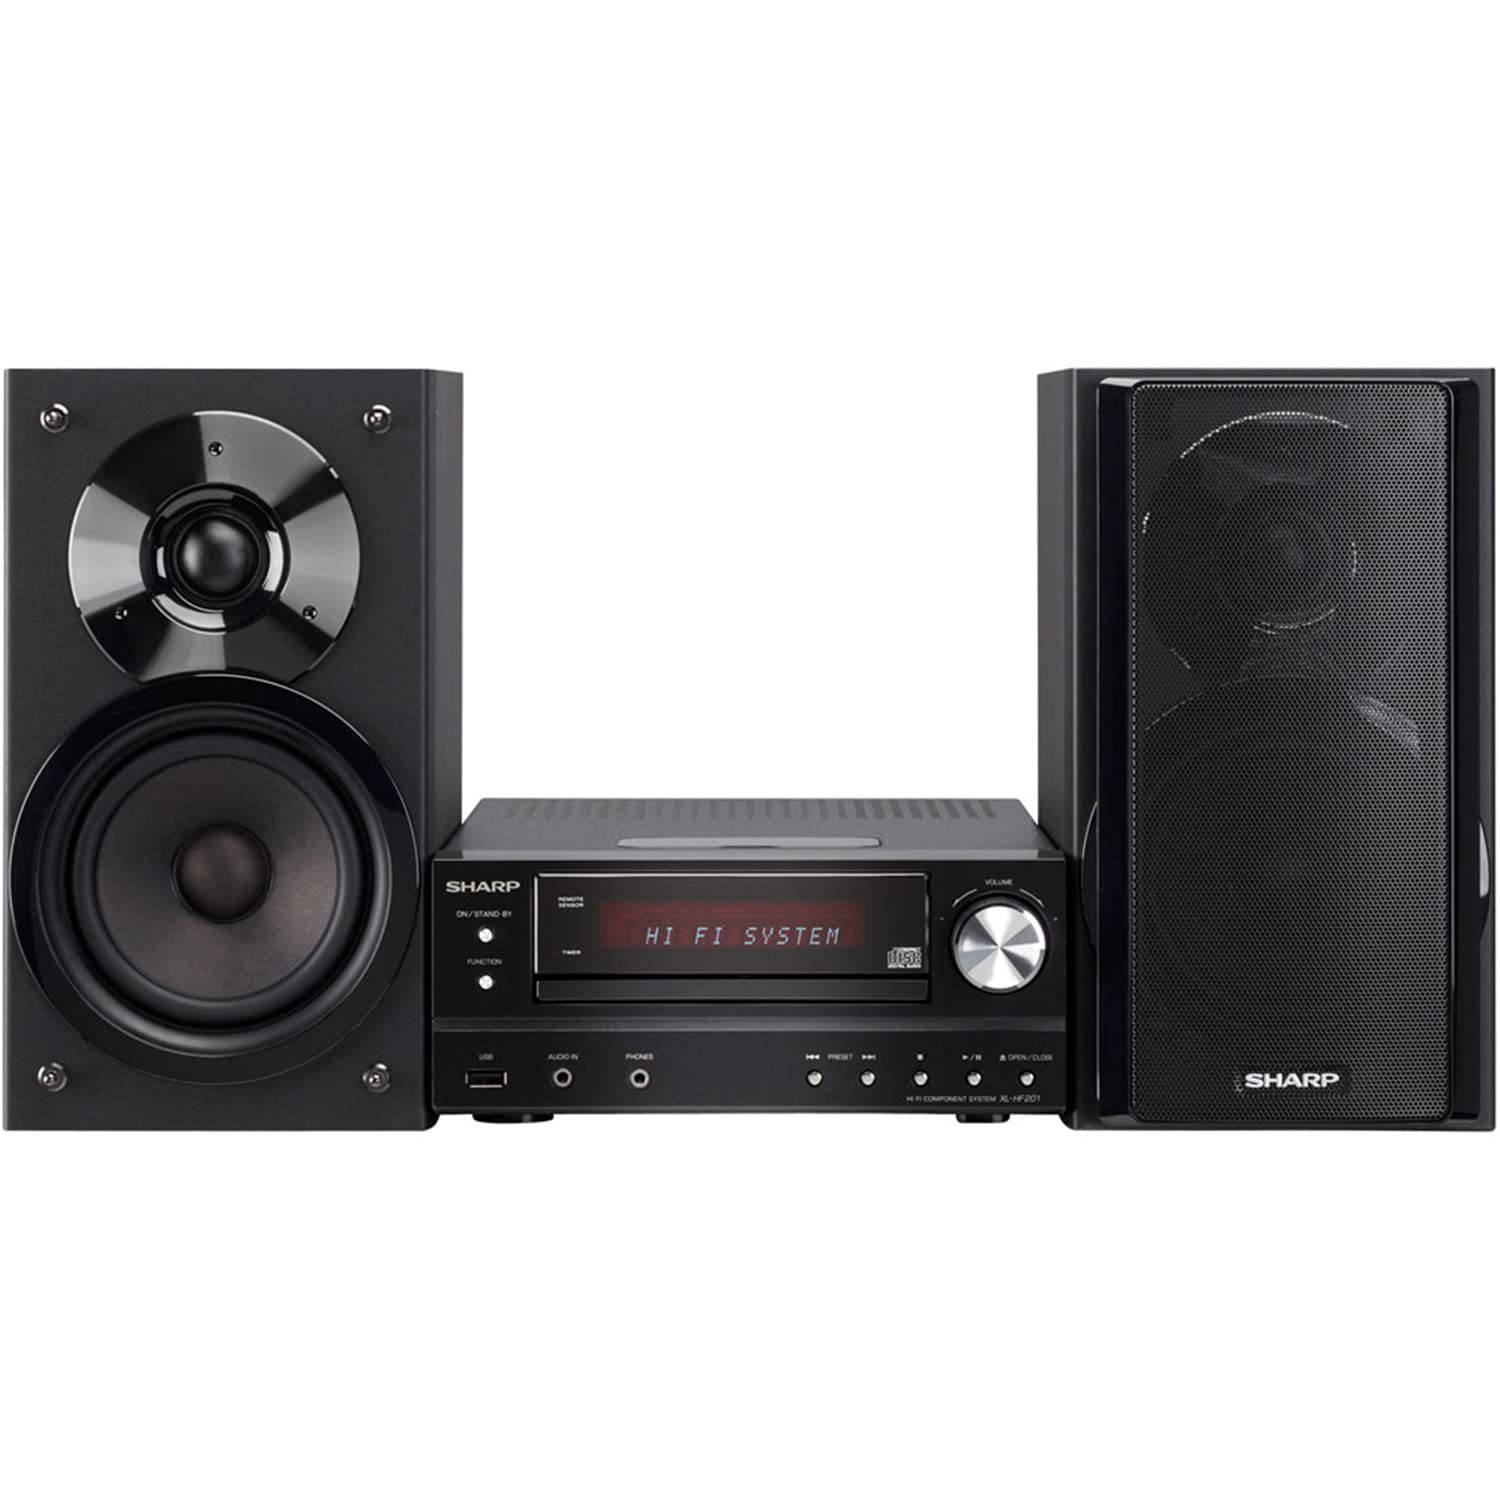
Image 4.2.1: The Sharp XL-HF201P Micro Hi-Fi System, showing the main unit and two speakers. This image illustrates the overall appearance of the system, which includes a central receiver with a CD tray and an iPod dock on top, flanked by two dark-colored speakers.
4.3 Connecting the Antennas
- FM Antenası: Connect the supplied FM wire antenna to the FM antenna terminal on the rear of the main unit. Extend the wire for better reception.
- AM antenası: Assemble the AM loop antenna and connect it to the AM antenna terminals. Position the antenna for optimal AM reception.
4.4 Enerji Bağlantısı
After all other connections are made, plug the power cord into the AC inlet on the rear of the main unit, then plug the other end into a wall outlet.
5. Əməliyyat Təlimatları
5.1 Yandırma/Söndürmə
düyməsini basın GÜC button on the front panel or the remote control to turn the unit on or off (standby mode).
5.2 Mənbə seçimi
düyməsini basın FUNKSİYA button on the front panel or the remote control repeatedly to cycle through available sources: CD, USB, iPod, FM, AM, AUX.
5.3 CD Oynatma
- seçin CD funksiyası.
- düyməsini basın AÇ/BAĞLA CD qabını açmaq üçün düyməni basın.
- Place a CD (CD-DA, MP3, WMA) with the label side up on the tray.
- basın AÇ/BAĞLA again to close the tray. Playback will start automatically.
- istifadə edin OYNA/FASIL EDİN, STOP, KEÇİN (forward/backward) buttons for control.
5.4 USB Oynatma
- Insert a USB device (containing MP3 or WMA files) into the USB port on the front panel.
- seçin USB funksiyası.
- Playback will begin automatically or you may need to select a track.
- istifadə edin OYNA/FASIL EDİN, STOP, KEÇİN nəzarət üçün düymələr.
5.5 iPod/iPhone dok
- Carefully place your compatible iPod or iPhone onto the dock connector on top of the main unit.
- seçin iPod funksiyası.
- Your device will begin charging and you can control playback using the system's remote or your device's controls.
5.6 Radionun tənzimlənməsi
- seçin FM or AM funksiyası.
- istifadə edin TUNING buttons (or knob on the unit) to manually tune to a station.
- basın və saxlayın TUNING buttons for automatic station scanning.
- Stansiyaları əvvəlcədən qurmaq üçün istədiyiniz stansiyaya kökləyin, sonra basın YADDAŞ ardınca əvvəlcədən təyin edilmiş nömrə düyməsi.
5.7 Səs səviyyəsinə nəzarət
Səs səviyyəsini HƏCM +/- buttons on the remote control or the volume knob on the main unit.
6. Baxım
6.1 Cihazın təmizlənməsi
Wipe the exterior of the unit with a soft, dry cloth. Do not use abrasive cleaners, waxes, or solvents as they may damage the finish. For stubborn stains, lightly dampen the cloth with water and mild detergent, then wipe dry.
6.2 CD Linza Baxımı
Avoid touching the CD lens. If the lens becomes dirty, use a commercially available CD lens cleaner. Do not use compressed air or liquid cleaners directly on the lens.
7. Giderme
| Problem | Mümkün Səbəb | Həll |
|---|---|---|
| Güc yoxdur | Elektrik kabeli təhlükəsiz qoşulmayıb. | Elektrik kabelinin qurğuya və divar rozetkasına qoşulmasını yoxlayın. |
| Səs yoxdur | Volume is too low or muted. Speaker wires are not connected correctly. | Increase volume. Check speaker wire connections, ensuring correct polarity (+/-). |
| CD oxunmur | CD is dirty, scratched, or inserted incorrectly. Incorrect function selected. | Clean or replace CD. Insert CD with label side up. Select CD function. |
| USB cihazı tanınmadı | USB cihazı düzgün formatlanmayıb və ya dəstəklənməyən fayl ehtiva edir files. | Ensure USB device is FAT16/FAT32 formatted and contains MP3/WMA files. Try another USB device. |
| Zəif radio qəbulu | Antenna not properly positioned or connected. Interference. | Adjust antenna position. Move unit away from other electronic devices. |
| Pult işləmir | Batareyalar tükənib və ya səhv yerləşdirilib. Pult və cihaz arasında maneə. | Replace batteries (2 AA). Ensure clear line of sight to the unit's remote sensor. |
8. Spesifikasiyalar
- Brend: Kəskin
- Model: XL-HF201P
- Çıxış Gücü: 100 Watt RMS
- Dəstəklənən Media: CD-DA, MP3, WMA (CD, USB)
- Bağlantı: USB, iPod Dock, AUX Input, FM/AM Tuner
- Dinamik növü: Subwoofers (integrated into speaker design)
- Güc mənbəyi: Kabelli Elektrik
- Məhsulun Ölçüləri (Əsas Vahid): Təxminən 13 x 15.09 x 20.15 düym
- Maddə çəkisi: Təxminən 20.3 funt
- Batareyalar (Uzaqdan): 2 AA batareya (daxildir)
9. Zəmanət və Dəstək
Zəmanət məlumatı və müştəri dəstəyi üçün məhsulunuzla birlikdə verilən zəmanət kartına baxın və ya rəsmi Sharp mağazasına baş çəkin. website. You may also contact Sharp customer service directly for assistance with product registration, technical support, or service inquiries.
Onlayn dəstək: www.sharpusa.com