1. Giriş
Welcome to the Teknetics EuroTek Metal Detector user manual. This guide provides essential information for the proper assembly, operation, maintenance, and troubleshooting of your new metal detector. The EuroTek is designed for both beginners and experienced hobbyists, offering precise target identification and versatile performance in various environments.
Please read this manual thoroughly before using your detector to ensure optimal performance and longevity of the device.
2. Təhlükəsizlik Məlumatı
Always prioritize safety when using your metal detector. Adhere to the following guidelines:
- Respect Property Rights: Şəxsi mülkdə axtarış aparmazdan əvvəl həmişə icazə alın.
- Avoid Hazardous Areas: Do not use the detector near underground cables, gas lines, or other utilities. Be aware of your surroundings.
- Gözün qorunması: Wear appropriate eye protection when digging to prevent injury from debris.
- Batareyanın Təhlükəsizliyi: Use only recommended batteries. Do not mix old and new batteries, or different types of batteries. Dispose of batteries responsibly.
- Hava şəraiti: Avoid using the control housing in heavy rain. The search coil is waterproof, but the control unit is not.
3. Paketin məzmunu
Upon opening your Teknetics EuroTek package, please verify that all the following components are present:
- Teknetics EuroTek Control Housing
- 8-Inch Concentric Waterproof Search Coil
- Qoltuqaltı ilə Üst Kök
- Aşağı Kök
- Stem Locking Collars
- Search Coil Bolt and Wing Nut
- İstifadəçi təlimatı
4. Montaj Təlimatları
Follow these steps to assemble your Teknetics EuroTek Metal Detector:
- Axtarış başlığını əlavə edin: Insert the lower stem into the search coil yoke. Align the holes and secure with the provided bolt and wing nut. Ensure it is snug but allows for slight angle adjustment.
- Connect Stems: Slide the lower stem into the upper stem. Adjust the length to a comfortable position and secure it with the locking collar.
- Mount the Control Housing: Slide the control housing onto the upper stem. Ensure it clicks securely into place.
- Batareyaları quraşdırın: Open the battery compartment on the back of the control housing. Insert one 9V alkaline battery, observing the polarity markings. Close the compartment securely.
- Kabeli sarın: Carefully wrap the search coil cable around the stem, leaving enough slack near the coil for angle adjustment. Plug the coil connector into the corresponding port on the control housing.
- Qoltuqaltını tənzimləyin: Position the armrest for comfortable use.

Figure 1: Fully assembled Teknetics EuroTek Metal Detector.
5. Controls and Display Overview
The Teknetics EuroTek features an intuitive control panel and LCD display for easy operation.
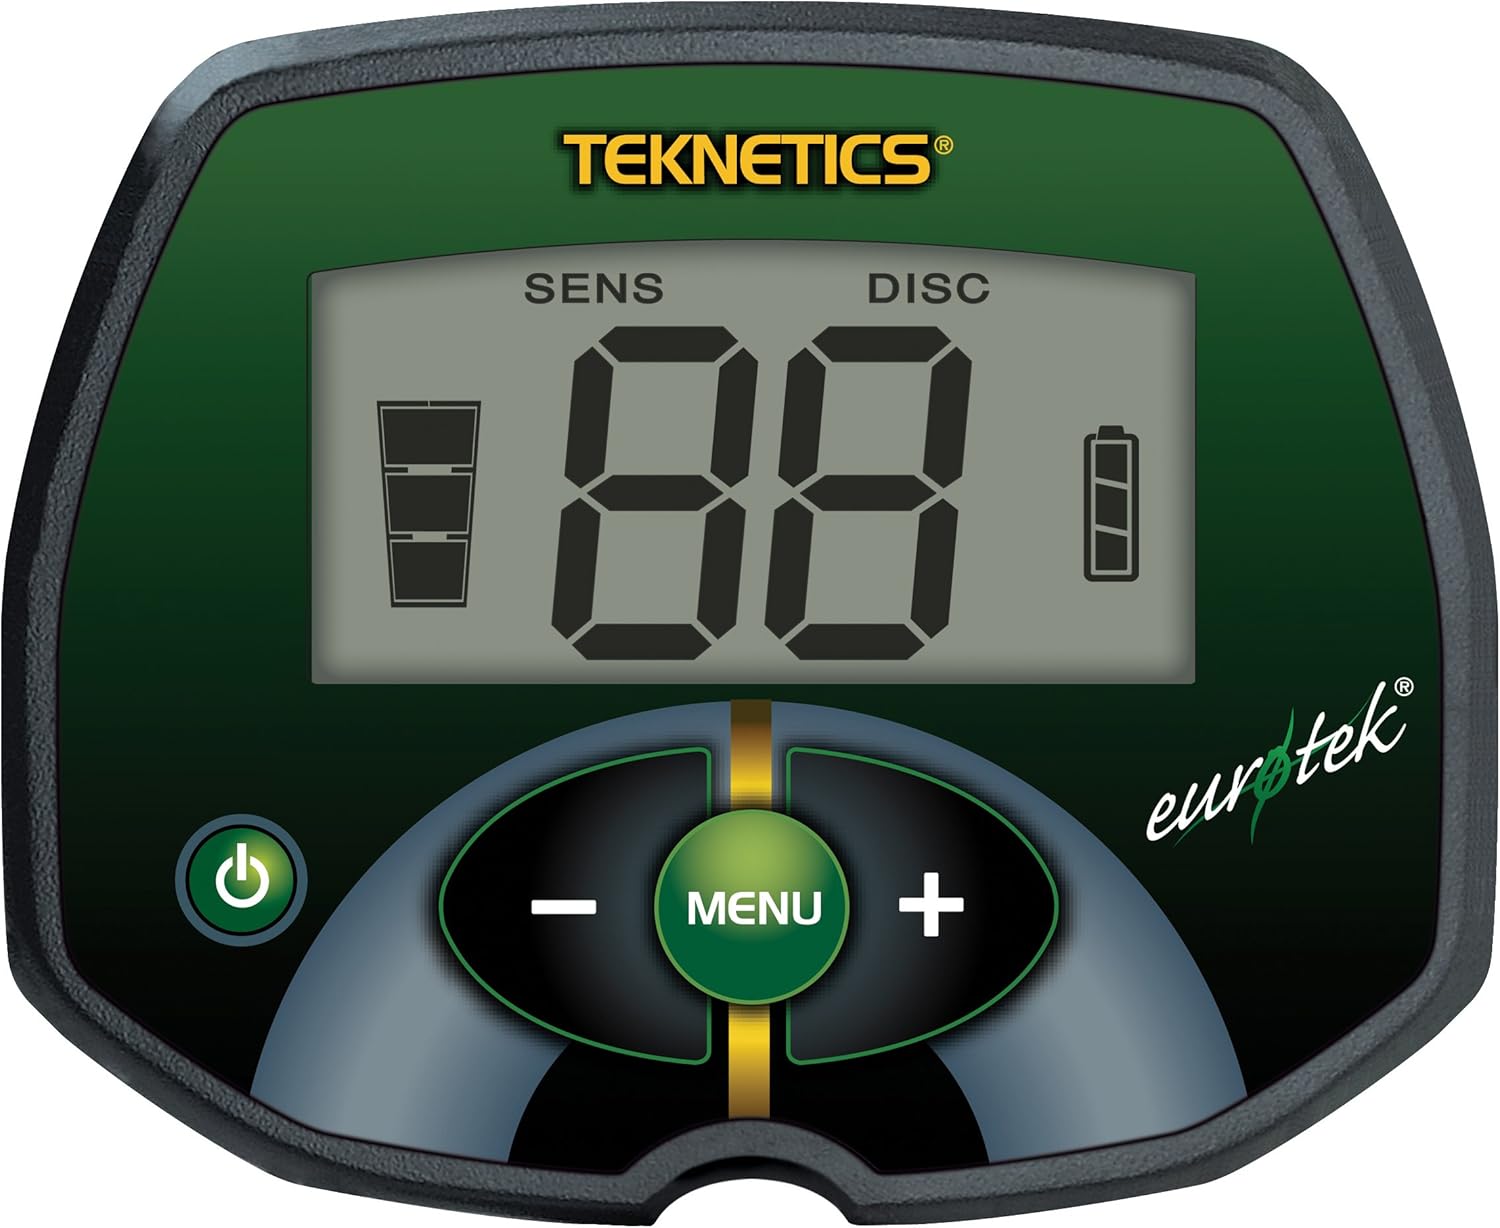
Şəkil 2: Yaxından view of the EuroTek control panel.
5.1. LCD Ekran
- SENS (Həssaslıq): Indicates the current sensitivity level. Higher sensitivity increases detection depth but can also increase interference.
- DİSC (Ayrı-seçkilik): Shows the current discrimination level. This setting allows you to filter out unwanted metals (e.g., iron).
- Target ID (VDI Numbers): A two-digit number (0-99) that helps identify the probable type of metal detected. Different metals produce different VDI ranges.
- Batareya göstəricisi: Displays the remaining battery life. Replace batteries when the indicator shows low power.
5.2. İdarəetmə düymələri
- Güc düyməsi (⏻): Press to turn the detector ON or OFF.
- MENU düyməsi: Used to cycle through adjustable settings (Sensitivity, Discrimination).
- PLUS (+) Button: Increases the value of the selected setting.
- MINUS (-) Button: Decreases the value of the selected setting.
6. Əməliyyat Təlimatları
6.1. Yandırma və İlkin Quraşdırma
- Güc düyməsini basın (⏻) to turn on the detector.
- The detector will perform a brief self-test.
- Adjust Sensitivity (SENS): Press the MENU button until SENS is displayed. Use the PLUS (+) and MINUS (-) buttons to adjust the sensitivity. Start with a moderate level and increase it gradually until you hear occasional false signals, then reduce it slightly.
- Adjust Discrimination (DISC): Press the MENU button until DISC is displayed. Use the PLUS (+) and MINUS (-) buttons to set the discrimination level. A higher DISC setting will filter out more ferrous (iron) targets, but may also cause you to miss some desirable targets.
6.2. Understanding Target Identification
The EuroTek provides a two-digit VDI (Visual Discrimination Indicator) number on the LCD display to help identify detected targets. Lower numbers typically indicate ferrous metals, while higher numbers suggest non-ferrous metals like coins or jewelry. Familiarize yourself with common VDI ranges for targets you wish to find.
6.3. Audio Melodiyalar
The detector produces distinct audio tones for different types of metals. Generally, low tones indicate ferrous targets, and higher tones indicate non-ferrous targets. Pay attention to these audio cues as they provide valuable information about the detected object.
6.4. Sweeping Technique
Hold the detector with the search coil parallel to the ground, approximately 1-2 inches above the surface. Sweep the coil slowly from side to side in overlapping arcs. Maintain a consistent speed and height for best results. When a target is detected, the VDI number will appear, and an audio tone will sound.

Figure 3: The waterproof search coil allows for detection in shallow water.
6.5. Using the Waterproof Search Coil
The 8-inch concentric search coil is waterproof, allowing for detection in shallow water, wet sand, and other damp environments. Ensure the control housing remains dry, as it is not waterproof. After use in water, rinse the coil with fresh water and dry thoroughly.
7. Baxım
Proper maintenance will extend the life and performance of your Teknetics EuroTek Metal Detector.
- Təmizləmə: Wipe down the search coil and stem with a damp cloth after each use. Avoid harsh chemicals. Keep the control housing clean and dry.
- Batareyaya qulluq: Remove batteries if the detector will not be used for an extended period to prevent leakage.
- Yaddaş: Detektoru sərin və quru yerdə saxlayın. Həddindən artıq temperaturdan çəkinin.
- Kabel yoxlaması: Periodically check the search coil cable for any signs of wear or damage.
8. Giderme
If you encounter issues with your Teknetics EuroTek, refer to the following common problems and solutions:
| Problem | Mümkün Səbəb | Həll |
|---|---|---|
| Detektor işə düşmür. | Ölü və ya səhv quraşdırılmış batareya. | Replace with a fresh 9V alkaline battery, ensuring correct polarity. |
| Erratic signals or false alarms. | High sensitivity setting, electromagnetic interference (EMI), mineralized ground. | Reduce sensitivity. Move away from power lines, cell phones, or other electronic devices. Sweep slower. |
| Poor detection depth. | Low sensitivity, incorrect sweep speed, small target size. | Increase sensitivity. Ensure consistent, slow sweep. Target size affects depth. |
| Səs çox yüksəkdir. | The EuroTek does not have a built-in volume control. | Use headphones with their own volume control for comfortable listening. |
| Inaccurate depth indicator. | Depth indicators are approximations and can vary based on target size, shape, and ground conditions. | Use the depth indicator as a general guide. Practice with known targets to understand its behavior. |
If the problem persists after attempting these solutions, please contact Teknetics customer support.
9. Spesifikasiyalar
Key technical specifications for the Teknetics EuroTek Metal Detector (Model ETEK-SKD):
| Xüsusiyyət | Detal |
|---|---|
| Brend | Teknetics |
| Model nömrəsi | ETEK-SKD |
| Axtarış Bobini | 8-inch Concentric, Waterproof |
| Güc mənbəyi | 1 x 9V Batareya (tələb olunur) |
| Maddə Çəkisi | 2.4 Funt (təqribən 1.09 kq) |
| Məhsul Ölçüləri | 50.5 "U x 8" W x 5" Y (təxminən 128.3 sm L x 20.3 sm E x 12.7 sm H) |
| Ayarlanabilir uzunluq | Bəli |
| Material | ABS Plastik |
| Beynəlxalq Qoruma Reytinqi | IP65 (Control housing is not waterproof) |
10. Zəmanət və Müştəri Dəstəyi
Teknetics products are known for their quality and reliability. The Teknetics EuroTek Metal Detector typically comes with a 5-year limited warranty, covering defects in materials and workmanship under normal use. Please refer to the warranty card included with your product for specific terms and conditions.
For technical assistance, warranty claims, or general inquiries, please contact Teknetics customer support through their official website or the contact information provided in your product packaging. When contacting support, please have your model number (ETEK-SKD) and purchase date available.


