1. Giriş
This manual provides detailed instructions for the installation, operation, and maintenance of your Advance Darkside 8303B30 Micro ATX PC Case. Please read this manual thoroughly before beginning installation to ensure proper setup and to maximize the performance and longevity of your system components.
The Advance Darkside ATX Mid-Tower PC case features a top panel with a 2.5/3.5 inch SATA HDD docking station, 2 USB 3.0 ports, and 1 USB 2.0 port. It is designed to accommodate Micro ATX motherboards and offers efficient cooling solutions.
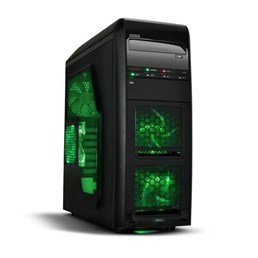
Şəkil 1: Ön view of the Advance Darkside 8303B30 PC Case, showcasing its design and front panel features.
2. Məhsulun xüsusiyyətləri
- Model: Advance Darkside 8303B30
- Şassi materialı: SGCC Steel
- Rəng: Black (interior and exterior)
- Anakart Uyğunluğu: Mikro ATX
- Front Panel Connectivity: 2 x USB 3.0, 1 x USB 2.0, Audio Jacks
- Saxlama xüsusiyyətləri: Top panel 2.5/3.5 inch SATA HDD docking station
- Soyutma sistemi: Five 120mm fans included (two LED fans at the front, one LED fan on the side, one fan at the rear, and one fan at the top). Water cooling ready.
- Qrafik Kart Dəstəyi: Designed for King Size graphics cards
- Yan panel: Plexiglass window
3. Quraşdırma Təlimatları
3.1. İşin hazırlanması
- Unpack the PC case carefully and remove all packaging materials.
- Qutunu sabit, düz bir səthə qoyun.
- Korpusun arxasındakı vintləri açaraq və panelləri geri sürüşdürərək yan panelləri çıxarın.
3.2. Enerji təchizatının quraşdırılması
- Locate the power supply mounting area at the rear bottom of the case.
- Secure the power supply unit (PSU) using the provided screws. Ensure the PSU fan faces the bottom or top, depending on your PSU and case design for optimal airflow.
3.3. Ana platanın quraşdırılması
- Install the I/O shield into the cutout at the rear of the case.
- Align the motherboard with the standoffs inside the case. Ensure all standoffs match the motherboard's screw holes.
- Secure the motherboard with the appropriate screws.
3.4. Saxlama Diskinin Quraşdırılması
- For 3.5-inch HDDs, slide the drive into the drive bay trays. The trays are designed to flex slightly to accommodate the drive without screws in some configurations.
- For 2.5-inch SSDs/HDDs, secure them to the designated mounting points or use adapters if necessary.
- Utilize the top panel SATA docking station for quick access to 2.5/3.5 inch SATA drives. Simply insert the drive into the slot until it clicks into place.
3.5. Qrafik Kart və Genişləndirmə Kartının Quraşdırılması
- Korpusun arxasındakı zəruri genişləndirmə yuvası qapaqlarını çıxarın.
- Insert the graphics card or other expansion cards into the appropriate PCIe slots on the motherboard.
- Secure the cards with screws or retention clips.
3.6. Kabel idarəetməsi
Route all cables (power, SATA, front panel connectors) through the designated cutouts and tie-down points behind the motherboard tray to ensure clean airflow and an organized interior.
4. Əməliyyat Təlimatları
4.1. Sisteminizi işə salmaq
- Ensure all components are correctly installed and cables are securely connected.
- Elektrik kabelini PSU və divar rozetkasına qoşun.
- Press the power button located on the front panel of the case.
4.2. Using Front Panel Ports
- USB 3.0/2.0 Portları: Connect USB devices such as keyboards, mice, external drives, or flash drives.
- Audio jaklar: Connect headphones, microphones, or speakers.
- HDD Docking Station: Insert a 2.5-inch or 3.5-inch SATA HDD/SSD into the top docking slot for quick data access. Ensure the drive is properly seated.
5. Baxım
5.1. Cleaning the Case
- Regularly clean the exterior of the case with a soft, damp parça. Aşındırıcı təmizləyicilərdən çəkinin.
- Use compressed air to remove dust from fan filters and internal components.
5.2. Fana texniki qulluq
- Periodically check the case fans for dust buildup. Clean them gently with compressed air or a soft brush.
- Heç bir kabelin fan qanadlarına mane olmadığından əmin olun.
6. Giderme
6.1. Sistem Yandırılmır
- Check if the power cable is securely connected to both the PSU and the wall outlet.
- PSU açarının 'ON' vəziyyətində olduğundan əmin olun.
- Verify that the front panel power button cable is correctly connected to the motherboard.
6.2. Overheating Issues
- Ensure all case fans are spinning correctly and are not obstructed.
- Check for excessive dust buildup on fans and heatsinks.
- Verify proper cable management to allow for unobstructed airflow.
6.3. Front Panel USB/Audio Not Working
- Confirm that the front panel USB and audio cables are correctly connected to the corresponding headers on the motherboard.
- Check motherboard drivers for USB and audio.
7. Spesifikasiyalar
| Xüsusiyyət | Detal |
|---|---|
| Brend | Qabaqcıl |
| Model nömrəsi | 8303B30 |
| Rəng | Qara |
| Şassi materialı | Alloy Steel (SGCC Steel) |
| Ana plata uyğunluğu | Mikro ATX |
| Ölçülər (U x G x Y) | 48 x 19.5 x 48.2 sm |
| Məhsul Çəkisi | 5.8 kq |
| Ön Panel Portları | 2 x USB 3.0, 1 x USB 2.0, Audio Jacks |
| Saxlama Dok | Top panel 2.5/3.5 inch SATA HDD docking station |
| Fanatlar daxildir | 5 x 120mm (2 front LED, 1 side LED, 1 rear, 1 top) |
| Soyutma dəstəyi | Water cooling ready |
| Yan Panel | Pleksiglas |
| Tövsiyə olunan istifadə | Oyun |
8. Zəmanət və Dəstək
8.1. İstehsalçı Zəmanəti
This product comes with a manufacturer's warranty of 1 year from the date of purchase. Please retain your proof of purchase for warranty claims. The warranty covers defects in materials and workmanship under normal use.
8.2. Müştəri dəstəyi
For technical assistance, troubleshooting, or warranty inquiries, please contact Advance customer support. Refer to the official Advance webən son əlaqə məlumatları və dəstək resursları üçün sayt.


