1. Əhəmiyyətli Təhlükəsizlik Təlimatları
Elektrik alətləri ilə işləyərkən yanğın, elektrik şoku və şəxsi zədə riskini azaltmaq üçün həmişə əsas təhlükəsizlik tədbirlərinə əməl edin. İstifadə etməzdən əvvəl bütün təlimatları diqqətlə oxuyun.
- İş sahəsinin təhlükəsizliyi: İş yerinizi təmiz və yaxşı işıqlandırın. Dağınıq və ya qaranlıq ərazilər qəzalara səbəb olur. Elektrik alətlərini tez alışan mayelərin, qazların və ya tozların olduğu kimi partlayıcı mühitlərdə işlətməyin.
- Elektrik Təhlükəsizliyi: Elektrik alətinin fişləri rozetkaya uyğun olmalıdır. Heç vaxt fişini heç bir şəkildə dəyişdirməyin. Borular, radiatorlar, diapazonlar və soyuducular kimi torpaqlanmış və ya torpaqlanmış səthlərlə bədən təmasından çəkinin.
- Şəxsi Təhlükəsizlik: Həmişə göz qoruyucusu taxın. Uzun müddət işləyərkən eşitmə qoruyucu vasitələrdən istifadə edin. Düzgün geyinmək; boş paltar və ya zərgərlik geyinməyin. Saçları, paltarları və əlcəkləri hərəkət edən hissələrdən uzaq tutun.
- Alətdən İstifadə və Baxım: Elektrik alətini zorlamayın. Tətbiqiniz üçün düzgün elektrik alətindən istifadə edin. Hər hansı bir tənzimləmə etməzdən, aksesuarları dəyişdirməzdən və ya elektrik alətlərini saxlamazdan əvvəl fişini enerji mənbəyindən ayırın.
- Baxım: Elektrik alətlərini qoruyun. Hərəkət edən hissələrin uyğunsuzluğunu və ya bağlanmasını, hissələrin qırılmasını və elektrik alətinin işinə təsir edə biləcək hər hansı digər vəziyyəti yoxlayın. Zərər görmüşsə, istifadə etmədən əvvəl elektrik alətini təmir etdirin.
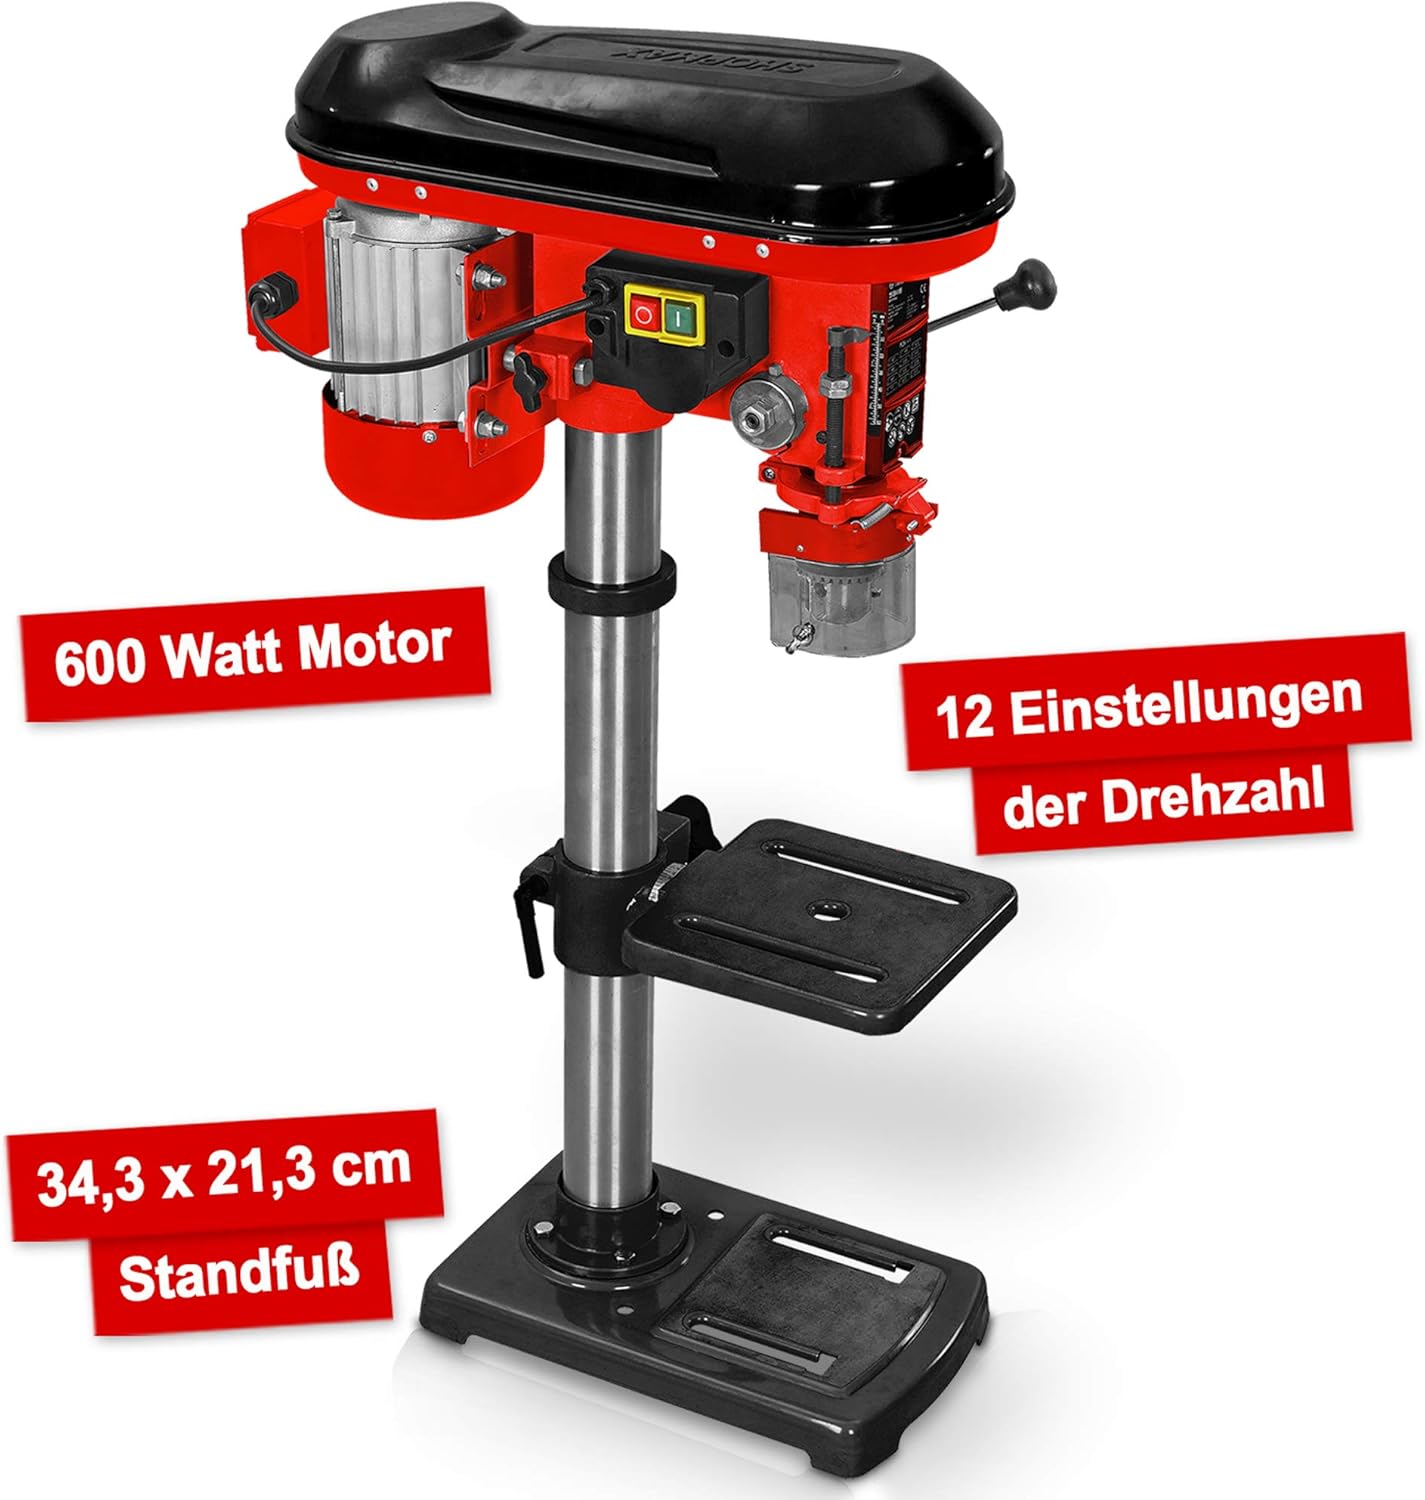
2. Məhsul bitdiview və Komponentlər
The Hecht Professional Pillar Drill is designed for precise drilling operations. Familiarize yourself with its main components for safe and effective use.

- Motorlu mənzil: Contains the 600W motor and belt drive system.
- Baş Məclis: Includes the chuck, spindle, and depth stop.
- Sütun: The main support structure for the head assembly and drilling table.
- Drilling Table: Adjustable in height and angle for versatile drilling.
- Əsas lövhə: Provides stability and features mounting slots for securing to a workbench.
- Çak: Holds the drill bits securely (3-16 mm capacity).
- Speed Adjustment Lever: Used to change the drilling speed.
- Feed Handles: Used to lower the chuck and drill bit into the workpiece.
- Açma/Söndürmə açarı: Power control for the drill.
- Chip Protection Guard: Transparent guard for safety during operation.
3. Quraşdırma və Quraşdırma
Follow these steps to assemble and set up your pillar drill before initial use.
- Qablaşdırma: Bütün komponentləri qablaşdırmadan diqqətlə çıxarın. Hər hansı bir zədə və ya çatışmayan hissələri yoxlayın.
- Əsas Plitənin Quraşdırılması: Place the base plate on a stable, level workbench. Secure it using appropriate bolts through the elongated slots on the base.
- Sütun Yığıncağı: Mount the column securely onto the base plate according to the provided hardware.
- Drilling Table Attachment: Slide the drilling table assembly onto the column. Adjust its height and secure it with the locking handle.
- Head Assembly Mounting: Carefully place the head assembly onto the top of the column and secure it.
- Chuck quraşdırılması: Insert the chuck onto the spindle taper. Use a rubber mallet to gently tap it into place, ensuring a firm fit.
- Chip Guard: Attach the transparent chip protection guard around the chuck area.

4. Əməliyyat Təlimatları
Understand how to properly operate your pillar drill for optimal performance and safety.
4.1 Selecting Drill Bits
Choose the appropriate drill bit for the material and desired hole size. The chuck accommodates bits from 3 mm to 16 mm. Ensure the drill bit is sharp and free from damage.
4.2 Qazma Uçlarının Quraşdırılması
- Qazmanın elektrik şəbəkəsindən çıxarıldığından əmin olun.
- Open the chuck jaws using the chuck key.
- Insert the drill bit into the chuck, ensuring it is centered and seated firmly.
- Tighten the chuck jaws securely with the chuck key. Remove the chuck key immediately after tightening.
4.3 Sürətin tənzimlənməsi
The drill features 12 speed settings, adjustable via a belt drive system. Select the speed appropriate for your material and drill bit size. Lower speeds are generally for larger bits and harder materials, while higher speeds are for smaller bits and softer materials.


4.4 Adjusting Drilling Table
The drilling table can be adjusted in height and tilted up to +/- 45 degrees. Loosen the locking handle, position the table as required, and then securely tighten the handle.

4.5 Setting Drilling Depth
Use the depth stop mechanism to set the desired drilling depth. This ensures consistent hole depths for repetitive tasks.
4.6 Qazma proseduru
- Secure the workpiece firmly to the drilling table using clamps or a vise. Never hold the workpiece by hand.
- Adjust the table height and angle, and set the drilling depth.
- Müvafiq sürəti seçin.
- Turn on the drill using the On/Off switch.
- Slowly lower the drill bit into the workpiece using the feed handles, applying steady, even pressure.
- İstədiyiniz dərinliyə çatdıqdan sonra, qazma ucunu iş parçasından geri çəkin.
- Turn off the drill.
5. Baxım
Regular maintenance ensures the longevity and safe operation of your pillar drill.
- Təmizləmə: After each use, clean the drill of dust and chips. Use a brush or compressed air. Do not use solvents that may damage plastic parts.
- Yağlama: Periodically lubricate moving parts such as the column, spindle, and depth stop mechanism with light machine oil.
- Kəmər gərginliyi: Check the tension of the drive belt regularly. Adjust if necessary to prevent slippage and ensure proper power transmission. Refer to the belt diagram inside the motor housing cover.
- Çuxura Baxım: Keep the chuck jaws clean and free of debris. If the chuck becomes stiff, clean and lightly lubricate it.
- Elektrik Şnuru: Inspect the power cord for any damage. Replace if frayed or cut.
6. Giderme
This section addresses common issues you might encounter with your pillar drill.
| Problem | Mümkün Səbəb | Həll |
|---|---|---|
| Qazma başlamaz | Enerji təchizatı yoxdur; Arızalı keçid; Motor problemi | Check power connection and circuit breaker; Inspect switch for damage; Consult qualified service personnel. |
| Həddindən artıq vibrasiya | Loose mounting; Unbalanced drill bit; Worn bearings | Tighten mounting bolts; Replace or re-center drill bit; Consult service personnel for bearing replacement. |
| Qazma ucu çuxurda sürüşür | Chuck not tightened sufficiently; Oily chuck jaws; Damaged chuck jaws | Tighten chuck firmly with key; Clean chuck jaws; Replace chuck if damaged. |
| Motor həddindən artıq qızır | Overloading; Insufficient ventilation; Prolonged use | Reduce load; Ensure clear ventilation; Allow motor to cool down. |
| Inaccurate drilling | Loose workpiece; Worn drill bit; Misaligned table | Secure workpiece firmly; Replace drill bit; Check and adjust table alignment. |
7. Spesifikasiyalar
Technical data for the Hecht Professional Pillar Drill.
| Xüsusiyyət | Spesifikasiya |
|---|---|
| İstehsalçı | Hecht |
| Element Model nömrəsi | Standbohrmaschine Hecht |
| Güc mənbəyi | Kabelli Elektrik |
| Cildtage | 230 volt |
| Maksimum güc | 600 Vt |
| Maksimum Fırlanma Sürəti | 2700 rpm |
| Sürətlərin sayı | 12 |
| Maksimum Çak Ölçüsü | 16 mm |
| Material | Metal |
| Rəng | Red Pillar Drill |
| Paket Ölçüləri | 71 x 45 x 27 sm |
| Çəki | 23 kilograms (approx.) |
| İstifadə mühiti | Daxili |
| İstinad nömrəsi | 8595614925655 |
8. Zəmanət və Dəstək
For warranty information, please refer to the documentation provided with your purchase or contact the retailer. For technical support or spare parts inquiries, please contact Hecht customer service or your authorized dealer.
Please have your model number (Standbohrmaschine Hecht) and reference number (8595614925655) available when contacting support.


