1. Giriş
This manual provides detailed instructions for the installation, operation, and maintenance of the VIVOTEK ND9323P H.265 8-Channel Embedded PoE Network Video Recorder (NVR). Please read this manual thoroughly before using the product to ensure proper and safe operation. Keep this manual for future reference.
2. Təhlükəsizlik Məlumatı
Observe the following safety precautions to prevent damage to the NVR and to ensure user safety:
- Enerji təchizatı: Use only the power adapter supplied with the NVR. Ensure the power source matches the NVR's voltage tələblər.
- Havalandırma: Do not block any ventilation openings. Install the NVR in a well-ventilated area to prevent overheating.
- Ətraf mühit: Avoid exposing the NVR to water, moisture, extreme temperatures, or direct sunlight. Do not place heavy objects on the NVR.
- Xidmət: Bu məhsula özünüz xidmət göstərməyə çalışmayın. Bütün xidmətlər üçün ixtisaslı xidmət personalına müraciət edin.
- İdarəetmə: Handle the NVR with care. Avoid dropping or subjecting it to strong impacts.
3. Paketin məzmunu
Carefully unpack the box and ensure all items are present and in good condition. If any items are missing or damaged, contact your vendor immediately.
- VIVOTEK ND9323P NVR Unit
- Güc adapteri
- USB Siçan
- Sürətli Quraşdırma Bələdçisi
- Accessory Pack (Screws for HDD installation, Ethernet cable)
- Case (referring to the NVR enclosure itself)
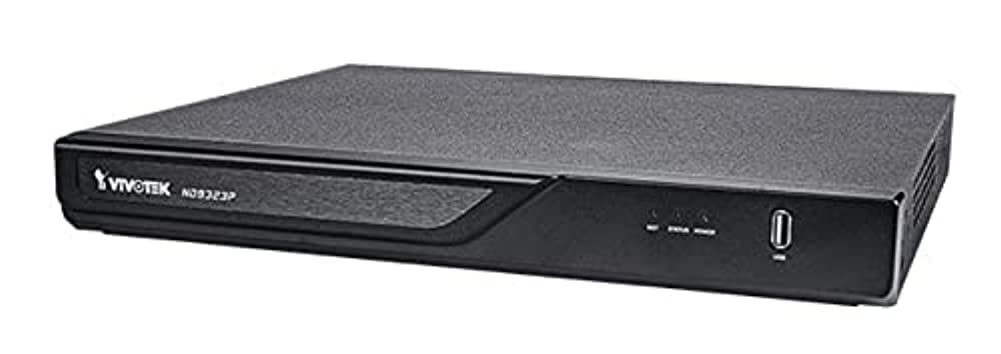
Figure 3.1: VIVOTEK ND9323P NVR unit. This image shows the front panel of the NVR, typically featuring status indicators and USB ports.
4. Məhsul bitdiview
The VIVOTEK ND9323P is an 8-channel embedded Network Video Recorder designed for IP surveillance systems. It supports H.265 video compression for efficient storage and bandwidth usage. With its integrated Power over Ethernet (PoE) ports, it simplifies camera installation by providing both power and data connectivity through a single Ethernet cable.
4.1 Əsas Xüsusiyyətlər
- 8-Channel Video Input
- H.265/H.264 Video Compression
- 8 x 802.3at/af PoE Ports
- Local Display Output (HDMI/VGA)
- Remote Access via VIVOTEK VIVOCloud App or VMS
- Supports up to 16TB HDD storage (HDD not included)
4.2 Ön və Arxa Panellər
Refer to the Quick Installation Guide for detailed diagrams of the front and rear panels, indicating ports and indicators.
- Ön Panel: Power LED, HDD LED, Network LED, USB ports.
- Arxa Panel: Power input, LAN port, PoE ports (1-8), HDMI output, VGA output, Audio I/O, USB ports.
5. Quraşdırma
5.1 Sərt Diskin Quraşdırılması (İstəyə bağlı)
The NVR does not typically include a pre-installed hard drive. Follow these steps to install a 3.5-inch SATA hard drive:
- Unscrew and remove the NVR's top cover.
- Connect the SATA data and power cables from the NVR to the hard drive.
- Verilən vintlərdən istifadə edərək, sabit diski NVR şassisinə bərkidin.
- Üst qapağı dəyişdirin və vintlər ilə bərkidin.
Qeyd: Ensure the NVR is powered off and unplugged before installing or removing a hard drive.
5.2 Fiziki Əlaqələr
- Kameraları birləşdirin: Connect your IP cameras to the NVR's PoE ports (1-8) using Ethernet cables. The NVR will provide power and network connectivity to the cameras.
- Şəbəkəyə qoşulun: Connect the NVR's LAN port to your local network router or switch using an Ethernet cable.
- Ekranı qoşun: Monitoru NVR-in HDMI və ya VGA çıxış portuna qoşun.
- Siçanı birləşdirin: USB siçanını NVR-in USB portlarından birinə qoşun.
- Güc Aktivdir: Enerji adapterini NVR-nin güc girişinə qoşun və sonra onu elektrik rozetkasına qoşun. NVR avtomatik olaraq işə düşəcək.
5.3 İlkin Konfiqurasiya
Upon first boot, the NVR will guide you through a setup wizard on the connected monitor:
- Dil seçimi: İstədiyiniz dili seçin.
- Parol Quraşdırma: Create a strong password for the administrator account. This is crucial for security.
- Şəbəkə Parametrləri: Configure network settings (DHCP or Static IP). DHCP is recommended for most home users.
- Vaxt və Tarix: Düzgün saat qurşağını, tarixi və vaxtı təyin edin.
- Sərt diskin işə salınması: If you installed a new hard drive, the NVR will prompt you to format it. Confirm to proceed. Xəbərdarlıq: Formatting will erase all data on the drive.
- Camera Search and Add: The NVR will automatically search for connected VIVOTEK cameras. Select and add them to the NVR.
- Bitir: Complete the wizard to access the NVR's live view.
6. NVR-nin işlədilməsi
6.1 Accessing the NVR
You can access and manage the NVR through various methods:
- Yerli Ekran: Directly via the connected monitor and USB mouse.
- Web Brauzer: Enter the NVR's IP address into a web eyni şəbəkəyə qoşulmuş kompüterdə brauzer.
- VIVOTEK VIVOCloud App: Download the mobile app for remote viewing və idarəetmə.
- VIVOTEK VAST 2 VMS: For advanced management and multi-NVR systems.
6.2 Canlı View
Canlı view displays real-time video feeds from all connected cameras. You can switch between single-camera view, çoxkameralı şəbəkə view, and customize the display layout.
6.3 Qeyd Parametrləri
Configure recording schedules and modes for each camera:
- Davamlı qeyd: Qeydlər 24/7.
- Hərəkət Algılama Qeydləri: Yalnız hərəkət aşkar edildikdə qeyd edir.
- Planlaşdırılmış Qeyd: Records during specific time periods.
- Hadisə qeydi: Records based on external triggers or alarms.
Access these settings through the NVR's main menu: Configuration > Recording > Schedule.
6.4 Oynatma
Parçaladıview foo qeyd etditage:
- Əsas menyudan seçin Oynatma.
- Choose the camera(s) and the date/time range you wish to review.
- Use the timeline and playback controls (play, pause, fast forward, rewind) to navigate through the footage.
6.5 Event Management and Notifications
Configure the NVR to respond to events such as motion detection, camera tampering, or network disconnection. The NVR can send email notifications, trigger alarms, or start recording.
Access these settings via: Configuration > Event.
7. Baxım
7.1 Mikroproqram yeniləmələri
Regularly check for and install firmware updates to ensure optimal performance, security, and access to new features. Firmware can be updated via the NVR's web interface or local display menu: Configuration > System > Firmware Upgrade.
Diqqət: Do not power off the NVR during a firmware upgrade. This can cause permanent damage.
7.2 Sərt diskin idarə edilməsi
Monitor the health of your hard drive(s) and ensure sufficient storage space. The NVR will automatically overwrite the oldest recordings when the disk is full, based on your settings.
Access HDD status and settings via: Configuration > Storage > HDD Management.
7.3 Təmizləmə
Keep the NVR unit clean and free from dust. Use a soft, dry cloth for cleaning. Do not use liquid cleaners or aerosols.
8. Giderme
This section addresses common issues you might encounter with your VIVOTEK ND9323P NVR.
8.1 No Video Display on Monitor
- Kabelləri yoxlayın: HDMI/VGA kabelinin həm NVR, həm də monitora etibarlı şəkildə qoşulduğundan əmin olun.
- Monitor Girişi: Verify the monitor is set to the correct input source (HDMI/VGA).
- NVR Power: Confirm the NVR is powered on and its power LED is illuminated.
8.2 Cameras Not Showing Up / No Image
- PoE Bağlantısı: Ensure cameras are properly connected to the NVR's PoE ports. Check if the PoE port LEDs on the NVR are active.
- Kamera Gücü: If not using PoE, ensure cameras are receiving power from their own power adapters.
- Şəbəkə bağlantısı: Verify the NVR and cameras are on the same network segment if not directly connected via PoE.
- Kamera Vəziyyəti: Check the camera's own status indicators.
- NVR Camera Management: gedin Configuration > Camera > Camera Management to ensure cameras are added and enabled. Try rescanning for cameras.
8.3 Cannot Access NVR via Web Brauzer
- IP ünvanı: Confirm the NVR's IP address is correct and that your computer is on the same network.
- Şəbəkə kabeli: Ensure the NVR's LAN port is connected to your network.
- Firewall: Temporarily disable your computer's firewall to check if it's blocking access.
- Brauzer Uyğunluğu: Use a recommended web brauzer (məsələn, Chrome, Firefox).
8.4 Unutulmuş parol
If you forget the administrator password, you may need to perform a factory reset. Refer to the VIVOTEK support website or contact technical support for the specific procedure for your model, as this often involves a physical reset button or a specific utility.
9. Spesifikasiyalar
The following table lists the key specifications for the VIVOTEK ND9323P NVR:
| Xüsusiyyət | Spesifikasiya |
|---|---|
| Model nömrəsi | ND9323P |
| Brend | VİVOTEK |
| Kanalların sayı | 8 |
| Bağlantı texnologiyası | Ethernet |
| Uyğun Cihazlar | Camera, Mobile Device |
| Video sıxılma | H.265, H.264 |
| PoE Portları | 8 x 802.3at/af |
| Məhsul Ölçüləri | 19.69 x 19.69 x 11.02 düym |
| Maddə Çəkisi | 0.01 unsiya |
| İstehsalçı | Vivotek |
10. Zəmanət və Dəstək
VIVOTEK products are covered by a limited warranty. For detailed warranty terms and conditions, please refer to the warranty card included with your product or visit the official VIVOTEK websayt.
For technical support, product registration, or to download the latest firmware and software, please visit the VIVOTEK support portal:
VIVOTEK Official Support Websayt
When contacting support, please have your NVR's model number (ND9323P) and serial number ready.


