1. Giriş
This instruction manual provides comprehensive guidance for the Tilta Camera Cage Advanced Kit, designed specifically for the Blackmagic Design Pocket Cinema Camera 6K Pro and 6K G2. This kit offers enhanced protection, versatile mounting options for accessories, and improved handling for professional filmmaking. Please read this manual thoroughly before assembly and operation to ensure proper use and longevity of your equipment.

2. Paketin məzmunu
The Tilta Camera Cage Advanced Kit (TA-T11-A-B) includes the following components:
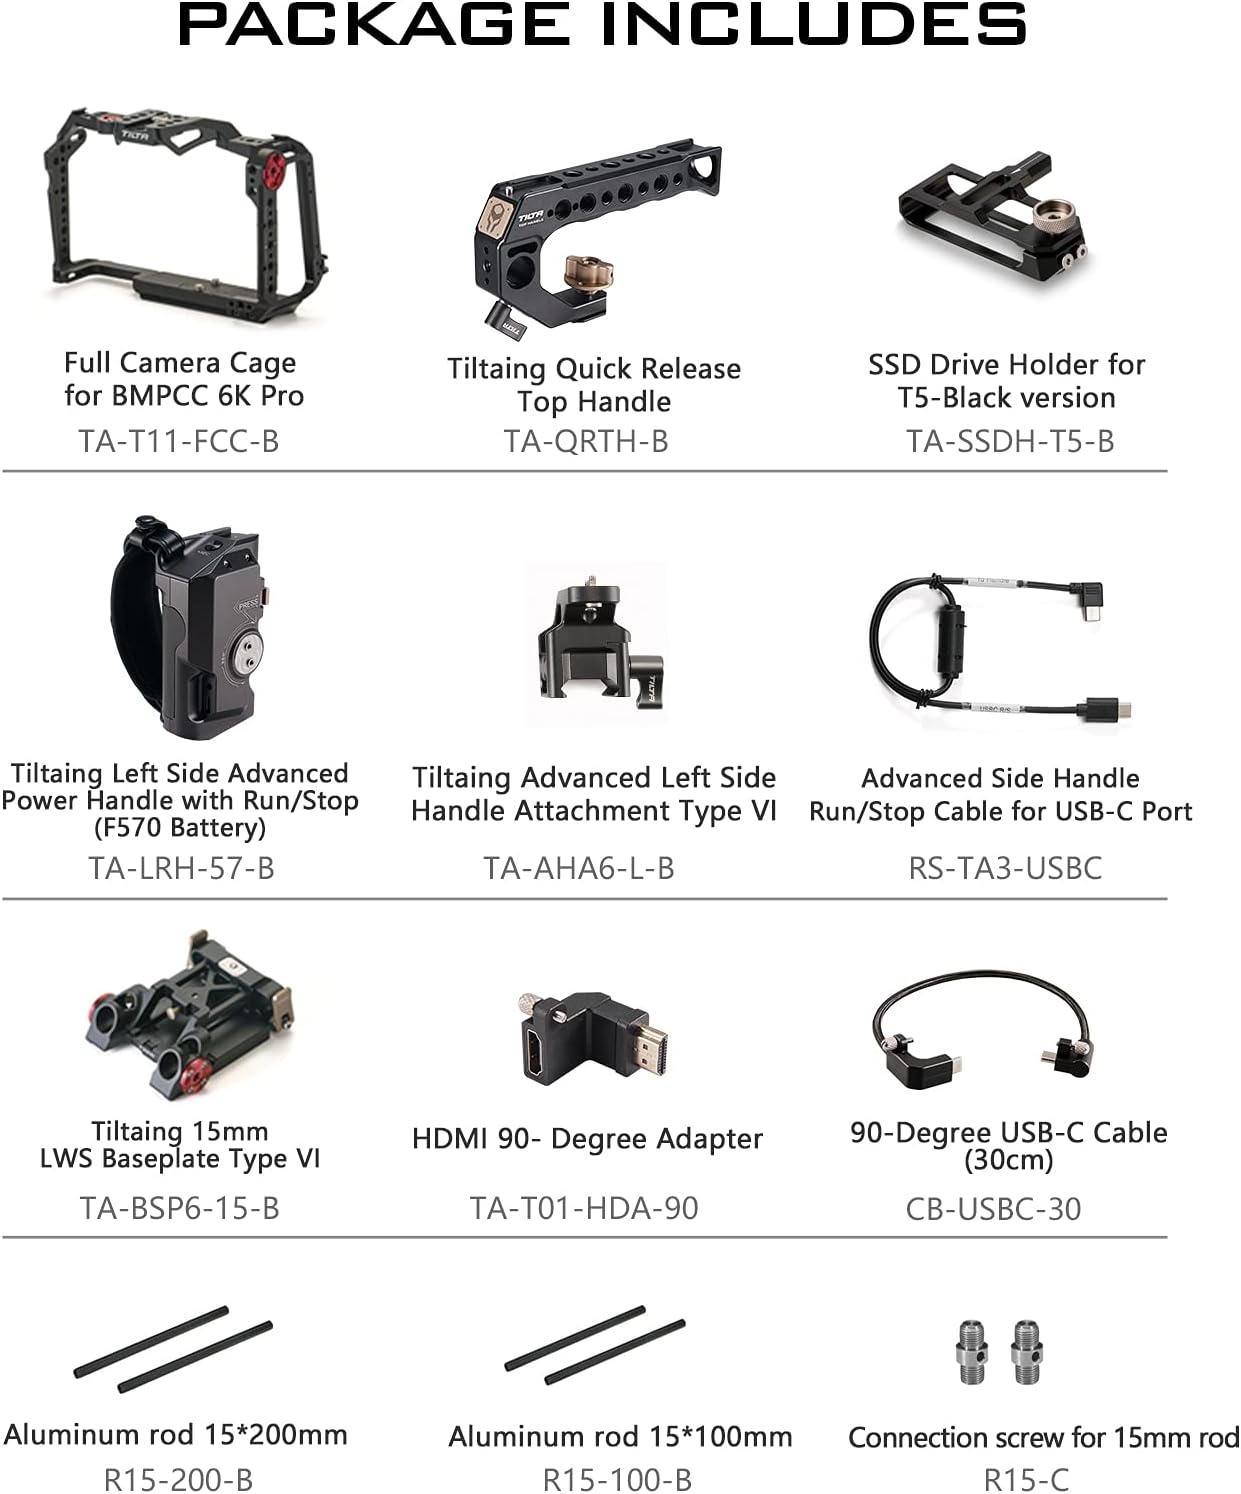
- Tilta Full Camera Cage for BMPCC 6K Pro / G2 (TA-T11-FCC)
- Tiltaing Quick Release Top Handle (TA-QRTH-B)
- SSD Drive Holder for T5-Black version (TA-SSDH-T5-B)
- Tiltaing Left Side Advanced Power Handle with Run/Stop (F570 Battery) (TA-LRH-57-B)
- Tiltaing Advanced Left Side Handle Attachment Type VI (TA-AHA6-L-B)
- Advanced Side Handle Run/Stop Cable for USB-C Port (RS-TA3-USBC)
- Tiltaing 15mm LWS Baseplate Type VI (TA-BSP6-15-B)
- HDMI 90-Degree Adapter (TA-T01-HDA-90)
- 90-Degree USB-C Cable (30cm) (CB-USBC-30)
- Aluminum rod 15*200mm (R15-200-B)
- Aluminum rod 15*100mm (R15-100-B)
- Connection screw for 15mm rod (R15-C)
3. Quraşdırma və Quraşdırma
Follow these steps to assemble your Tilta Camera Cage Advanced Kit:
- Attach the Full Camera Cage: Carefully place your Blackmagic Design Pocket Cinema Camera 6K Pro/G2 into the full camera cage. Secure it using the designated screws to ensure a snug fit. The cage is designed to minimize wear and tear over time.
- Install the Top Handle: Mount the Tiltaing Quick Release Top Handle onto the top of the camera cage using the integrated cold shoe and 1/4"-20 threads. This handle provides additional grip and mounting points.
- Yan Dəstəyi əlavə edin: Connect the Tiltaing Advanced Left Side Handle Attachment Type VI to the side of the cage. Then, attach the Tiltaing Left Side Advanced Power Handle with Run/Stop (F570 Battery) to this attachment. Use the Advanced Side Handle Run/Stop Cable for USB-C Port to connect the handle to your camera for control functions.
- Mount the Baseplate and Rods: Secure the Tiltaing 15mm LWS Baseplate Type VI to the bottom of the camera cage. Insert the 15mm aluminum rods (R15-200-B and R15-100-B) into the baseplate. These rods provide support for additional accessories like follow focus systems or matte boxes.
- Install the SSD Drive Holder: Attach the SSD Drive Holder for T5-Black version (TA-SSDH-T5-B) to a suitable mounting point on the cage. This allows for secure attachment of an external SSD for recording.
- Connect Cables and Adapters: Use the HDMI 90-Degree Adapter (TA-T01-HDA-90) and 90-Degree USB-C Cable (30cm) (CB-USBC-30) to manage cable routing and prevent strain on ports.


4. Əməliyyat Təlimatları
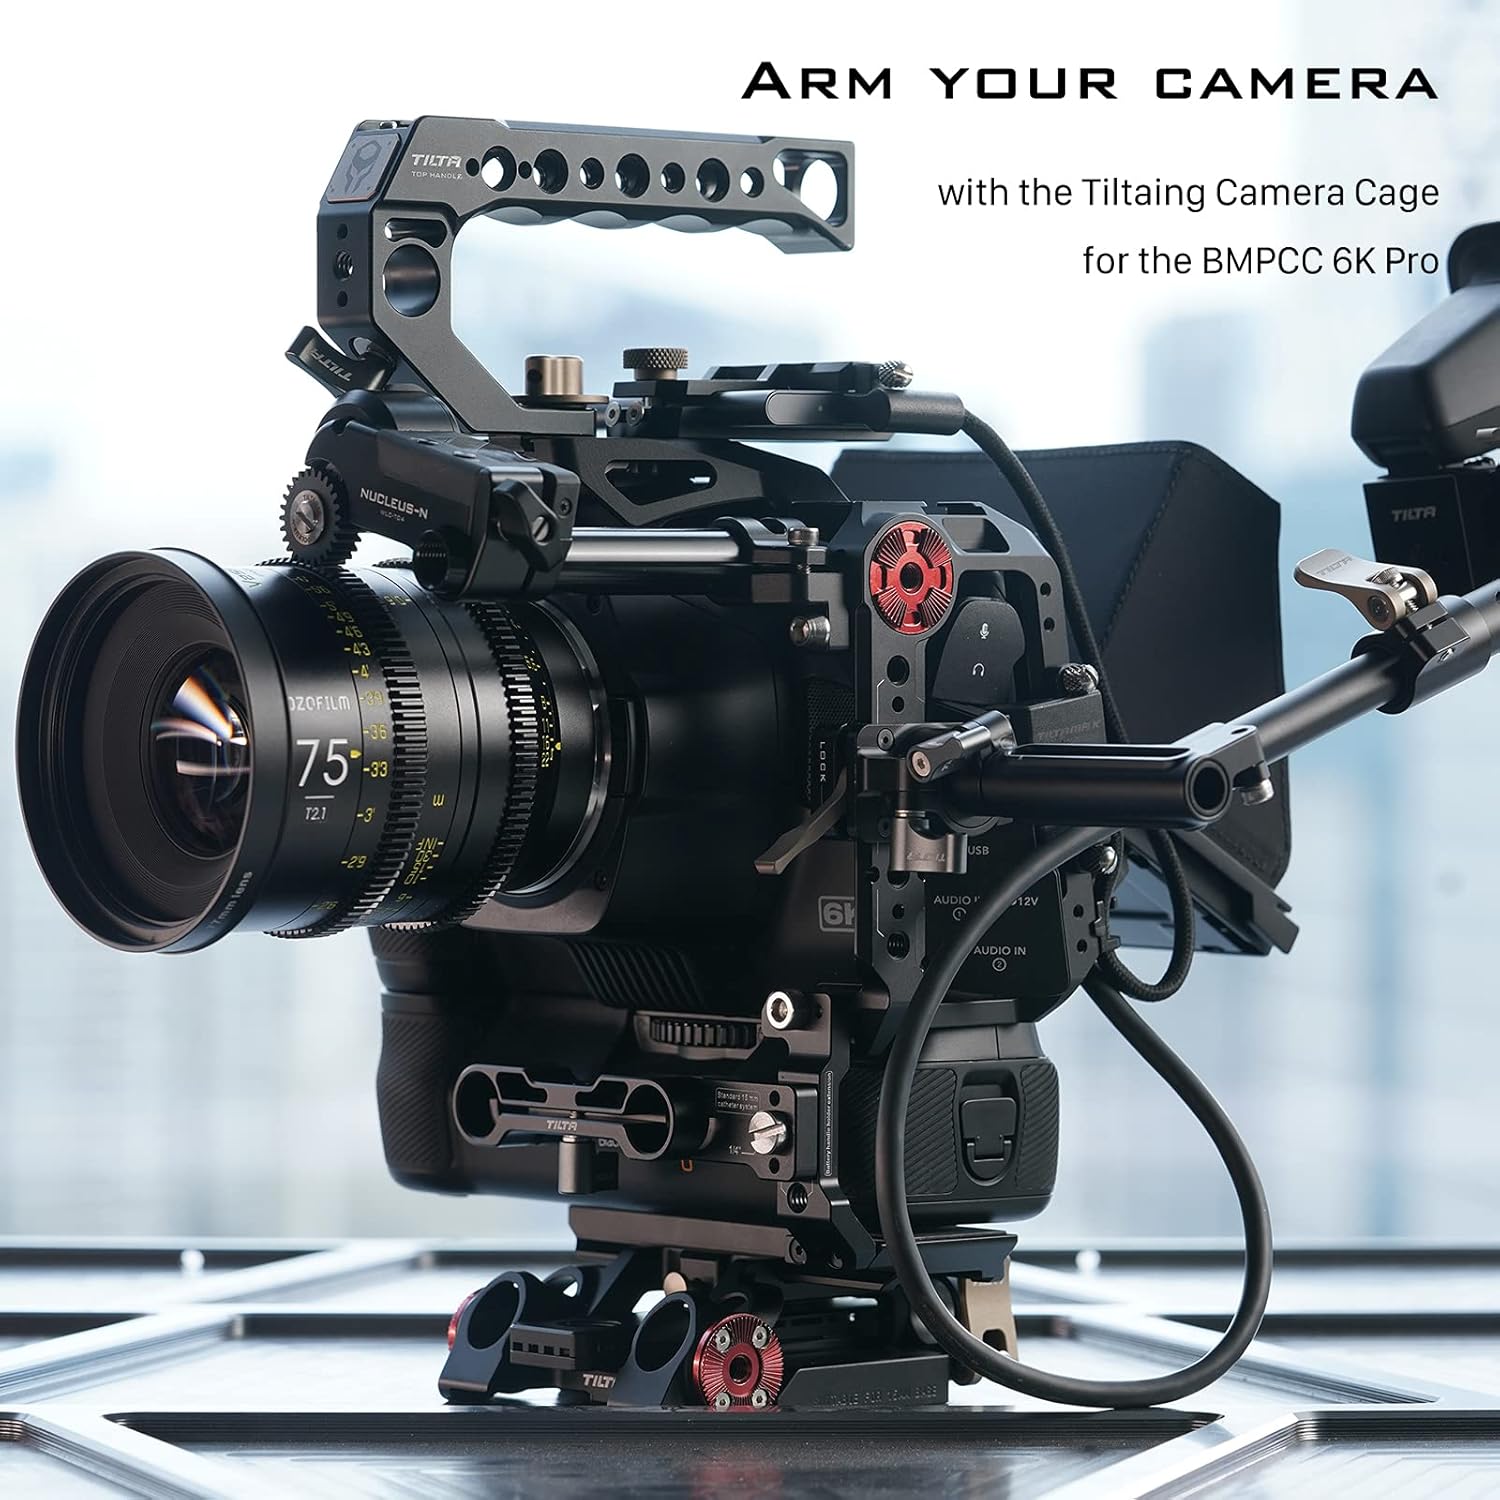
The Tilta Camera Cage Advanced Kit enhances the functionality and versatility of your Blackmagic Design Pocket Cinema Camera 6K Pro/G2. Here are key operational aspects:
- Aksesuar montajı: Utilize the multiple 1/4"-20 threads with locating pins, NATO rails, Arri compatible rosettes, and cold shoe receivers to attach various accessories such as monitors, microphones, lights, and external recorders.
- Çıxarılan Dizayn: The cage features a detachable design, allowing you to use it as a full cage or a half cage depending on your shooting requirements. This provides flexibility for different setups and weight considerations.
- ARCA Compatibility: The bottom plate is ARCA compatible, enabling quick mounting and dismounting to the DJI RS 2 gimbal for seamless transitions between handheld and stabilized shots.
- İşə salma/Dayandırma Funksiyası: The left side advanced power handle includes a run/stop button, allowing you to start and stop recording directly from the handle when connected via the USB-C cable.
5. Baxım
Proper maintenance ensures the longevity and optimal performance of your Tilta Camera Cage Advanced Kit:
- Daimi Təmizlik: Use a soft, dry cloth to wipe down the cage and its components after each use to remove dust, dirt, and fingerprints. Avoid abrasive cleaners or solvents that could damage the finish.
- Check Screws and Connections: Periodically inspect all screws and connection points for tightness. Screws can loosen over time with regular use, so ensure they are securely fastened to prevent accidental detachment of components or the camera.
- Yaddaş: Store the camera cage and its accessories in a clean, dry environment, preferably in a padded case, to protect them from impacts and environmental elements when not in use.
6. Giderme
If you encounter any issues with your Tilta Camera Cage Advanced Kit, consider the following common troubleshooting steps:
- Boş komponentlər: If any part of the cage or an attached accessory feels loose, check and tighten all screws and clamps. Refer to the assembly instructions for correct placement and fastening.
- Run/Stop Function Not Working: Ensure the Advanced Side Handle Run/Stop Cable is correctly connected to both the side handle and the camera's USB-C port. Verify that the camera's settings are configured to accept external run/stop commands.
- Accessory Mounting Issues: If an accessory does not fit properly, double-check its compatibility with the cage's mounting points (e.g., 1/4"-20 threads, NATO rail, cold shoe). Ensure no debris is obstructing the mounting points.
For persistent issues or problems not covered here, please contact Tilta customer support.
7. Spesifikasiyalar
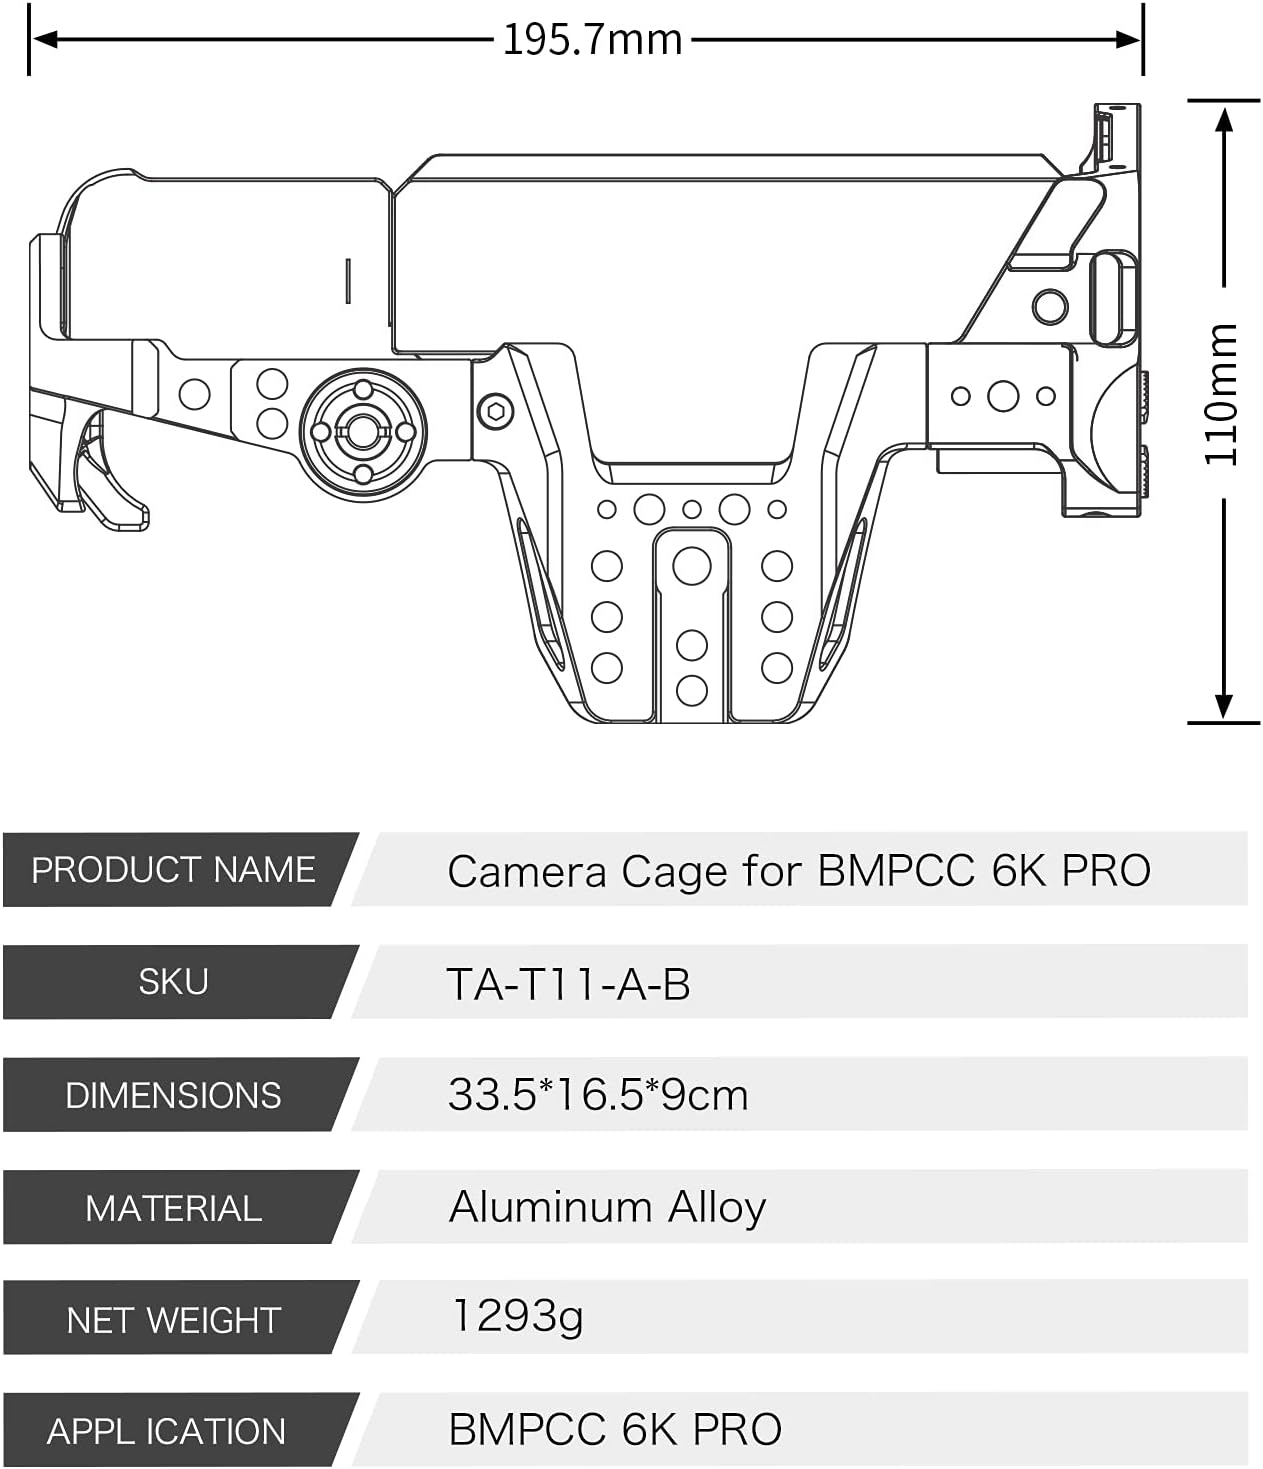
Key specifications for the Tilta Camera Cage Advanced Kit (TA-T11-A-B):
| Xüsusiyyət | Detal |
|---|---|
| Məhsul Ölçüləri | 7.68 x 5.71 x 4.33 düym (19.5 x 14.5 x 11 sm) |
| Maddə Çəkisi | 3.17 funt (1.44 kiloqram) |
| Model nömrəsi | TA-T11-AB |
| Brend | Tilta |
| Uyğun Cihazlar | BMPCC 6K G2, BMPCC 6K Pro, Blackmagic Design Cinema Camera 6K |
| Material | Alüminium ərintisi |
| Rəng | Qara |
| Montaj nöqtələri | NATO Rail, Arri Compatible Rosettes, Cold Shoe Receivers, 1/4"-20 Threads with Locating Pins |
| Baseplate Compatibility | ARCA compatible (for DJI RS 2) |
8. Zəmanət və Dəstək
For warranty information, product support, or service inquiries, please contact Tilta directly through their official website or authorized distributors. Keep your purchase receipt as proof of purchase for any warranty claims.
Rəsmi Tilta Websayt: www.tilta.com


