1. Təhlükəsizlik Təlimatları
- Always operate the rotisserie grill outdoors in a well-ventilated area.
- Əməliyyat zamanı uşaqları və ev heyvanlarını manqaldan uzaq tutun.
- Ensure the grill is placed on a stable, level surface to prevent tipping.
- Do not overload the spit rod beyond the specified weight capacity (132 lbs / 60 kg).
- İsti hissələrlə işləyərkən istiliyədavamlı əlcəklərdən istifadə edin.
- Keep flammable materials away from the grill.
- Təmizləmə və ya təmir etməzdən əvvəl enerjini ayırın.
- Ensure all connections are secure before starting the motor.
2. Məhsul bitdiview
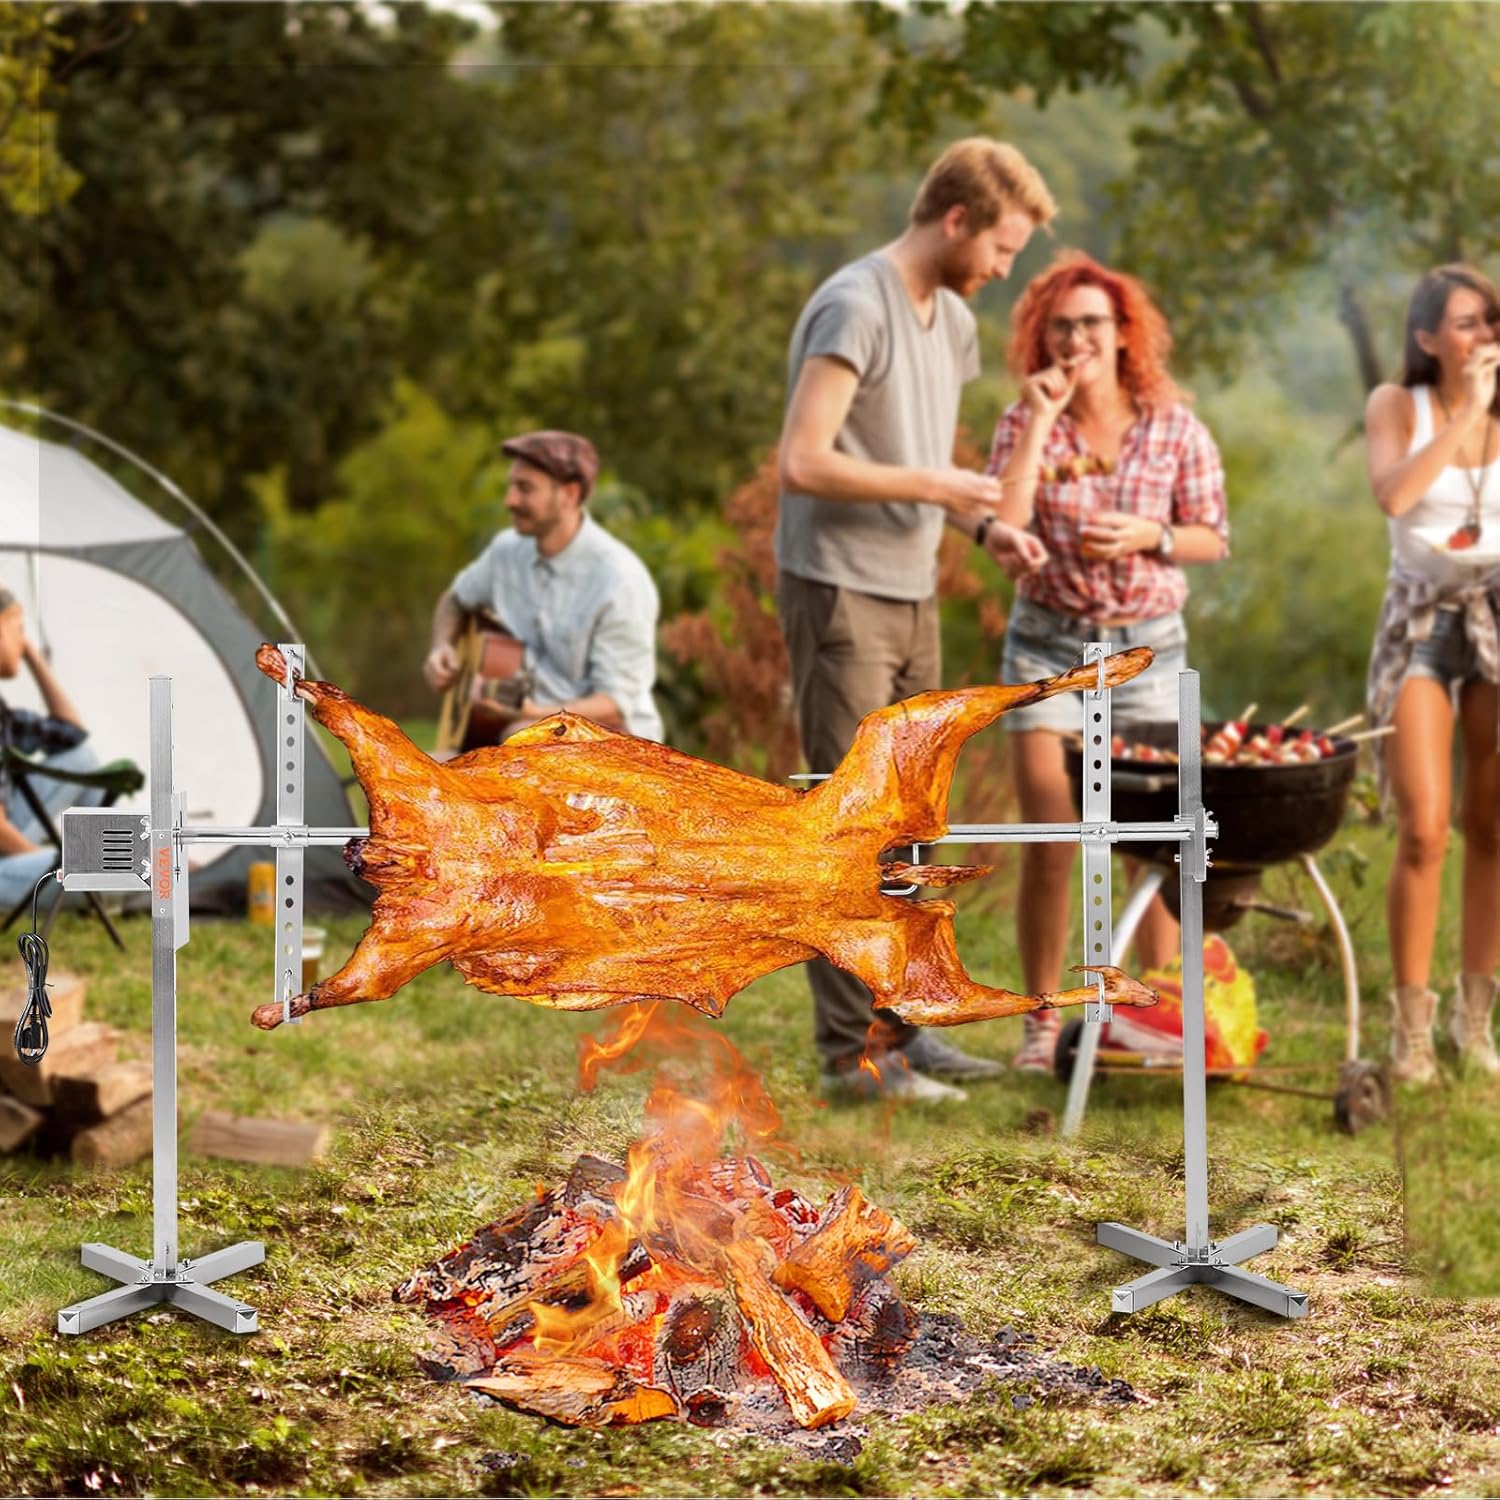
The VEVOR Electric Rotisserie Grill Kit is designed for roasting large cuts of meat, such as whole pigs or lambs, over an open flame or charcoal. Constructed from durable stainless steel, it features an automatic motor, adjustable height settings, and a sectional spit rod for convenient use and storage.
Əsas Xüsusiyyətlər:
- Enhanced Heat Shield: Equipped with a 52W motor operating at 4 RPM, an enlarged heat plate, and increased motor fan power to protect the motor from heat.
- Böyük Yük Tutumu: Supports up to 132 lbs (60 kg) with an automatic rotisserie fork and grill net.
- Davamlı tikinti: Made from sturdy stainless steel, resistant to wear, corrosion, and dust.
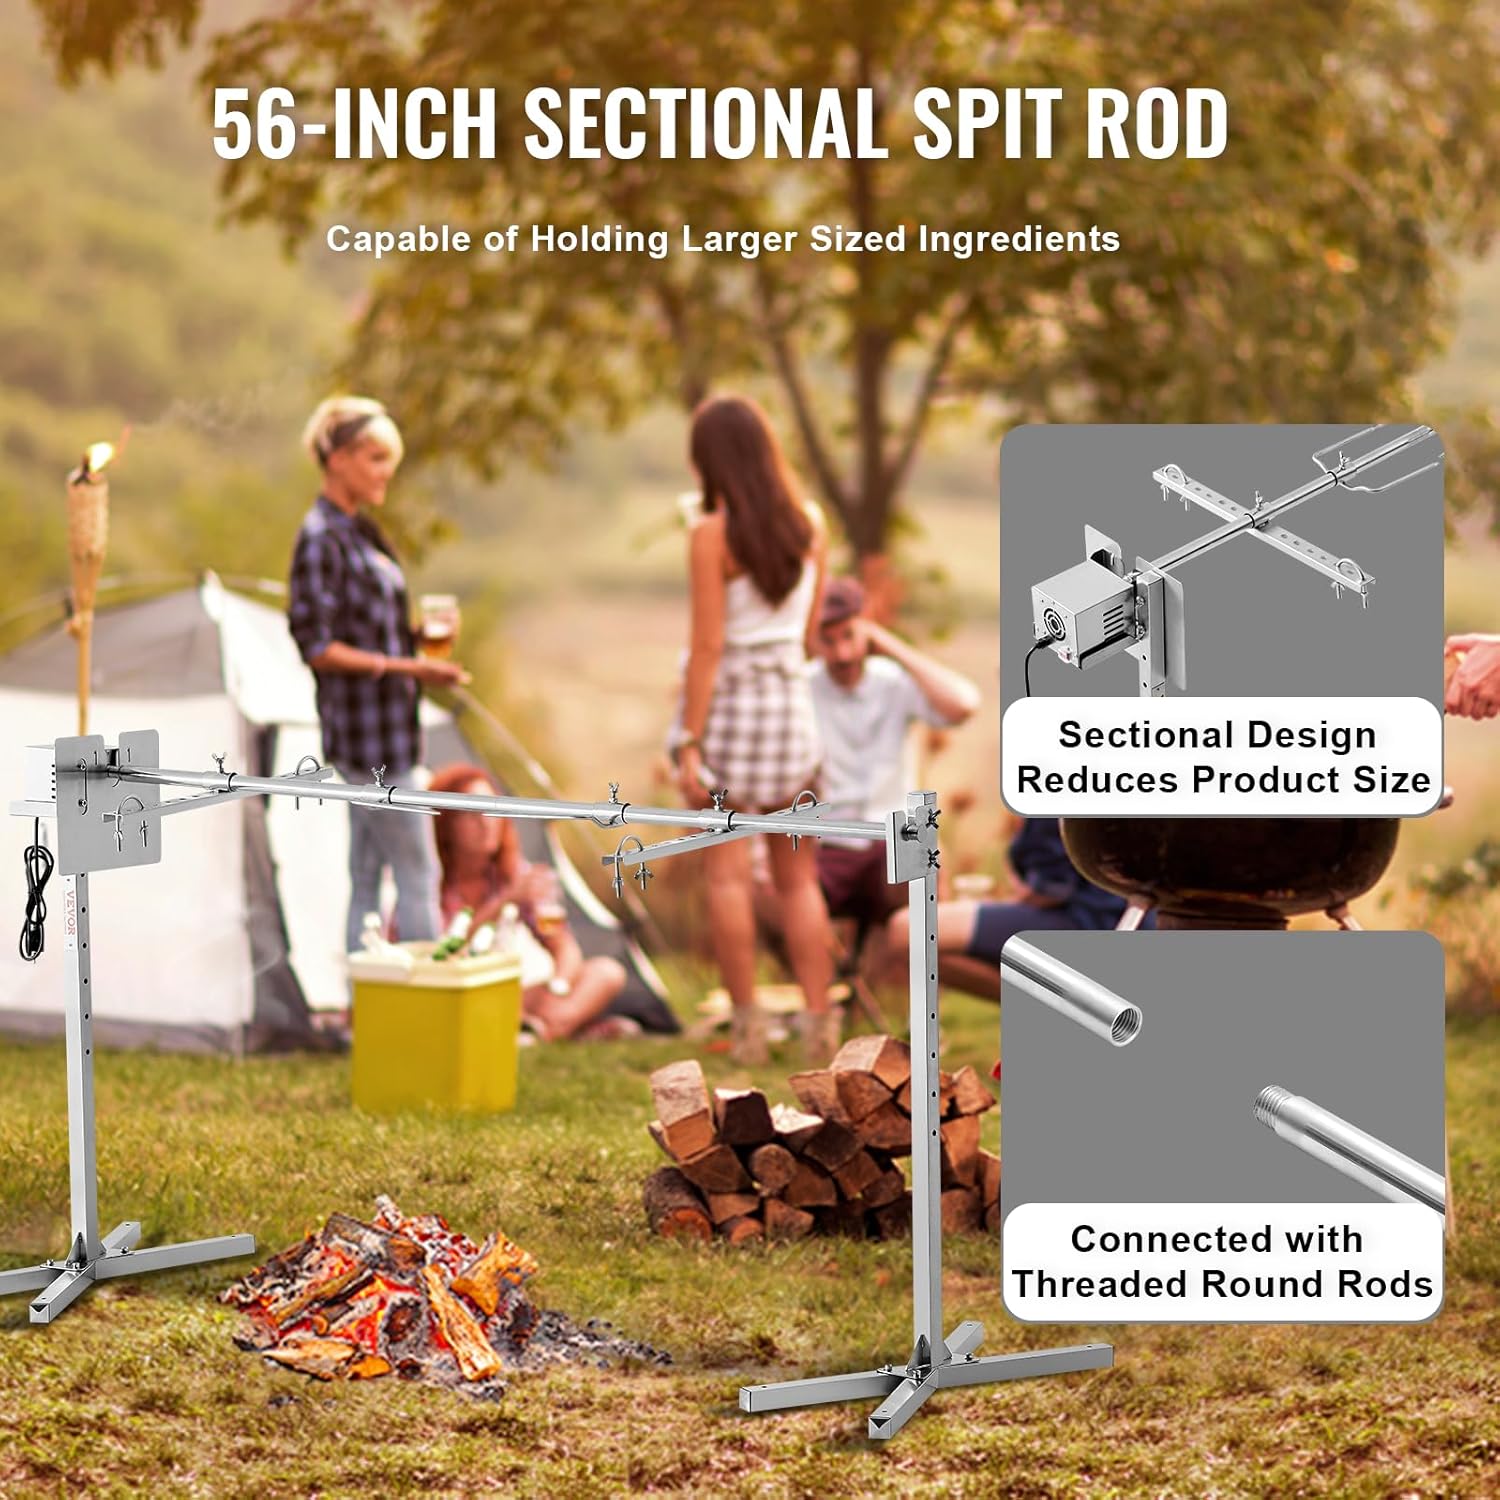
- 56-Inch Sectional Spit Rod: Easily disassembled for transport and storage.
- Tənzimlənən hündürlüklər: Features 8 different height holes for precise temperature control.
- Stabil Tripod Dizaynı: Upgraded 45-degree tripod ensures stability on various terrains.
Komponentlər:
- Motor vahidi
- Spit Rod (Sectional)
- Support Stands (2) with 45-degree tripods
- Meat Forks (2 sets)
- Spine Fork / Leg Brackets
- İstilik qalxanı
- L-Shaped Hex Wrench (x2)
- Ground Stakes (x4)
- Windshield (x1)

3. Montaj Təlimatları
Follow these steps to assemble your VEVOR Electric Rotisserie Grill Kit:
- Assemble the Base Stands: Attach the cross-shaped base components to the vertical support posts using the provided bolts and nuts. Ensure they are tightened securely for stability.
- Connect Spit Rod Sections: Join the sectional spit rod pieces together. Secure them using the internal threaded connections.
- Attach Meat Forks and Brackets: Slide the meat forks onto the spit rod. Position them according to the size of the meat you plan to roast and secure them with the wing nuts. Attach any additional leg brackets or spine forks as needed.
- Motoru quraşdırın: Secure the motor unit to one of the vertical support posts using the designated mounting points. Ensure the motor shaft aligns correctly with the spit rod receiver.
- Install Spit Rod: Insert the assembled spit rod into the motor unit on one side and rest the other end on the support bracket of the second vertical post. Secure the spit rod in place using the locking mechanism on the support post.
- Hündürlüyü tənzimləyin: Utilize the 8 height adjustment holes on the vertical posts to set the desired cooking height above your heat source. Secure the spit rod at the chosen height using the provided pins or chains.
- Add Windshield (Optional): If included, attach the windshield to help maintain consistent cooking temperatures and protect from wind.
4. Əməliyyat Təlimatları
Proper operation ensures optimal cooking results:
- Prepare the Meat: Securely attach the meat to the spit rod using the meat forks and any additional brackets. Ensure the meat is balanced to prevent strain on the motor.
- Position the Grill: Place the assembled rotisserie grill over your charcoal or open flame heat source.
- Hündürlüyü tənzimləyin: Use the height adjustment holes on the vertical posts to set the meat at the desired distance from the heat. Lower for higher heat, raise for lower heat.
- Güc bağlayın: Plug the motor into a suitable 110V (AC) power outlet. If needed, use a heavy-duty outdoor extension cord.
- Start Rotation: Turn on the motor using the power switch. The spit rod will begin to rotate slowly and evenly, ensuring consistent cooking.
- Pişirmə monitoru: Periodically check the meat's temperature and doneness. Adjust the height as necessary to control the cooking speed.
- Bişirməyi bitirin: Once the meat reaches the desired internal temperature, turn off the motor and carefully remove the spit rod using heat-resistant gloves.
5. Baxım
Regular cleaning and maintenance will extend the life of your rotisserie grill:
- Təmizləmə: After each use, allow the grill to cool completely. Wipe down all stainless steel components with a soft cloth and mild detergent. Avoid abrasive cleaners that can scratch the surface.
- Motora qulluq: Keep the motor unit clean and dry. Do not immerse the motor in water.
- Yaddaş: Disassemble the sectional spit rod and store all components in a dry place to prevent rust and corrosion.
- Yoxlama: Periodically check all bolts, nuts, and connections to ensure they are tight. Inspect the power cord for any signs of damage.
6. Giderme
| Problem | Mümkün Səbəb | Həll |
|---|---|---|
| Motor dönmür | No power; loose connection; overloaded spit rod; motor malfunction. | Check power outlet and connections. Reduce load on spit rod. Contact customer support if motor is faulty. |
| Spit rod not rotating smoothly | Meat unbalanced; forks loose; obstruction. | Re-balance meat on the spit rod. Tighten meat forks. Check for any obstructions. |
| Grill is unstable | Uneven surface; loose stand connections. | Place on a firm, level surface. Ensure all stand bolts are securely tightened. Use ground stakes if on soft ground. |
7. Spesifikasiyalar
| Atribut | Dəyər |
|---|---|
| Brend | VEVOR |
| Model Adı | Electric BBQ Rotisserie Grill Kit |
| Model nömrəsi | JY-MY-SKJ-56-120 |
| Material | Paslanmayan Polad |
| Spit Rod Length | 56 düym (1445 mm) |
| Yük tutumu | 132 funt (60 kq) |
| Motor Gücü | 52W |
| Fırlanma sürəti | 4 rpm |
| Cildtage | 110 Volt (AC) |
| Element Ölçüləri (U x G x Y) | 69.49 x 22.24 x 34.25 düym |
| Maddə Çəkisi | 22.8 funt sterlinq |
| Quraşdırma növü | Sərbəst Daimi |
| Tövsiyə olunan istifadələr | Grilling, Roasting Pig/Lamb |
8. Zəmanət və Dəstək
For warranty information or technical support, please refer to the documentation included with your product or visit the official VEVOR websayt. Yardım üçün birbaşa VEVOR müştəri xidmətləri ilə də əlaqə saxlaya bilərsiniz.


