1. Giriş
This instruction manual provides detailed guidance for the assembly, operation, maintenance, and troubleshooting of your Pinmoco LED TV Stand, Model B0FDGJBNW6. Please read this manual thoroughly before beginning assembly or use to ensure safe and correct operation. Keep this manual for future reference.
The Pinmoco LED TV Stand is designed with clean lines and a stylish wave-patterned acrylic door, allowing LED backlighting to create a captivating ambiance. Its versatile design supports multiple configurations, including a TV cabinet, a double-layer stackable storage unit, or a rectangular coffee table. It features two spacious compartments for media devices, DVDs, gaming accessories, and other items.

2. Təhlükəsizlik Məlumatı
Warning: This product requires assembly. Use caution when handling sharp objects and electrical components. Keep away from children and pets. Do not operate if damaged or modified from the original condition.
Ensure all components are securely fastened before use. Do not exceed the recommended weight capacity for the stand. Place the stand on a level and stable surface to prevent tipping. Keep electrical components, such as the LED lights and power adapter, away from water and moisture.
3. Paketin məzmunu
Verify that all parts listed below are present before beginning assembly. If any parts are missing or damaged, please contact customer support.
- All necessary P2 particleboard panels for construction.
- Wave-patterned acrylic sheets for doors.
- LED light strips and remote control.
- Assembly hardware (screws, dowels, cam locks, etc.).
- Təlimat kitabçası.

4. Quraşdırma və Quraşdırma
The Pinmoco LED TV Stand is designed for easy assembly. Follow the detailed instructions provided in the included manual or refer to the assembly video below. A screwdriver is required for assembly.
Montaj Video Təlimatı:
Əsas montaj addımları:
- Identify all components and hardware using the provided parts list.
- Assemble the base units according to the diagrams, ensuring all cam locks and screws are tightened.
- Insert the acrylic doors into their designated slots.
- Attach the LED light strips to the interior of the stand using the provided clips and screws. Connect the wiring as shown in the diagram.
- For wall mounting (optional), use the provided wall anchors and screws. Ensure the wall is suitable for supporting the weight of the stand and its contents.
5. Əməliyyat Təlimatları
5.1 Product Configurations
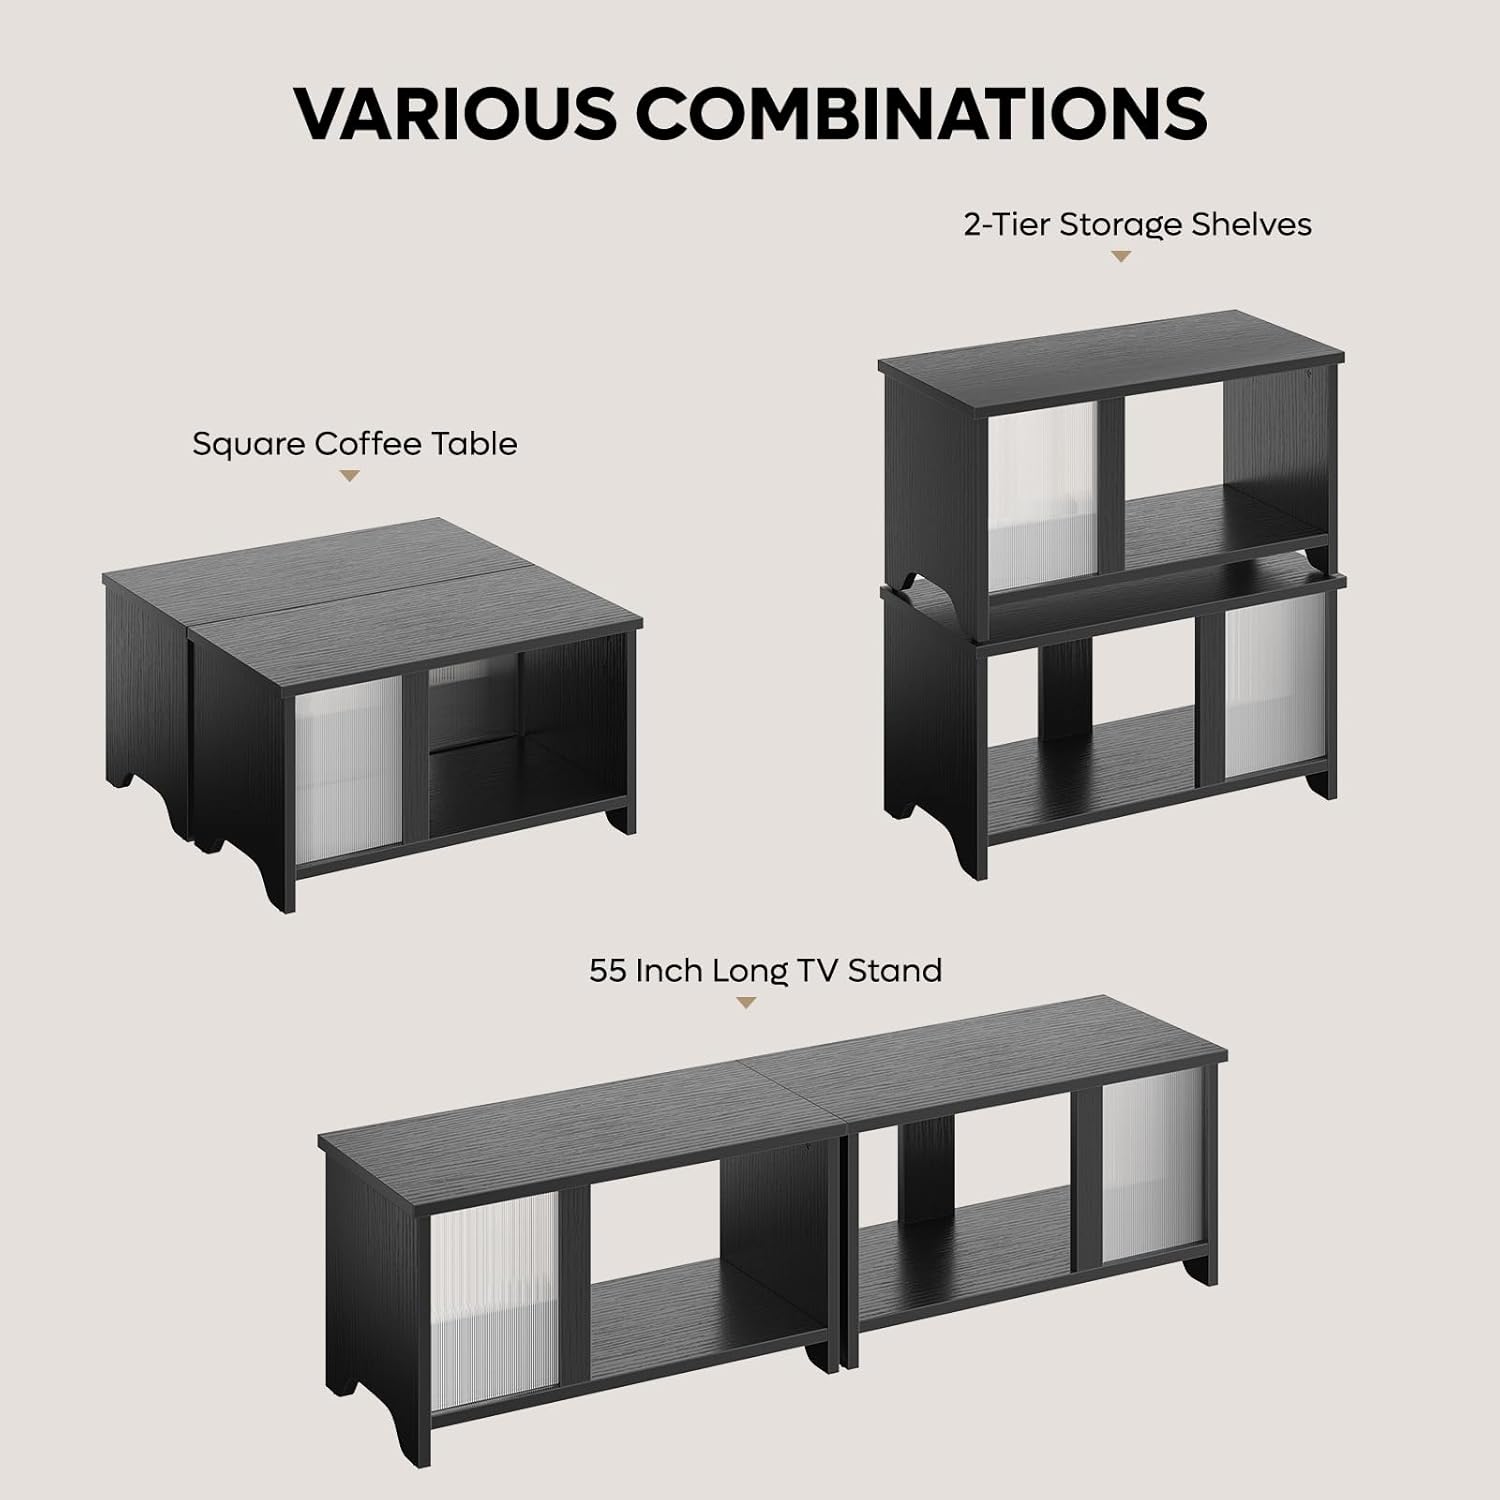
The Pinmoco LED TV Stand offers three primary configurations:
- 55-Inch Long TV Stand: Place the two units side-by-side to create a wide entertainment center suitable for TVs up to 65 inches.
- 2-Tier Stackable Storage Shelves: Stack one unit on top of the other to form a vertical storage cabinet.
- Square Coffee Table: Position the two units adjacent to each other to form a square coffee table.
5.2 LED Lighting Operation
The integrated LED lighting system can be controlled using the included remote control. It features 7 main colors and 20 dynamic modes to customize the ambiance of your living space.
- Yandırma/Söndürmə: Pultdakı güc düyməsini basın.
- Rəng Seçimi: Use the color buttons to select one of the 7 main colors.
- Dinamik rejimlər: Cycle through the 20 dynamic modes using the mode selection buttons.
- Parlaqlığın tənzimlənməsi: Use the brightness control buttons to increase or decrease the light intensity.

Məhsul Bitdiview Video:
6. Baxım
To ensure the longevity and appearance of your Pinmoco LED TV Stand, follow these maintenance guidelines:
- Təmizləmə: Səthləri yumşaq bir parça ilə silin, damp cloth. Avoid harsh chemicals or abrasive cleaners that may damage the finish or acrylic doors.
- Toz alma: Regularly dust the stand to prevent buildup, especially around LED components.
- Avadanlıq yoxlanışı: Bütün vintlərin və bərkidicilərin möhkəm qaldığından əmin olmaq üçün vaxtaşırı yoxlayın. Lazım gələrsə, yenidən sıxın.
- LED Baxımı: Avoid bending or excessively pulling on the LED strips or wiring. If an LED strip malfunctions, contact customer support for replacement options.
7. Giderme
If you encounter any issues with your Pinmoco LED TV Stand, refer to the following common troubleshooting steps:
- LED işıqlar işləmir:
- Check if the power adapter is securely plugged into a working outlet and the LED strip.
- Ensure the remote control has working batteries and is pointed directly at the receiver.
- Bütün naqillərin təhlükəsiz olduğundan əmin olun.
- Stend qeyri-sabitliyi:
- Stendin düz, düz bir səthə qoyulduğundan əmin olun.
- Check all assembly hardware (screws, cam locks) for tightness and re-tighten if loose.
- Qapılar hamar sürüşmür:
- Inspect the tracks for any obstructions or debris and clean if necessary.
- Ensure the doors are correctly seated in their tracks.
If the issue persists after attempting these steps, please contact customer support for further assistance.
8. Spesifikasiyalar
| Xüsusiyyət | Detal |
|---|---|
| Brend | Pinmoco |
| Model | B0FDGJBNW6 |
| Rəng | Qara |
| Material | Mühəndis Taxta |
| Xüsusi Xüsusiyyət | Expandable Side by Side or Stacking TV Stand, LED Light |
| Montaj növü | Mərtəbə dağı |
| Qapı Stil | Slab (Wave-patterned acrylic) |
| Bitirmə növü | Yarı Parıldadıcı |
| Ölçü (G x Y x D) | 60 inches x 18 inches x 15 inches (when configured side-by-side) |
| Rəflərin sayı | 1 per unit (2 total in side-by-side configuration) |
| Maddə Çəkisi | 36.04 funt sterlinq |
| Montaj Tələb olunur | Bəli |
| LED Xüsusiyyətləri | 7 Colors, 20 Dynamic Modes, Remote Control |
9. Zəmanət və Dəstək
Pinmoco is committed to providing high-quality products and customer satisfaction. If you encounter any missing parts, bent components, or require assistance with assembly or operation, please contact our customer support team.
We offer parts replacement or upgrade services for eligible issues. For specific warranty details, please refer to the documentation included with your purchase or visit the official Pinmoco websayt.
Dəstək üçün müraciət edin: Pinmoco Direct Store on Amazon


