Giriş
Thank you for choosing the FLYCOLOR Turbo Racing 1:76 Scale Drift RC Car. This miniature remote-controlled vehicle is designed for precision driving and drifting, offering a full proportional control experience. This manual provides essential information for setup, operation, maintenance, and troubleshooting to ensure optimal performance and enjoyment of your RC car.
Paketin məzmunu
Zəhmət olmasa, aşağıda sadalanan bütün əşyaların paketinizə daxil olduğunu yoxlayın:
- C66 Mini Remote Drift Car x1
- P36 Remote Control x1
- Simple instruction manual x1
- Light guide plate (set) x4
- Batareya bölməsi x1
- Remote control accessory (kit) x1
- USB & Type-C charging cable x1
- Double-headed Type-C charging cable x1
- "Circle-keeping practice" small track x1
- Original color car shell x2
- RX57 receiver x1
- One-word screwdriver x1
- Hexagonal screwdriver x1
- Eşleme pin x1
- Color leaflet x1

Məhsul Xüsusiyyətləri
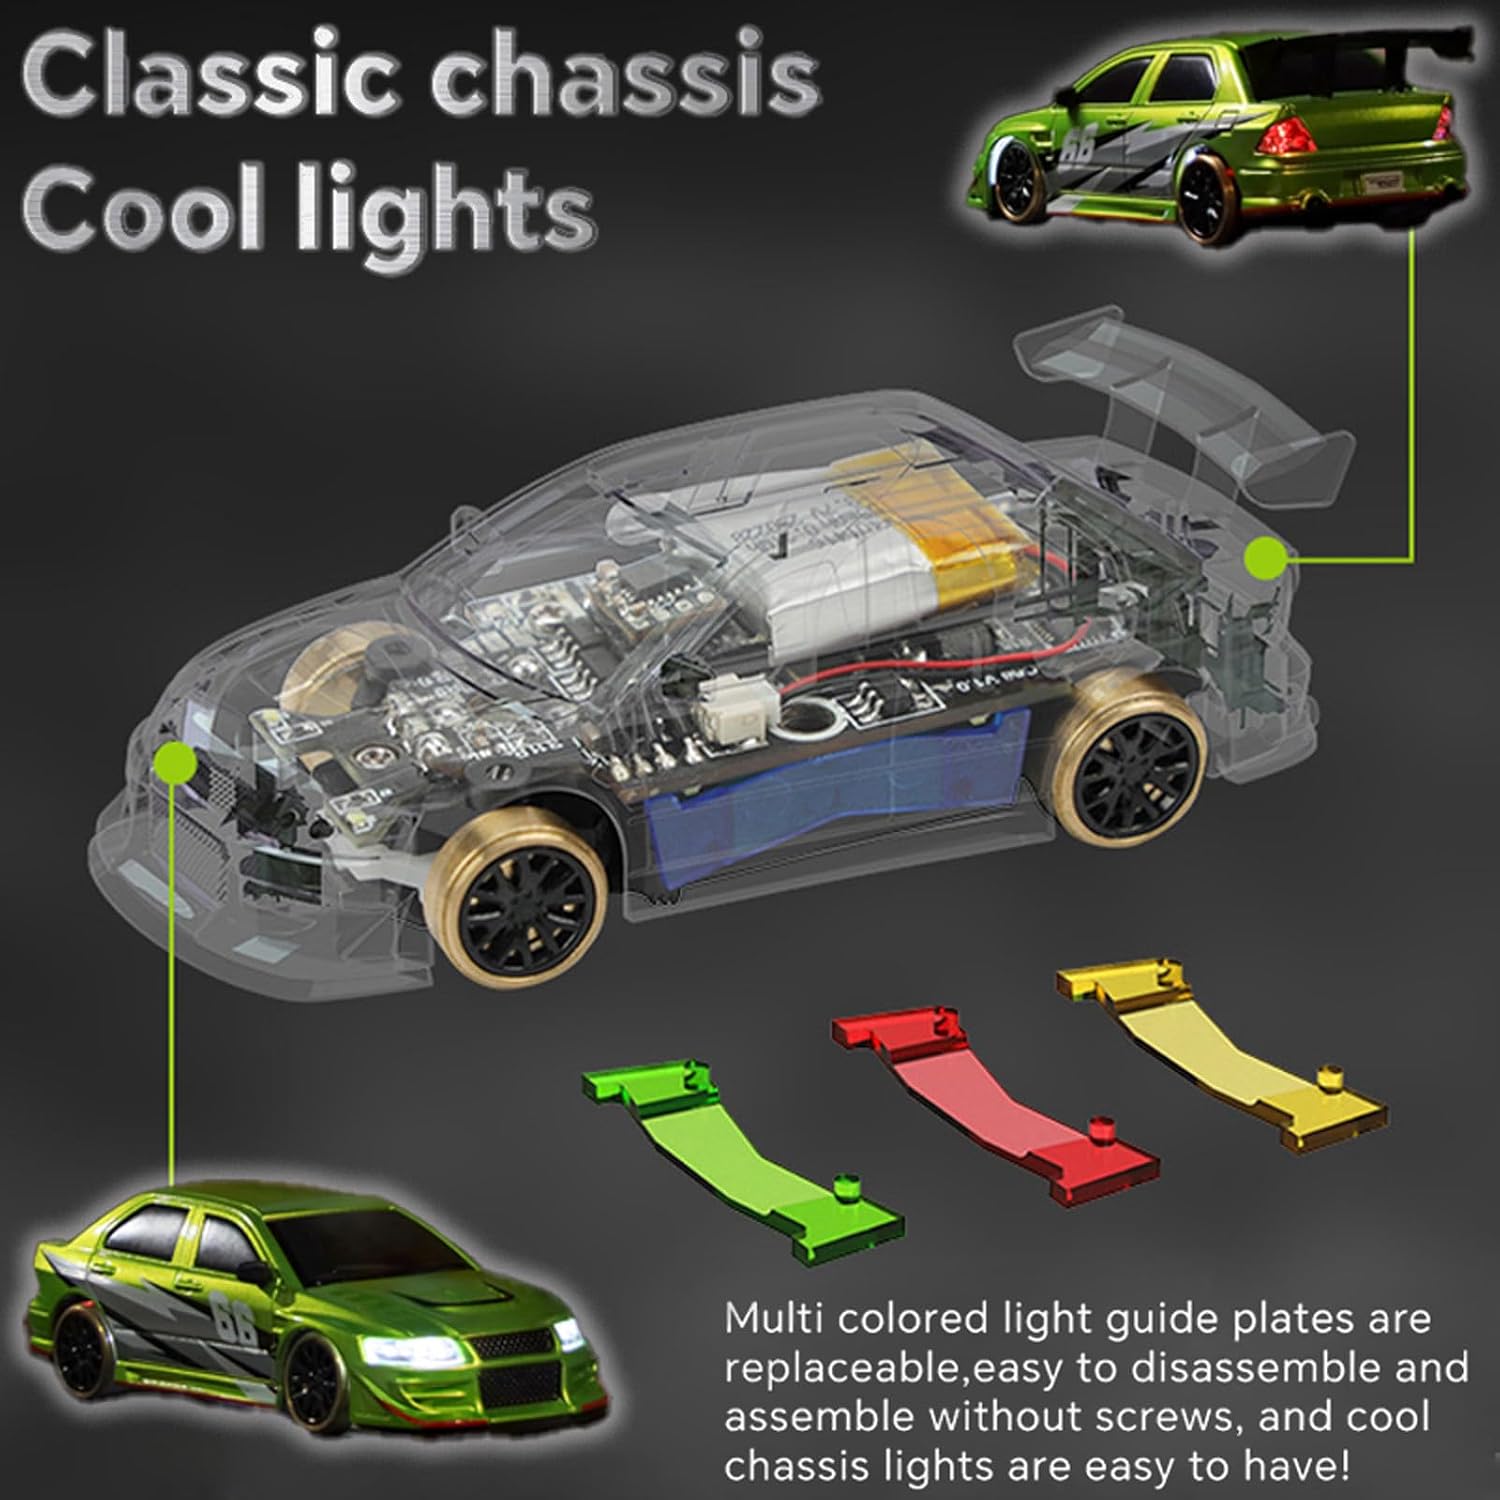
- High Simulation Headlights and Chassis LED Light: Features headlights with a spotlight effect and double flash function. The chassis lamp can be controlled via Channel 3 on the remote.
- New P36 Remote Control: A multi-functional 5-channel remote control with a split design and a rotary knob operation panel for clear value display and ease of use.
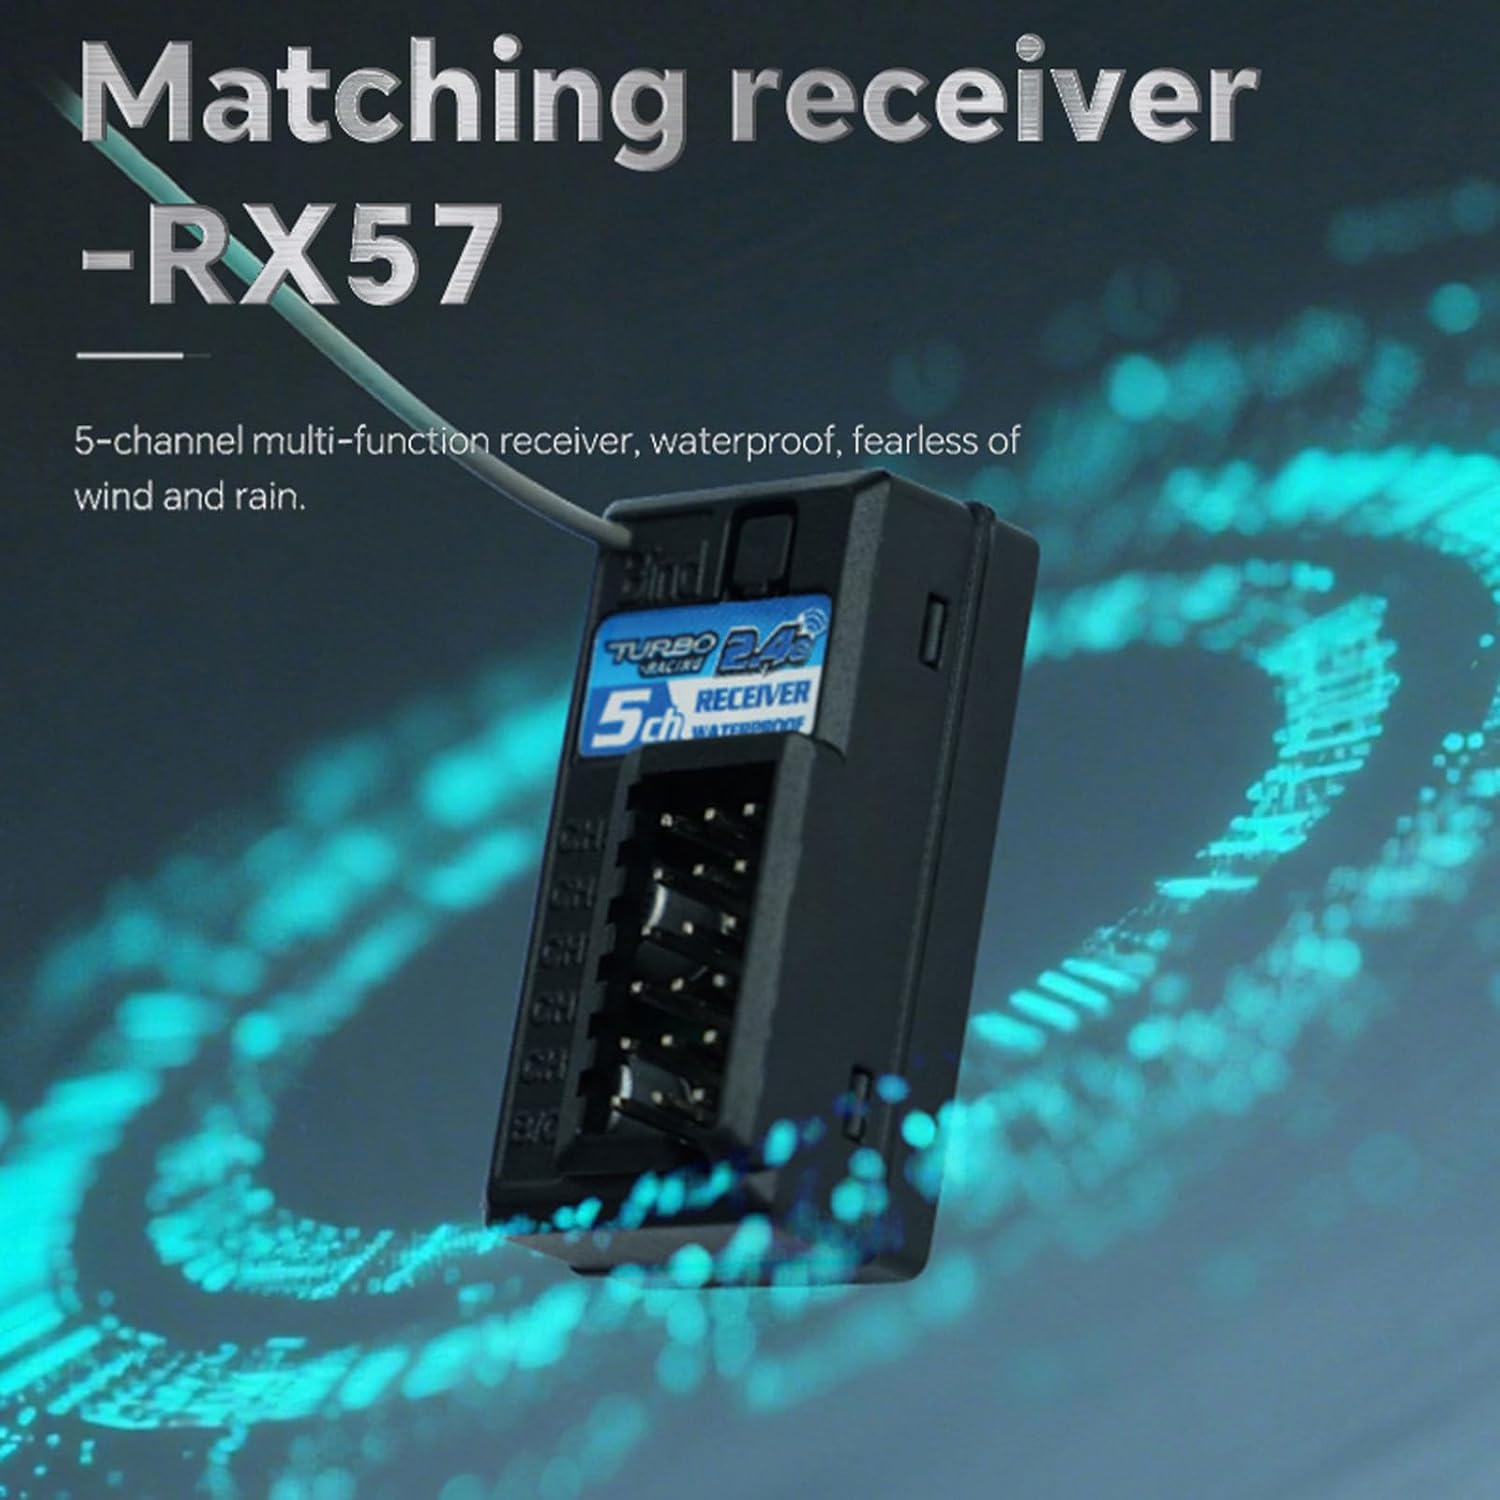
- 5-Channel Multi-function RX57 Receiver: The included receiver is waterproof, providing reliable performance in various conditions.
- THR-Curve Upgrade: The accelerator provides a gentle, linear speed increase for the first 50% of travel, followed by a faster, stronger power output for the remaining 50%, enhancing control and experience.
- Type-C Charging Port & 55mAh Battery: The car features a built-in Type-C charging port for versatile charging options. The 55mAh LiPo battery offers up to 30 minutes of working time with a charging time of approximately 40 minutes.
- DIY Removable Car Shell: The car body shell is detachable, and two additional original color car shells are provided for customization.


Quraşdırma
1. Remote Control (P36) Battery Installation
- The P36 remote control requires 4 AAA batteries (not included).
- Pultun altındakı batareya bölməsini açın.
- Düzgün polariteyi (+/-) təmin edərək, batareyaları daxil edin.
- Batareya bölməsini etibarlı şəkildə bağlayın.
2. Avtomobilin doldurulması
The C66 RC car is powered by a 3.7V 55mAh LiPo battery. It can be charged using two methods:
- Using the USB & Type-C Charging Cable: Connect the provided USB & Type-C charging cable to the car's Type-C port and a compatible USB power source.
- Using the P36 Remote Control: The remote control features an onboard USB-C charging port. Connect the car directly to this port for convenient charging. Ensure the remote control has sufficient battery power.
Charging time is approximately 40 minutes for a full charge.


3. Pairing the Car and Remote
To establish a connection between the remote control and the vehicle:
- Ensure both the remote control and the vehicle are powered on.
- Use the provided pairing pin to press the BIND pin hole on the vehicle.
- The front lights of the vehicle will change from flashing to permanently on, indicating successful pairing.
Əməliyyat Təlimatları
1. Əsas Nəzarətlər
- Sükan: Rotate the wheel on the remote control left or right to steer the car.
- Qaz tənzimləyicisi: Pull the trigger to move the car forward. Push the trigger away from you to engage reverse.
2. Advanced Control Adjustments (P36 Remote)
The P36 remote control offers several adjustment options to fine-tune your driving experience:
- ST-TRIM (Steering Trim): Adjusts the neutral position of the steering. Use this if the car does not drive straight when the steering wheel is centered.
- TH-TRIM (Throttle Trim): Adjusts the neutral position of the throttle. If the car moves forward or backward automatically when the throttle trigger is released, adjust this trim. Ensure the TH-TRIM arrow is aligned with the center point when powering on the remote.
- Gyro Parametrləri: Adjust the gyroscope's sensitivity to assist with drifting and maintaining control, especially during slides.
- İşıq Parametrləri: The remote control includes buttons to adjust various light settings, including the chassis LED light (Channel 3).
3. Sürücülük Məsləhətləri
- The C66 RC car performs best on smooth, flat surfaces like kitchen countertops or hardwood floors.
- Utilize the provided "Circle-keeping practice" small track to hone your drifting skills.
- Experiment with the advanced control adjustments to find the settings that best suit your driving style and the surface.
Baxım
1. Təmizləmə
- Regularly clean the car to remove dust and debris, especially from the wheels and chassis. Use a soft, dry cloth.
- Avoid using water or harsh chemicals, as this can damage electronic components.
2. Batareyaya qulluq
- Do not overcharge the car's battery. Disconnect once fully charged.
- If storing the car for an extended period, ensure the battery is partially charged (around 50%) to prolong its lifespan.
- Remove AAA batteries from the remote control if it will not be used for a long time to prevent leakage.
3. Body Shell Replacement
The C66 RC car features a DIY removable car shell. To replace the shell:
- Carefully detach the current car shell from the chassis.
- Align the new car shell with the chassis and gently press it into place until it is secure.
Problemlərin aradan qaldırılması
- Not walking in a straight line: Check if the remote control ST-TRIM is at the center point. Adjust the ST-TRIM to make the car drive in a straight line.
- Automatic forward/backward movement of the car: Align the TH-TRIM arrow on the remote control with the center point while the remote is powered on. Then, turn off the remote control and restart it. Reminder: When starting up, do not touch the throttle trigger with your hands, as this can cause the car to move automatically.
- Car runs unstably or shakes: If the car is unstable, it may deviate due to terrain and speed issues. If the speed is set to 100% (fastest), the car's grip may be insufficient, leading to deviation. Consider adjusting speed settings or driving on a more suitable surface.
- Re-pairing (Re-code): When the remote control and the vehicle are powered on normally, use the matching code to match the BIND pin hole on the vehicle. The front lights of the vehicle will change from flashing to permanently on, indicating that the remote control has successfully paired with the vehicle.
Spesifikasiyalar
| Xüsusiyyət | Detal |
|---|---|
| Model Adı | C66 Drift RC Car |
| Ölçək | 1:76 |
| Tezlik Bandı | 2.4 GHz |
| Nəzarət məsafəsi | 30M |
| İş vaxtı | 30 dəqiqəyə qədər |
| Doldurma vaxtı | təqribən. 40 dəqiqə |
| Yamac bucağı | 30 dərəcə |
| Sürücü rejimi | İki təkərli sürücülük |
| Sükan idarəsi | Proporsional sükan |
| Batareyanın doldurulması | 3.7V 55mAh LiPo (included) |
| Kəsmə funksiyası | Yes (ST-TRIM, TH-TRIM) |
| Steering Reverse (REV) | Bəli |
| RC Car Size | 60 x 25.6 x 17.3 mm (2.5 x 1 x 0.75 düym) |
| Maddə Çəkisi | 14 unsiya |
| İstehsalçı tərəfindən tövsiyə olunan yaş | 15 yaş və yuxarı |
| İstehsalçı | FLYCOLORE |
Təhlükəsizlik Məlumatı
- This product is recommended for users aged 15 years and up.
- Always operate the RC car in a safe environment, away from people, pets, and obstacles.
- Do not operate near water or in wet conditions, despite the receiver being waterproof, to prevent damage to other components.
- Boğulma təhlükəsinin qarşısını almaq üçün kiçik hissələri uşaqların əli çatmayan yerdə saxlayın.
- Use only the provided charging cables and follow charging instructions carefully.
Zəmanət və Dəstək
For warranty information or technical support, please refer to the contact details provided in the product packaging or visit the official FLYCOLOR websayt. Satınalma qəbzini alışın sübutu olaraq saxlayın.


